Once you have received your account information from the Sprig team, you will need to sign into your admin account to create user accounts, schools and classrooms. This article is intended for new clients to the platform and is broken up into four steps that will guide you throughout the creation of accounts, schools and classrooms:
- Generate Data Template – In this step you will create the schools and classrooms participating in the program and generate the template you will use to upload your school/classroom data.
- Enter School/Classroom Data – In this step you will download your generated template and populate it with real school/classroom data .
- Upload School/Classroom Data – In this step you will upload the completed data template and resolve errors if any are found in the template.
- Review Data in Portal – In this step you will review your uploaded school and classroom data in the portal.
1. Generate Data Template
1.1 Add School
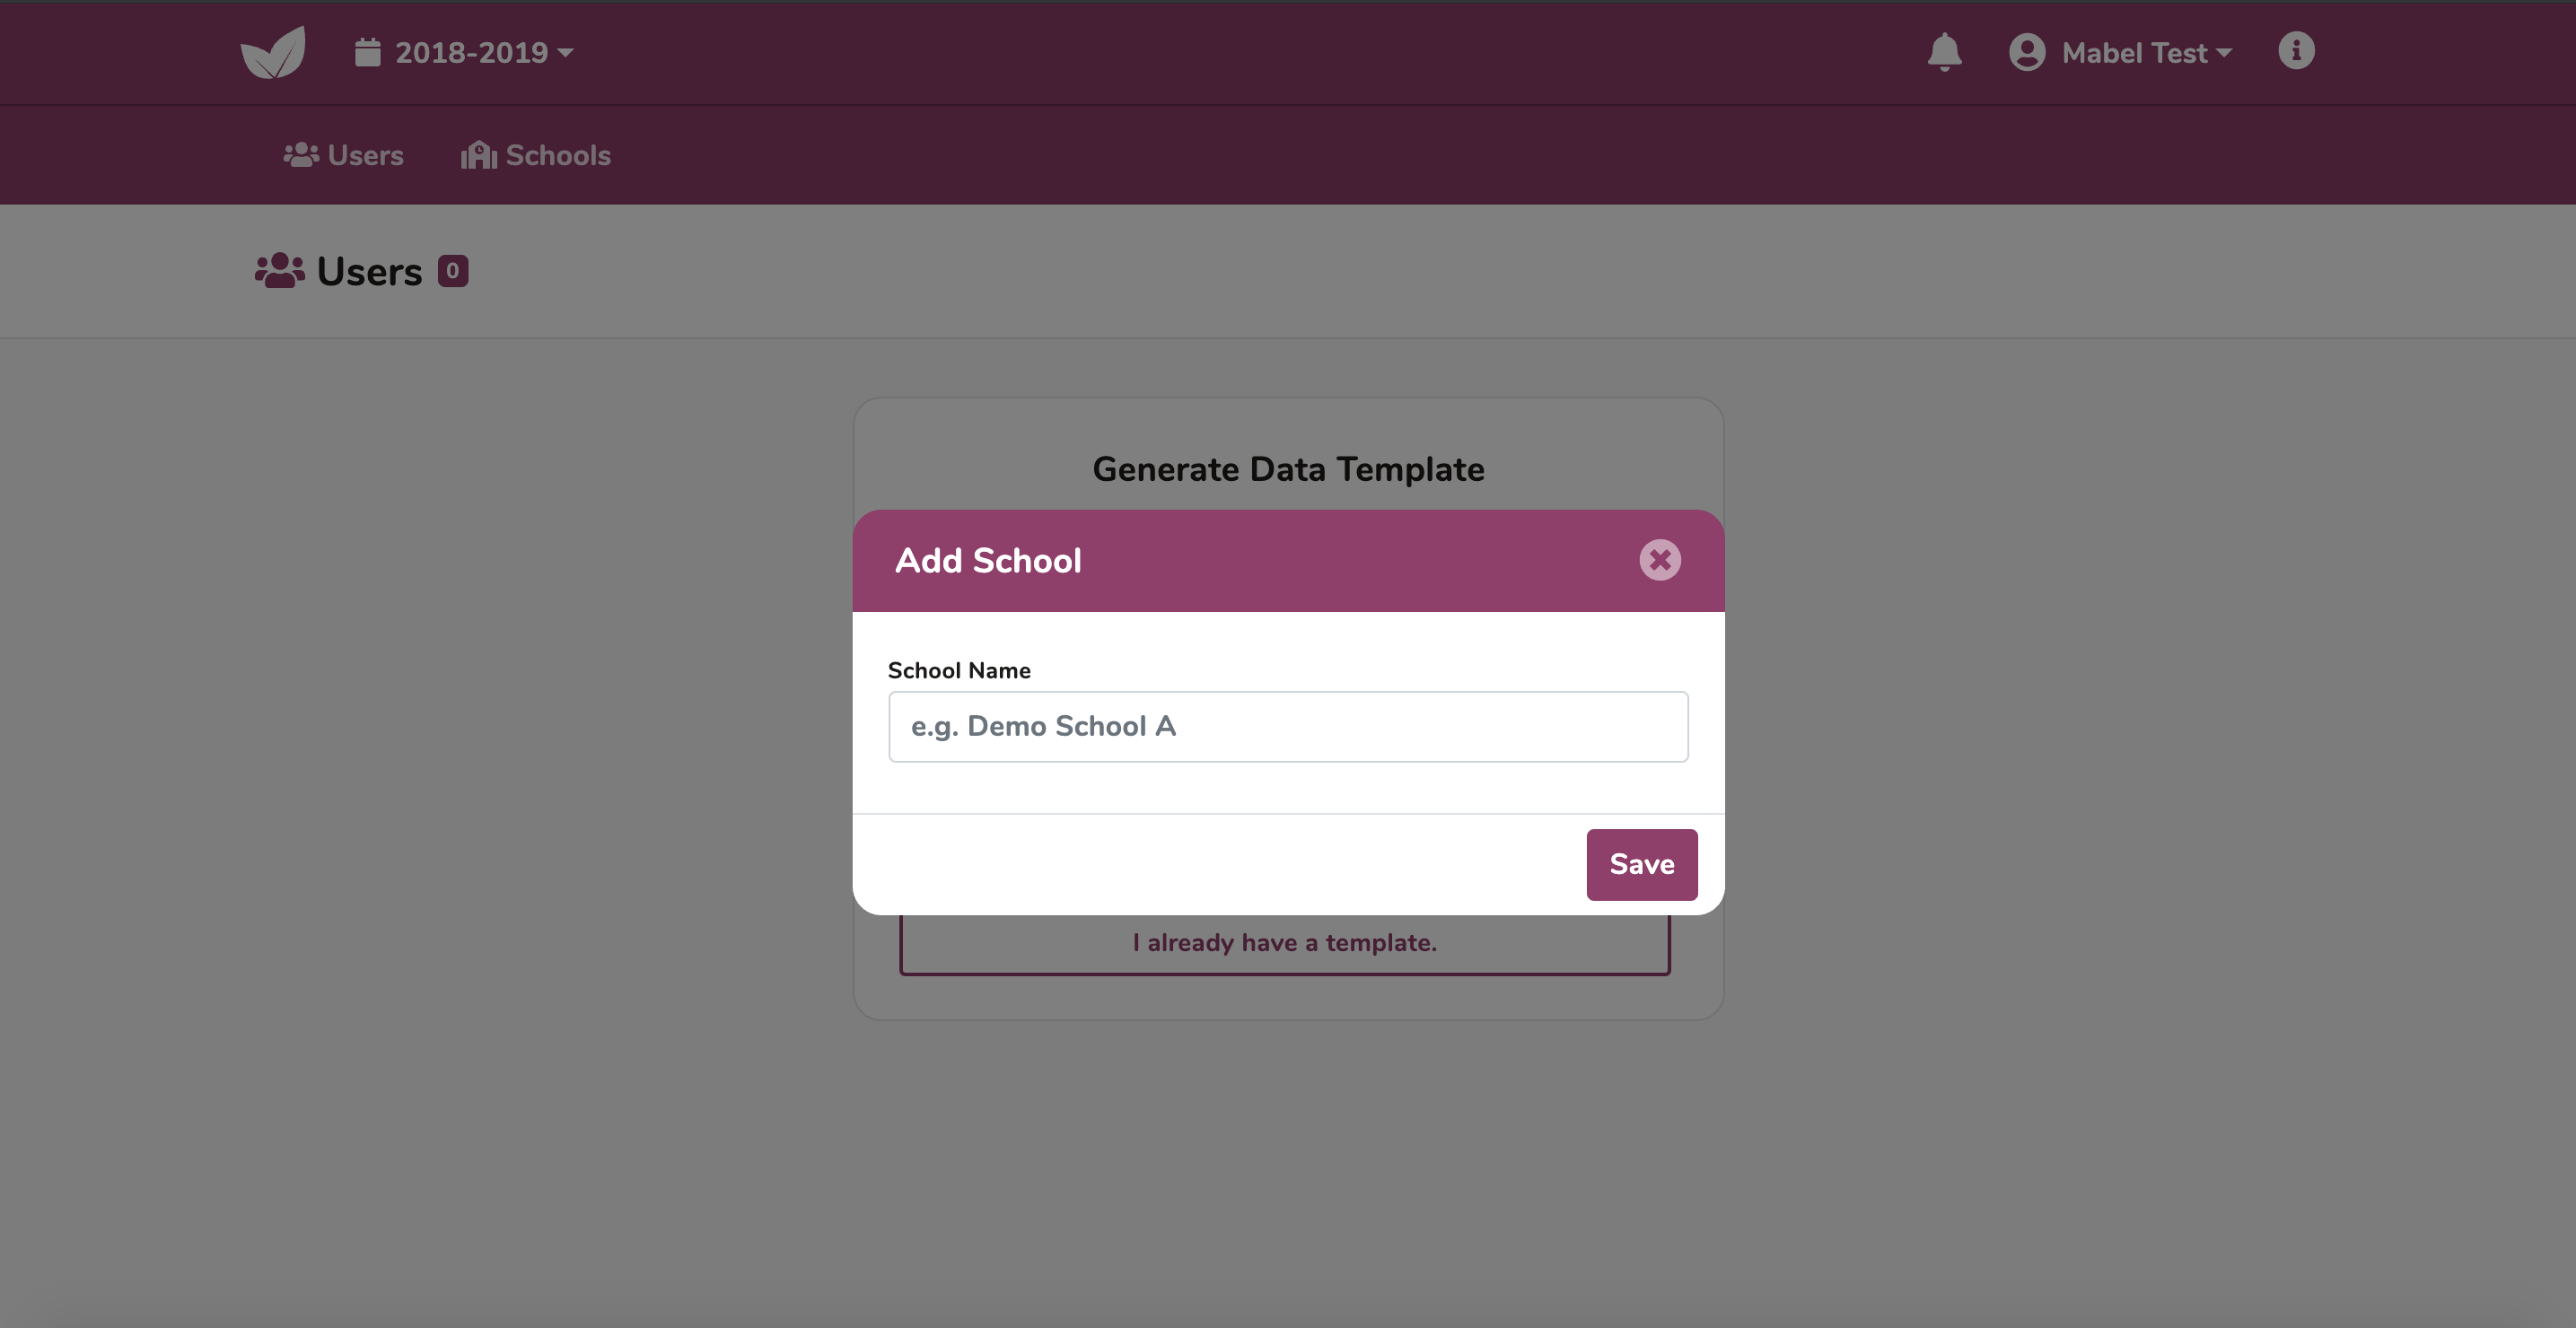
Click +Add School to create a new school.
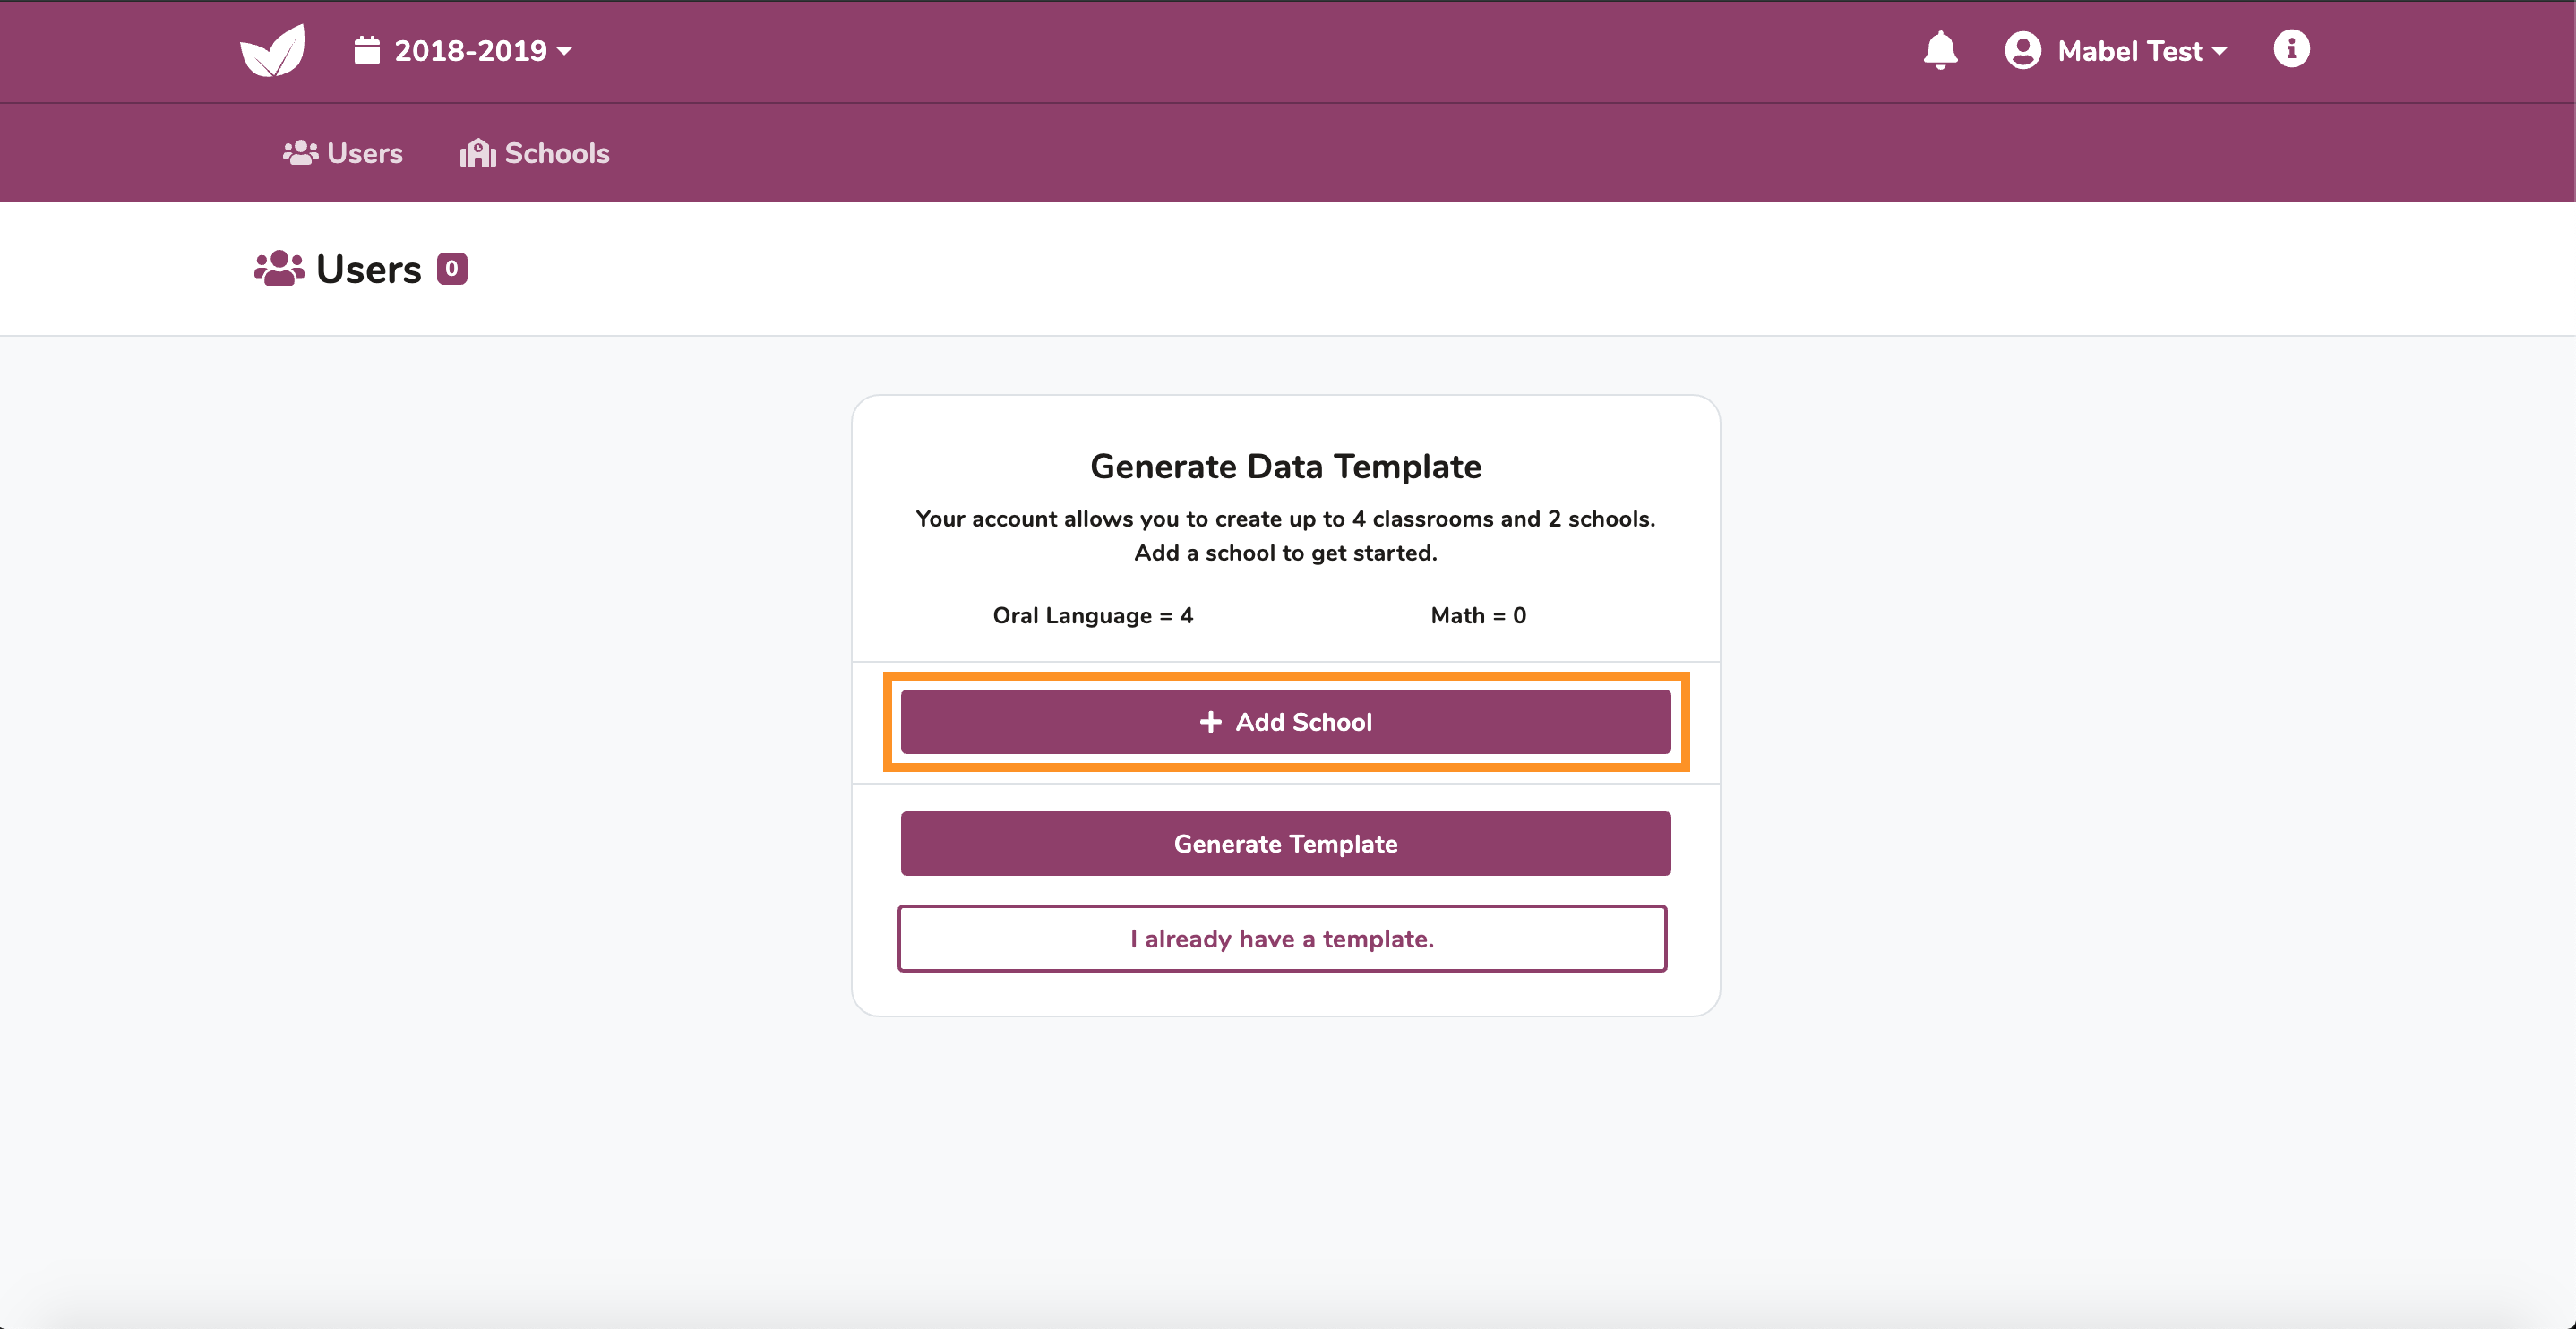
Enter the name of the school joining the program, click Save.
You now have now added a school to your template. To add another school, click +Add School and repeat the step above.
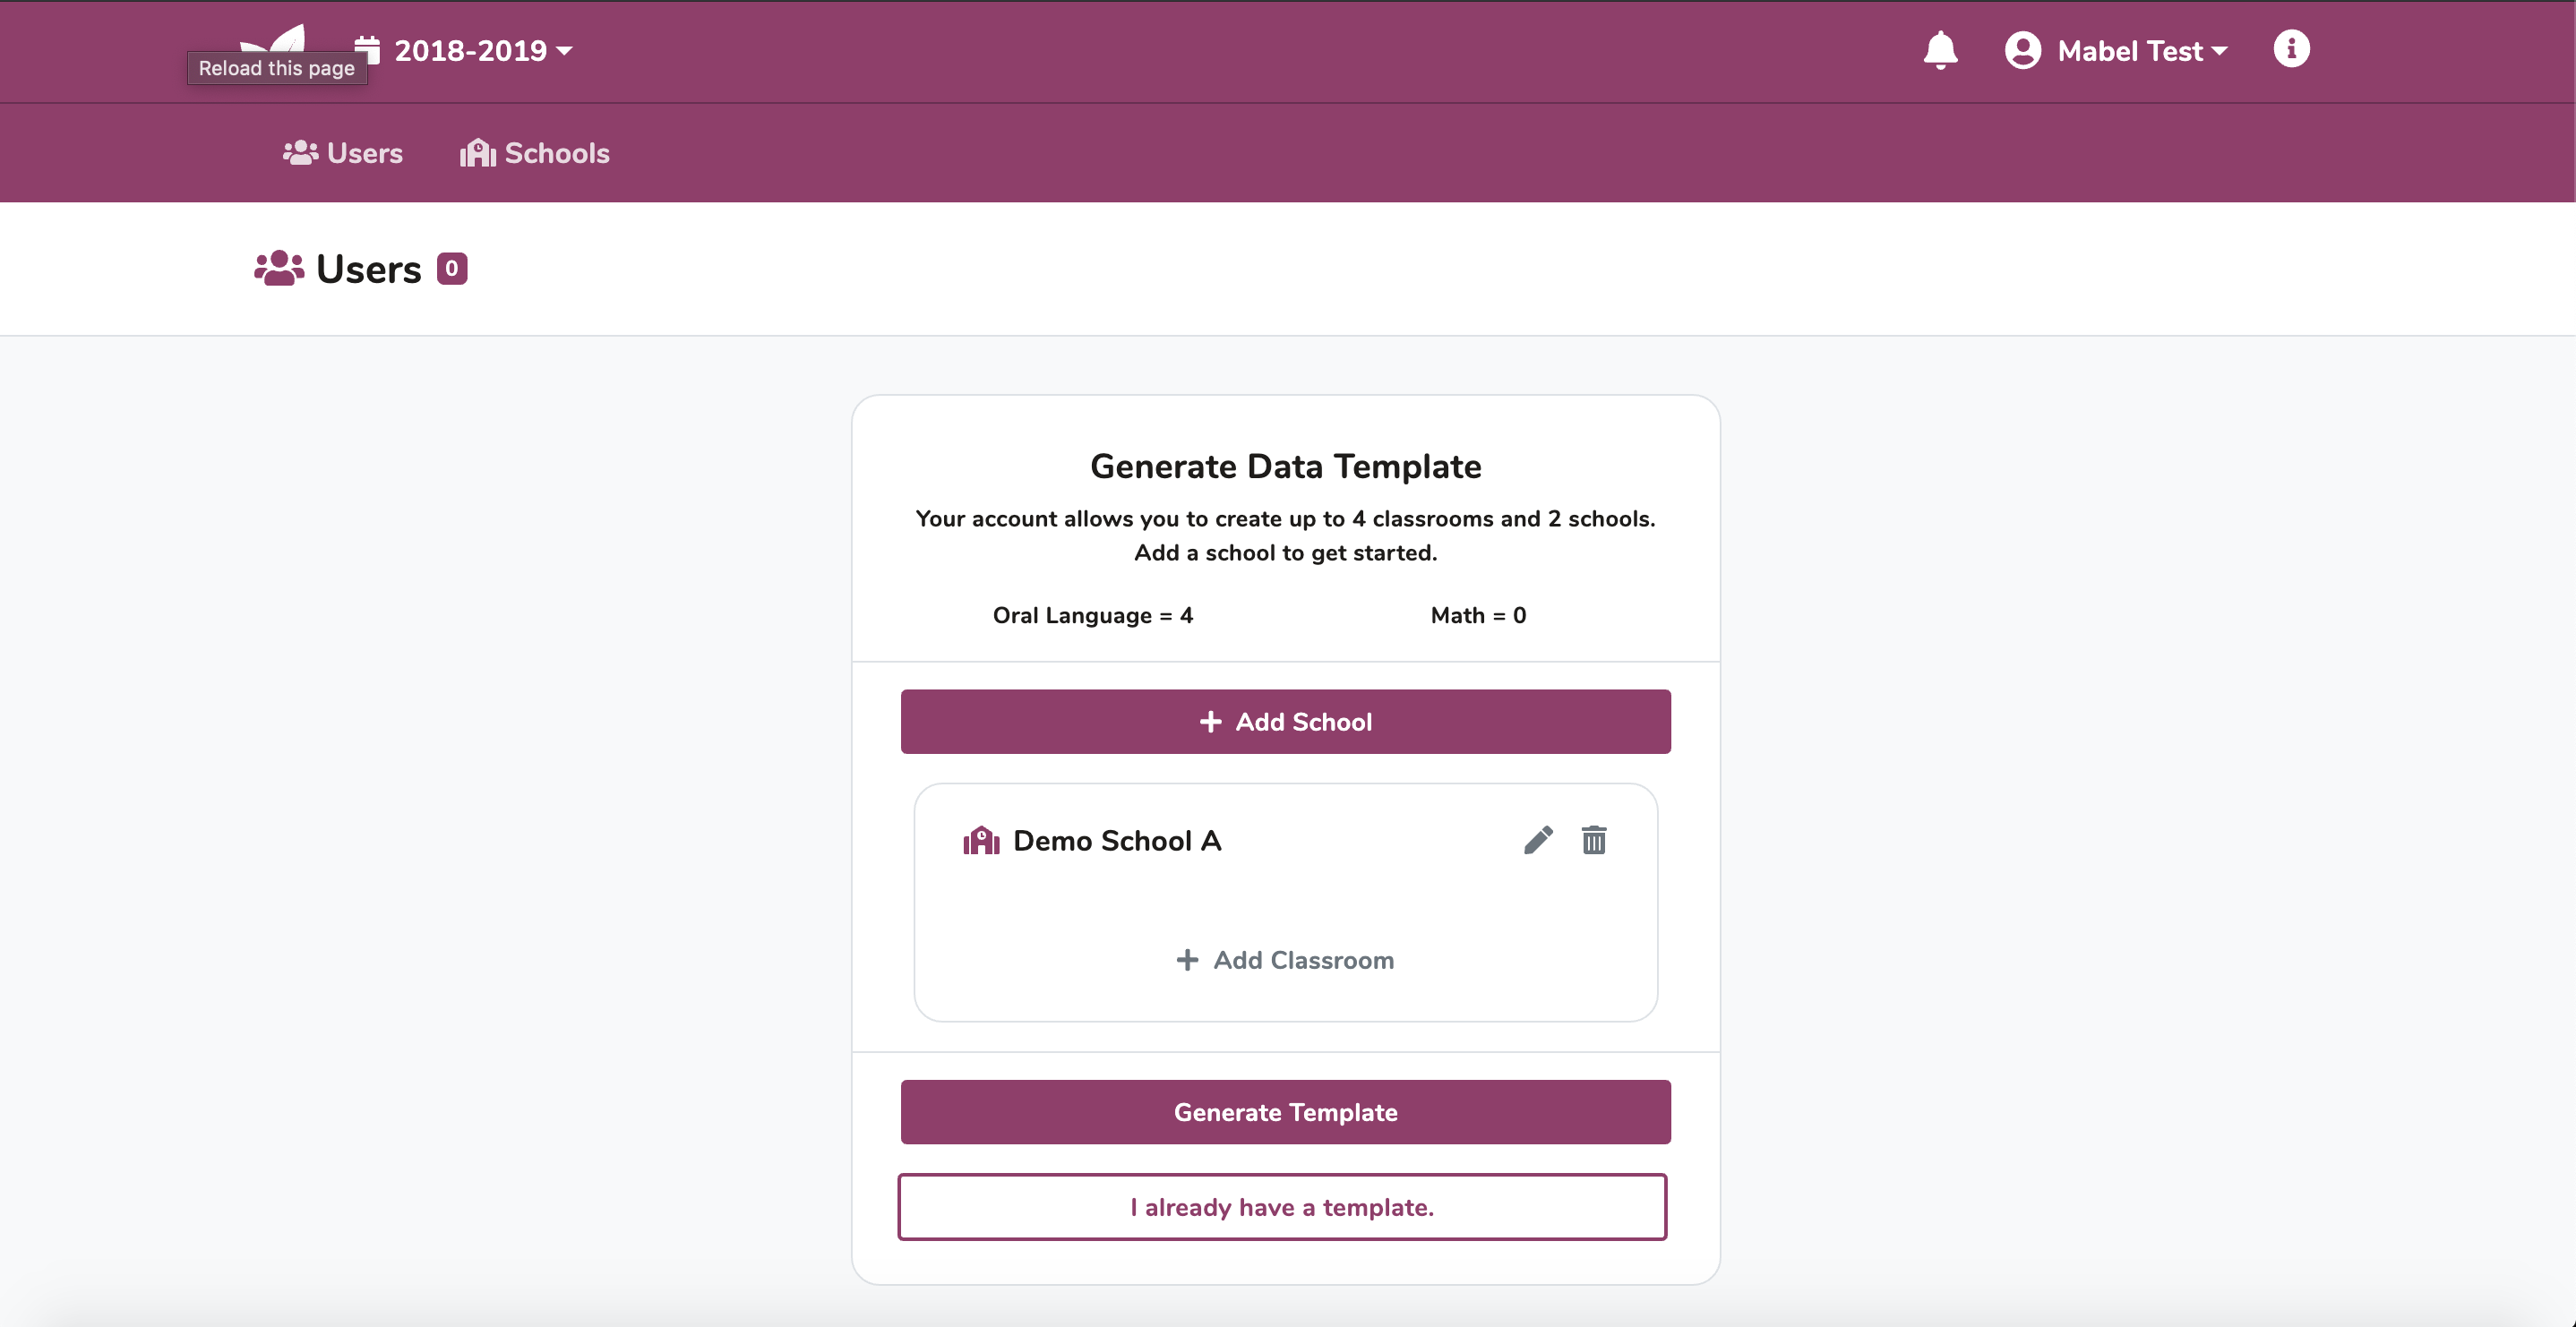
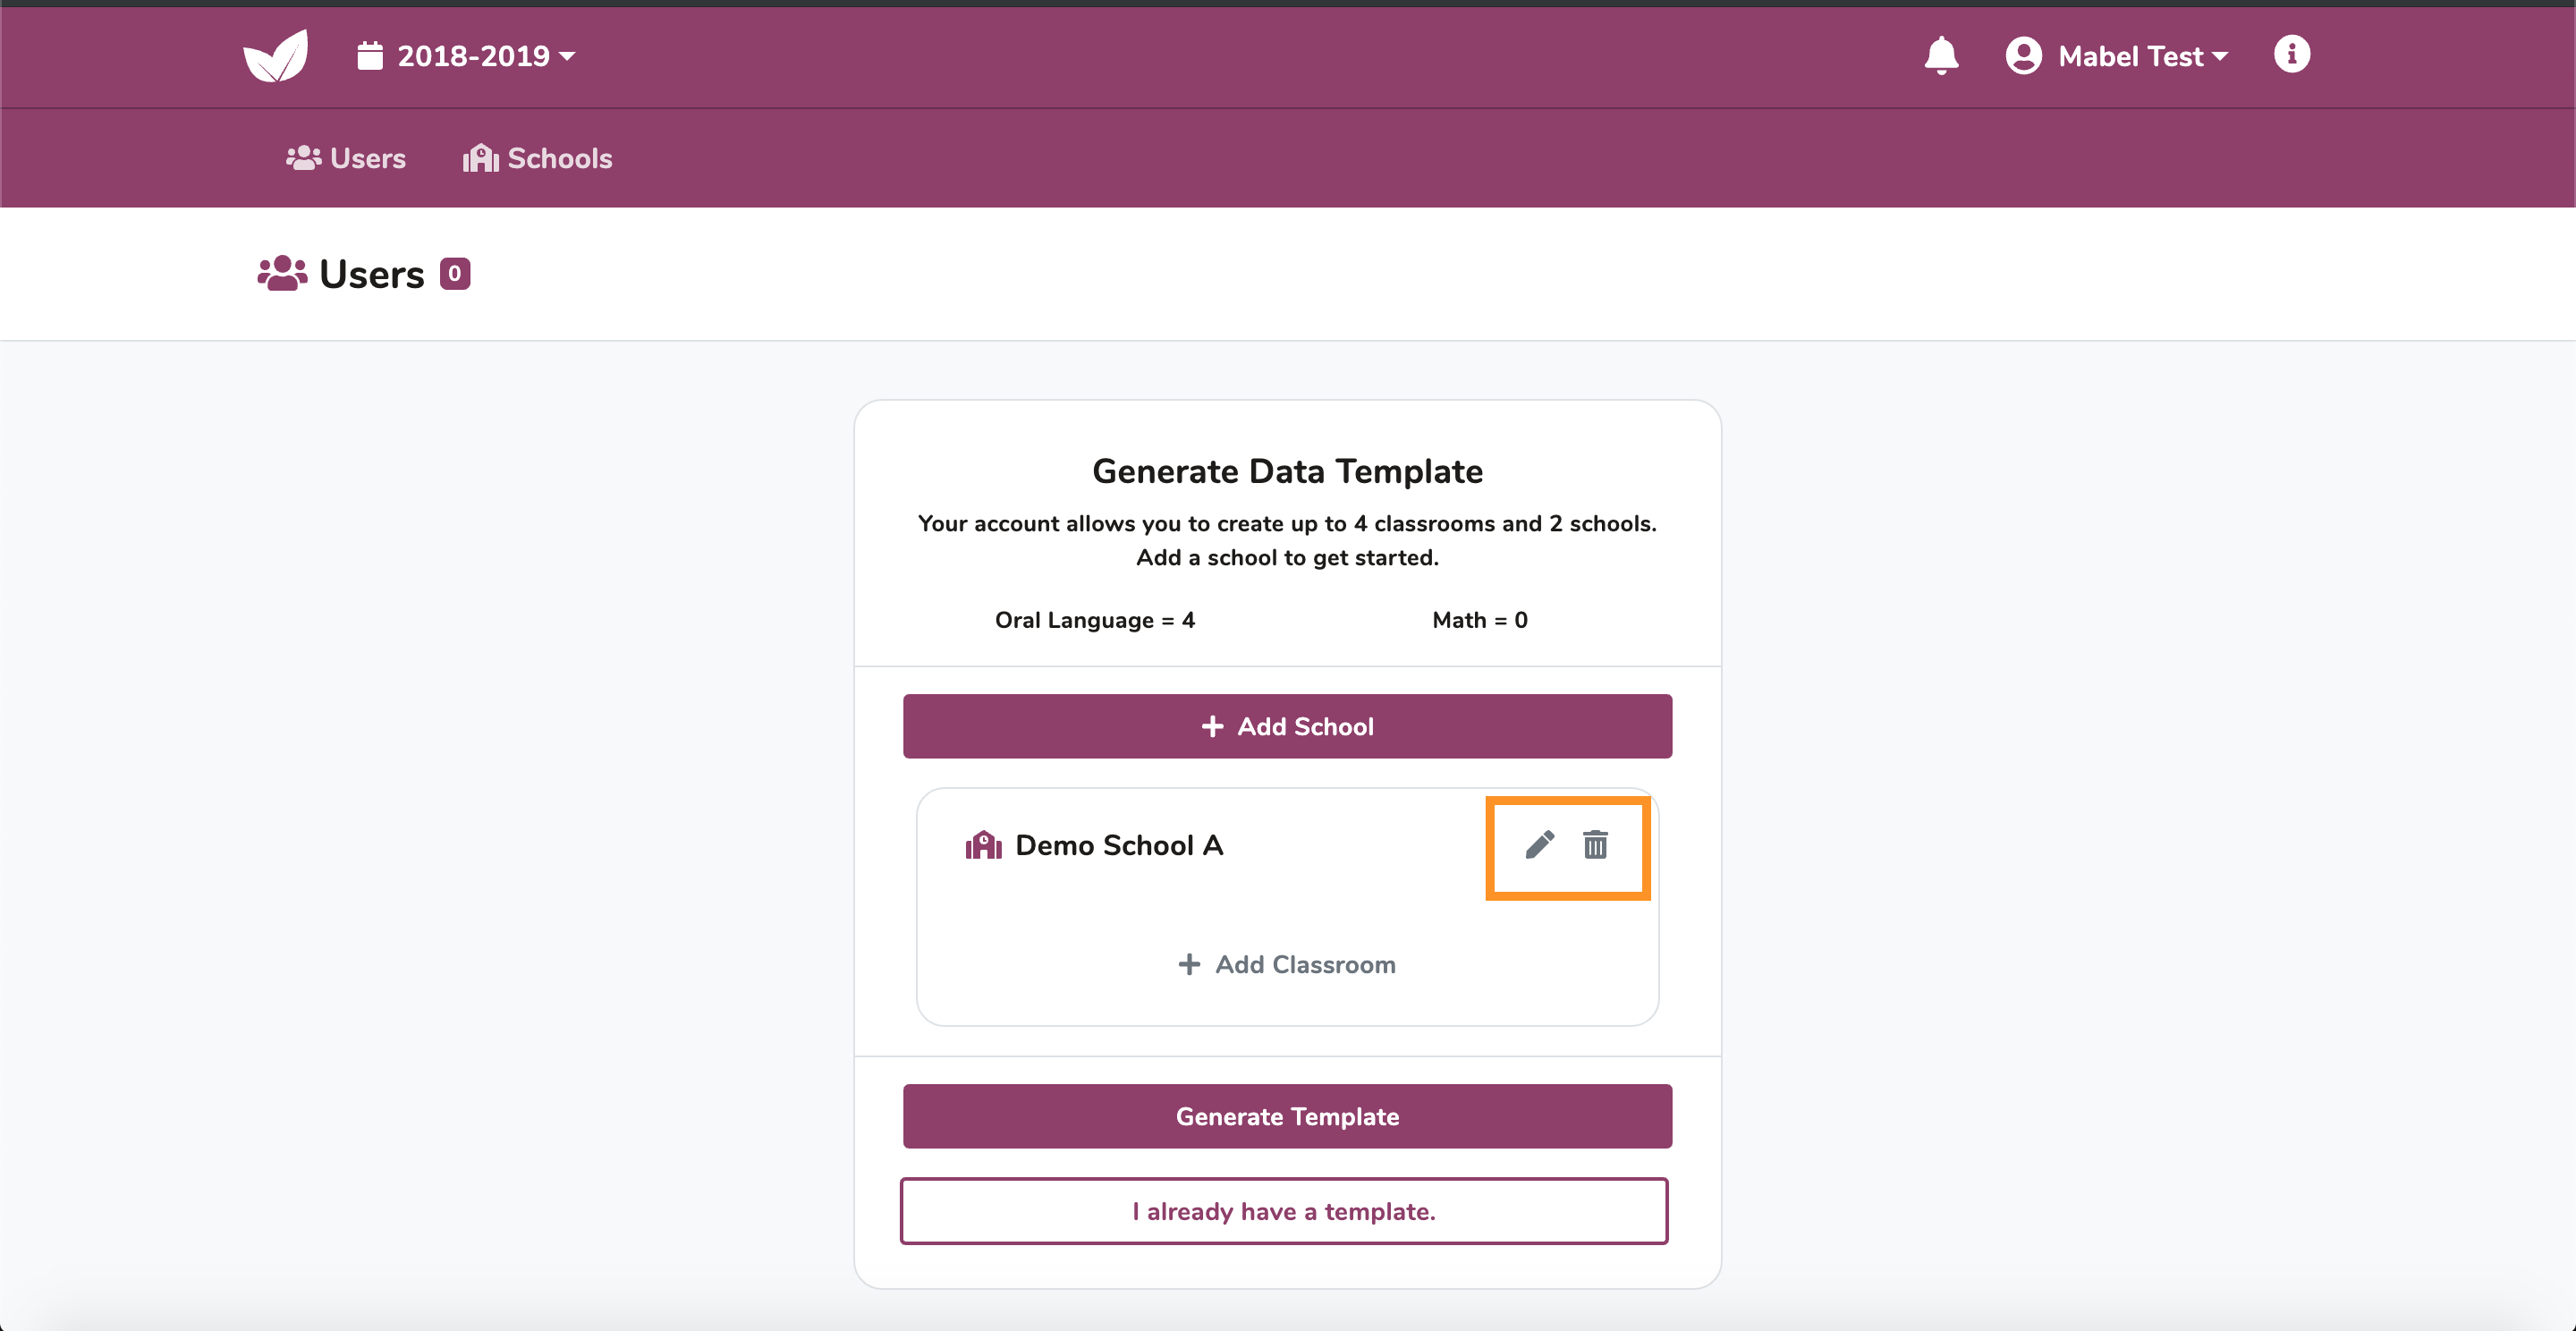
To edit or delete the school, click on the corresponding icons next to the school name.
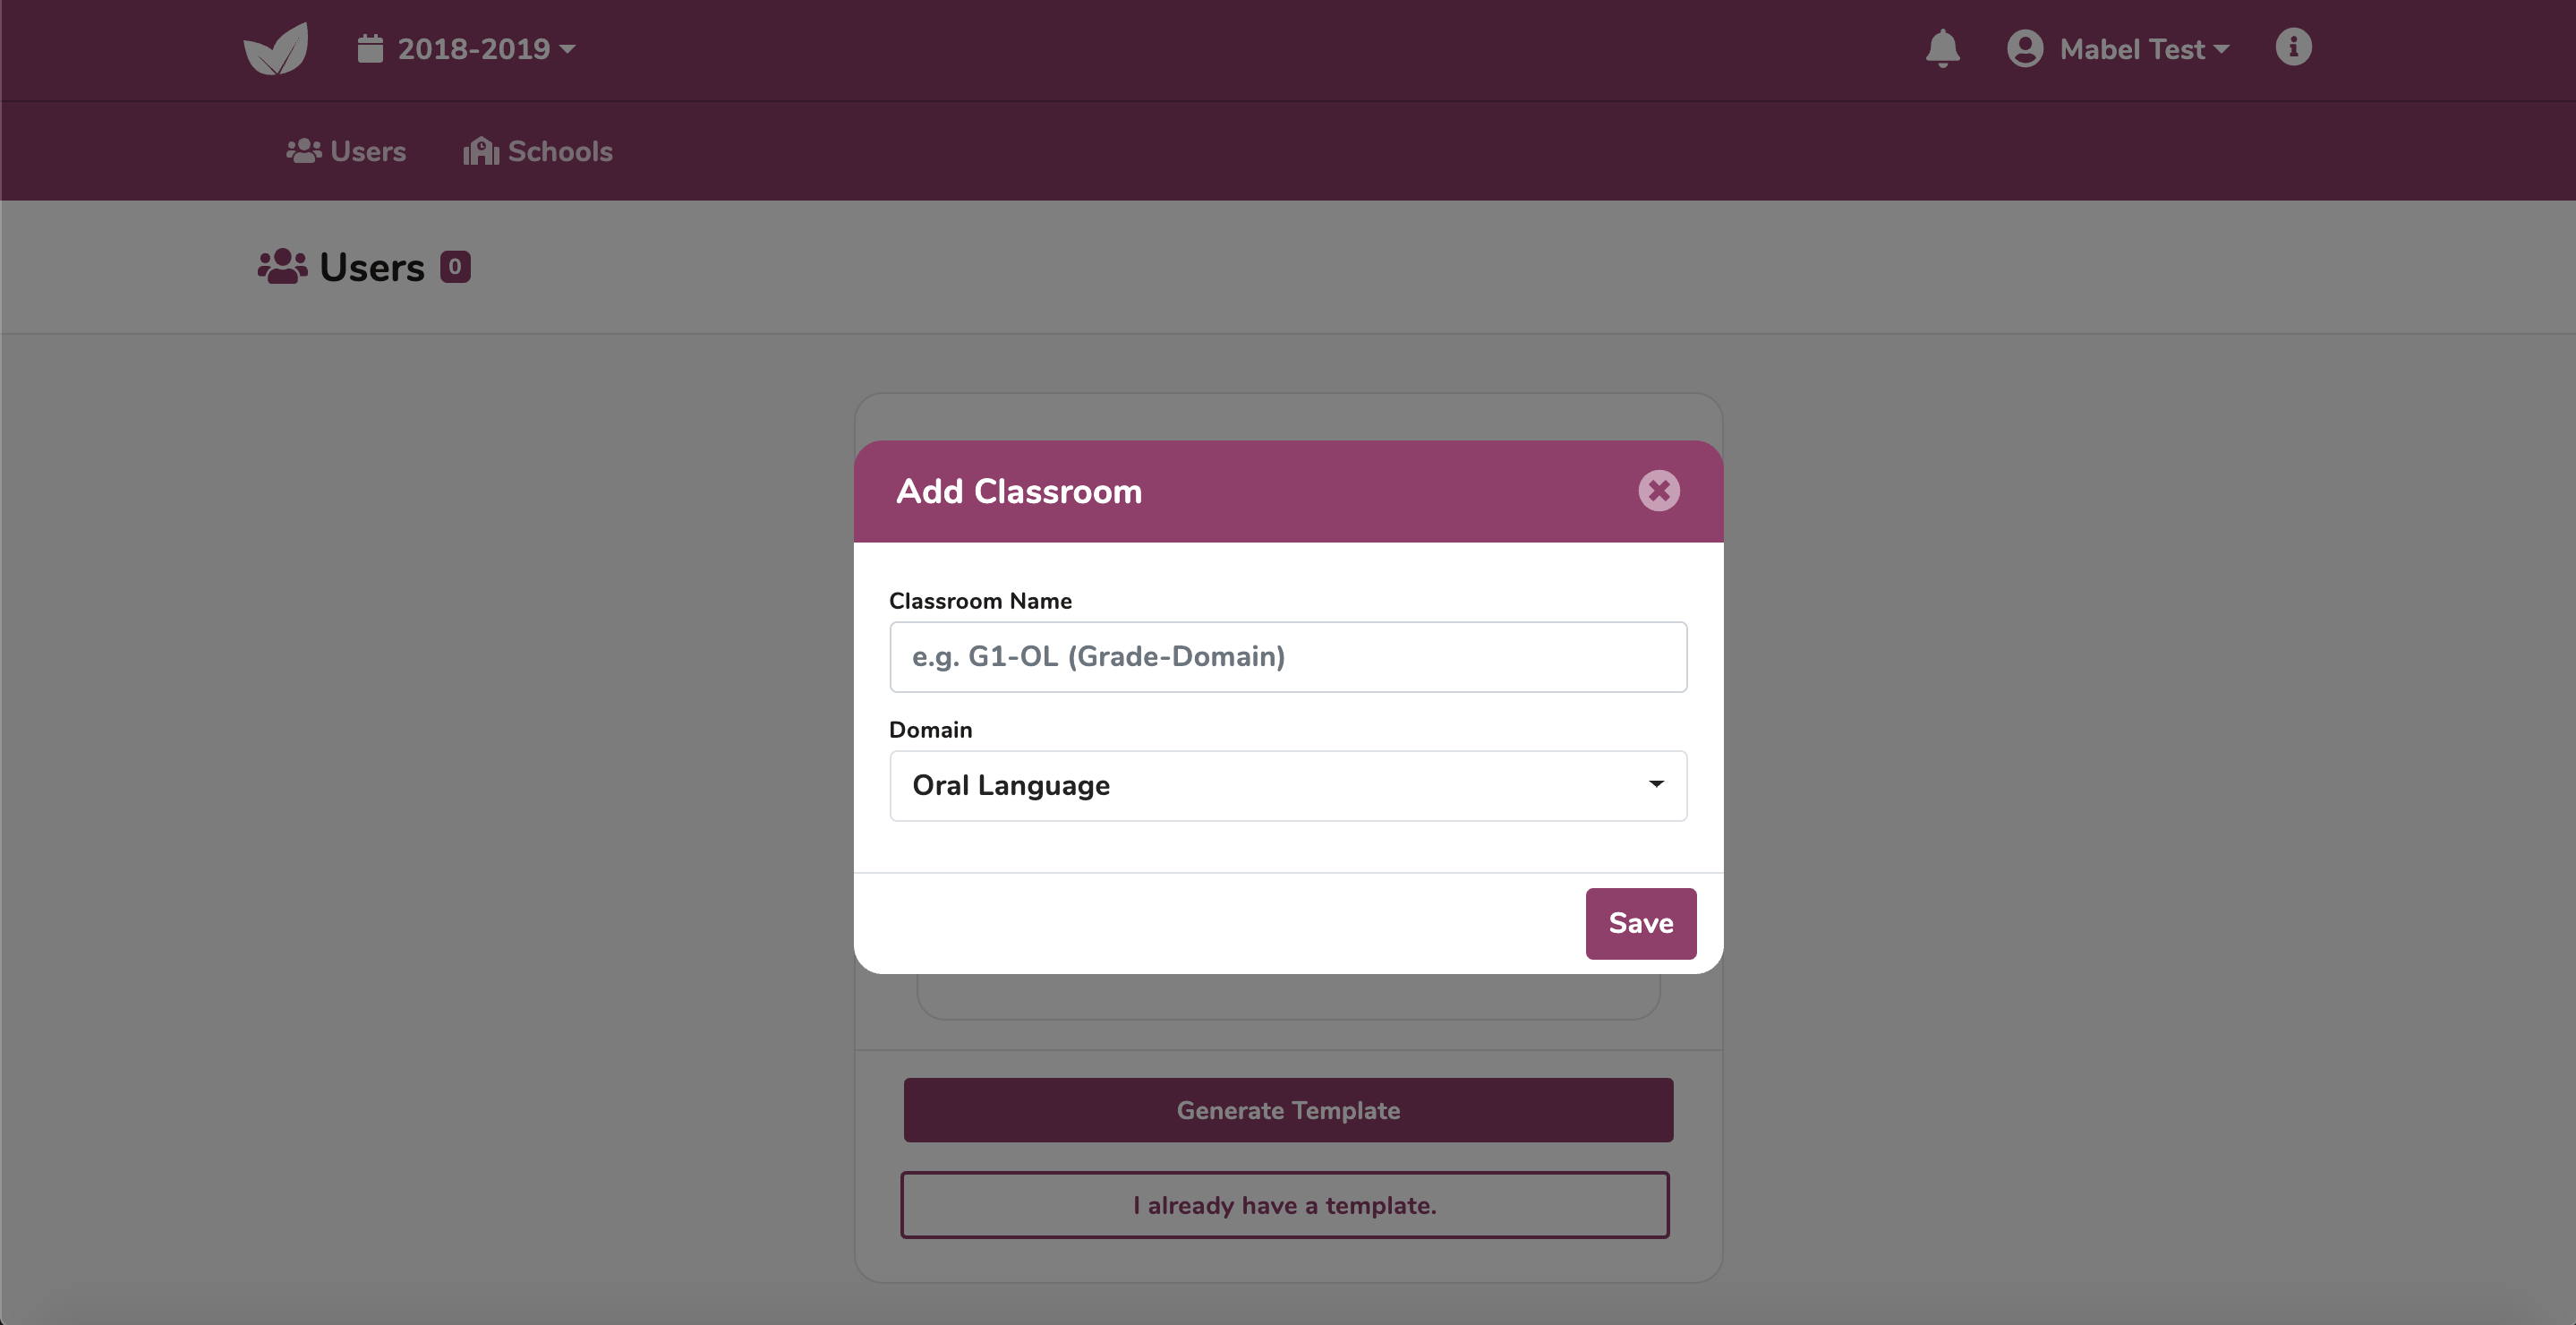
1.2 Add Classroom
Click +Add Classroom to create a new classroom.
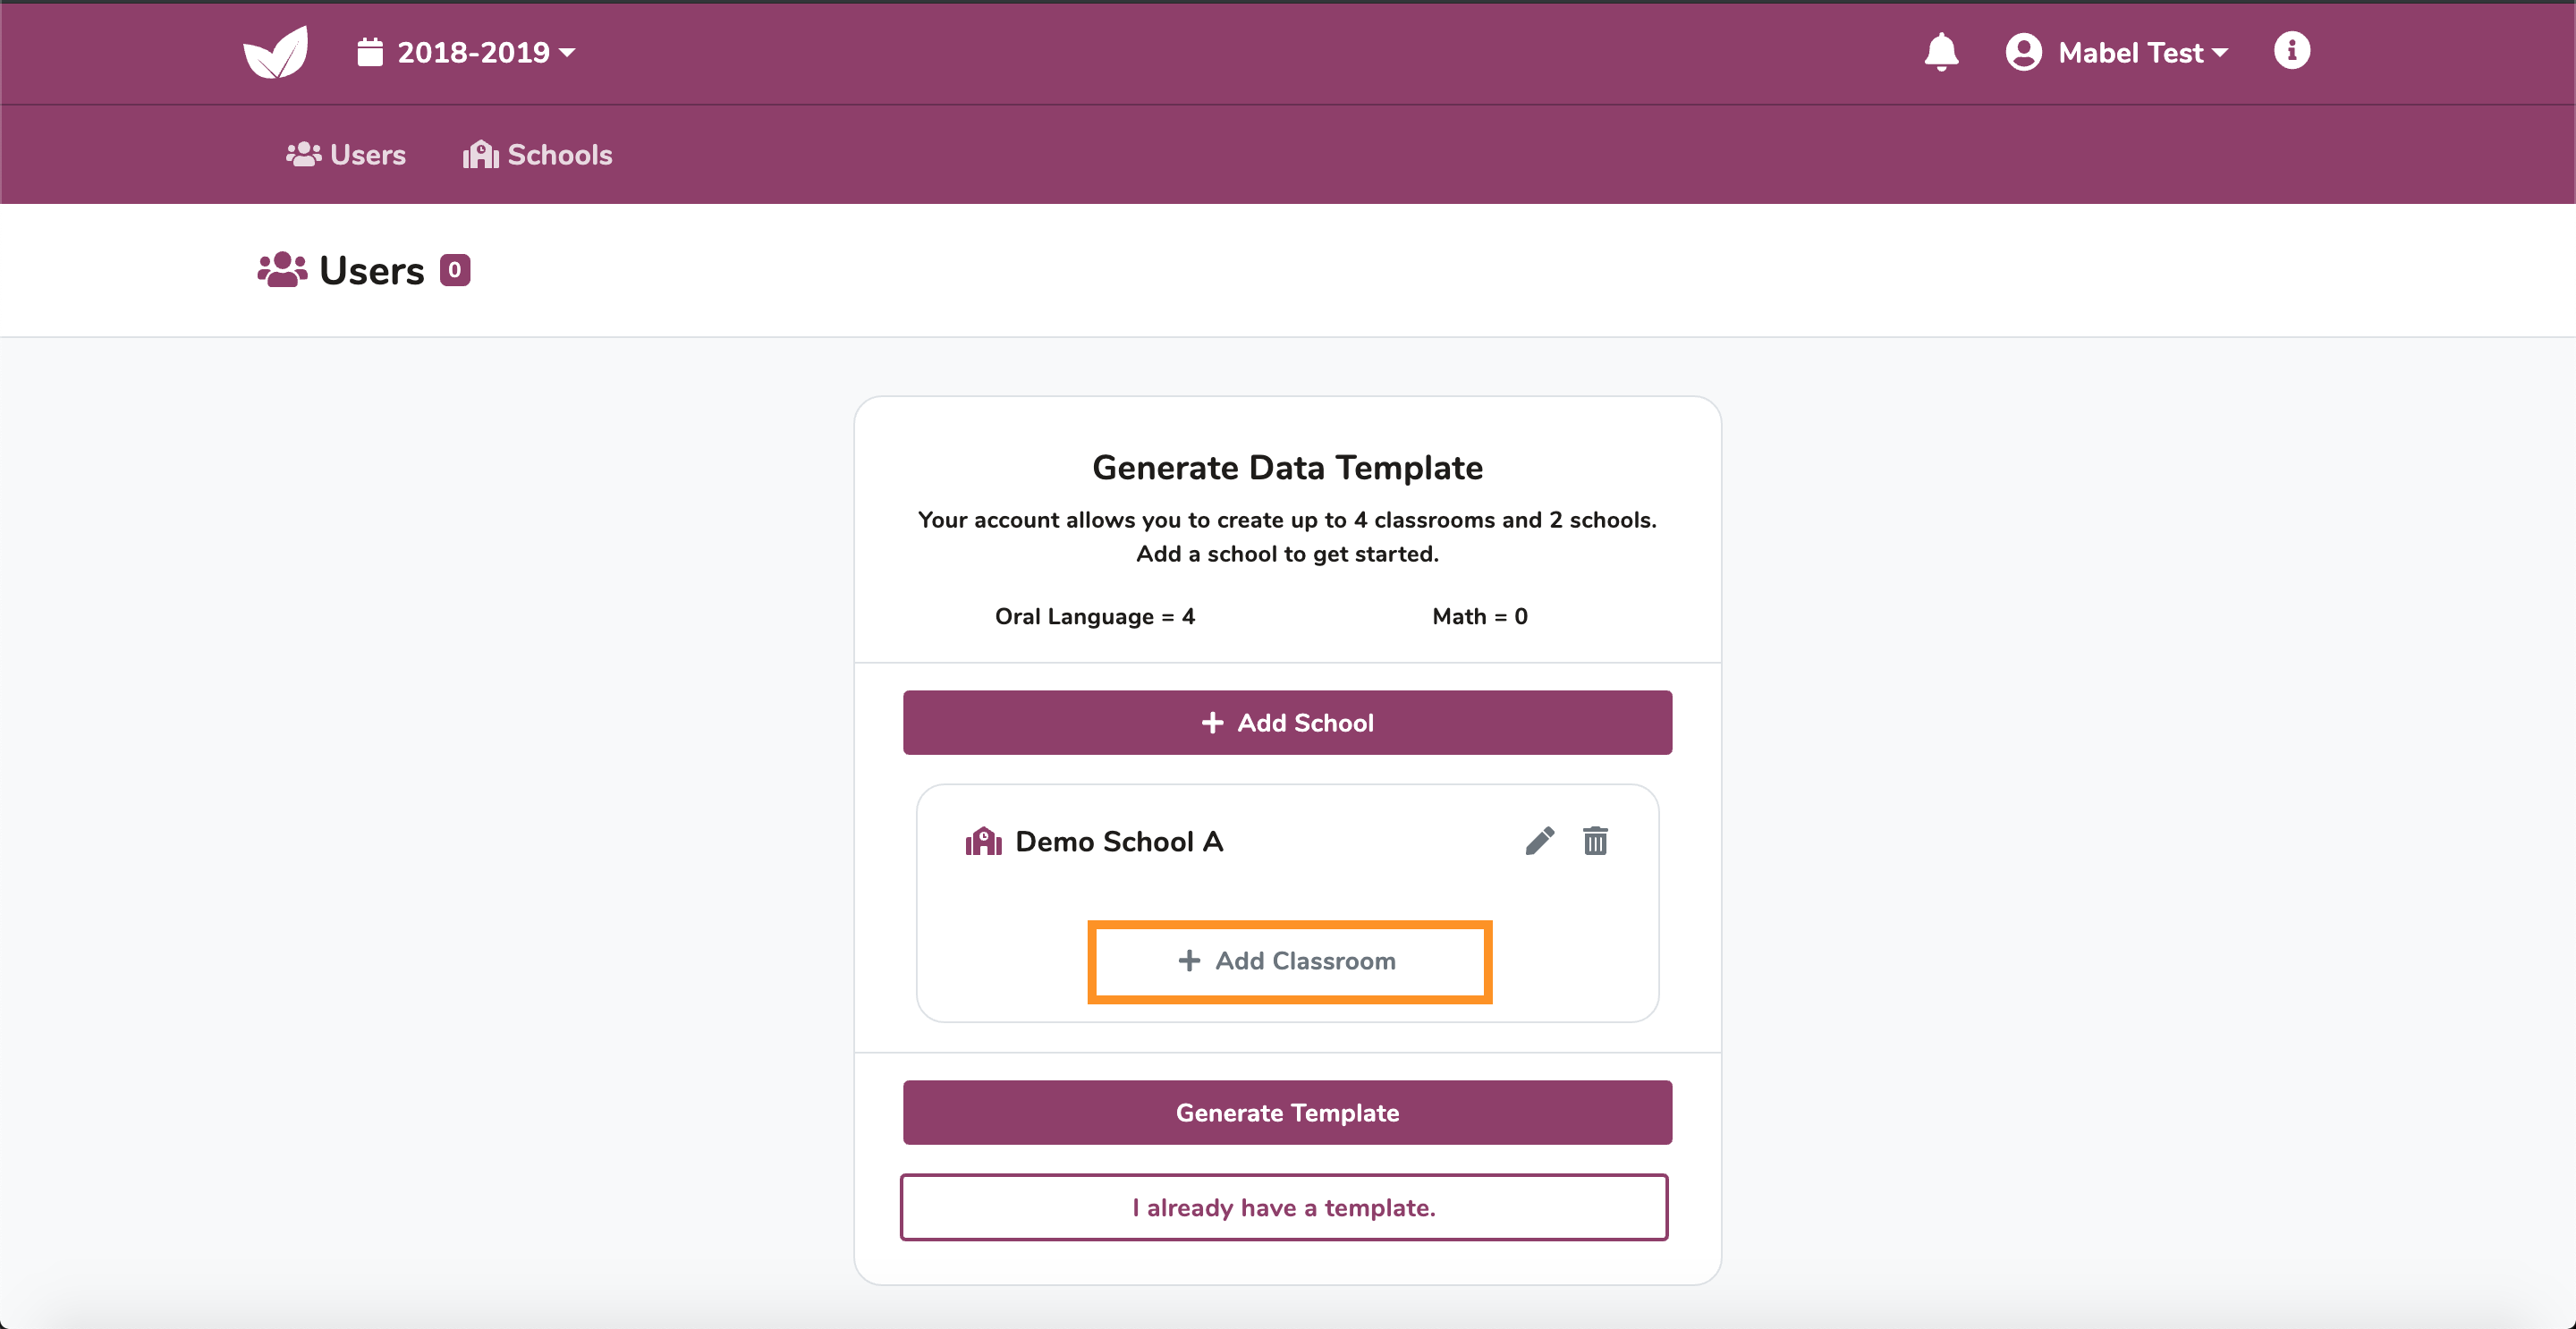
Enter a name for the classroom that will be used to identify it throughout the academic term, click Save.
You now have now added a classroom to a school in your template. To add another classroom, click +Add Classroom and repeat the step above.

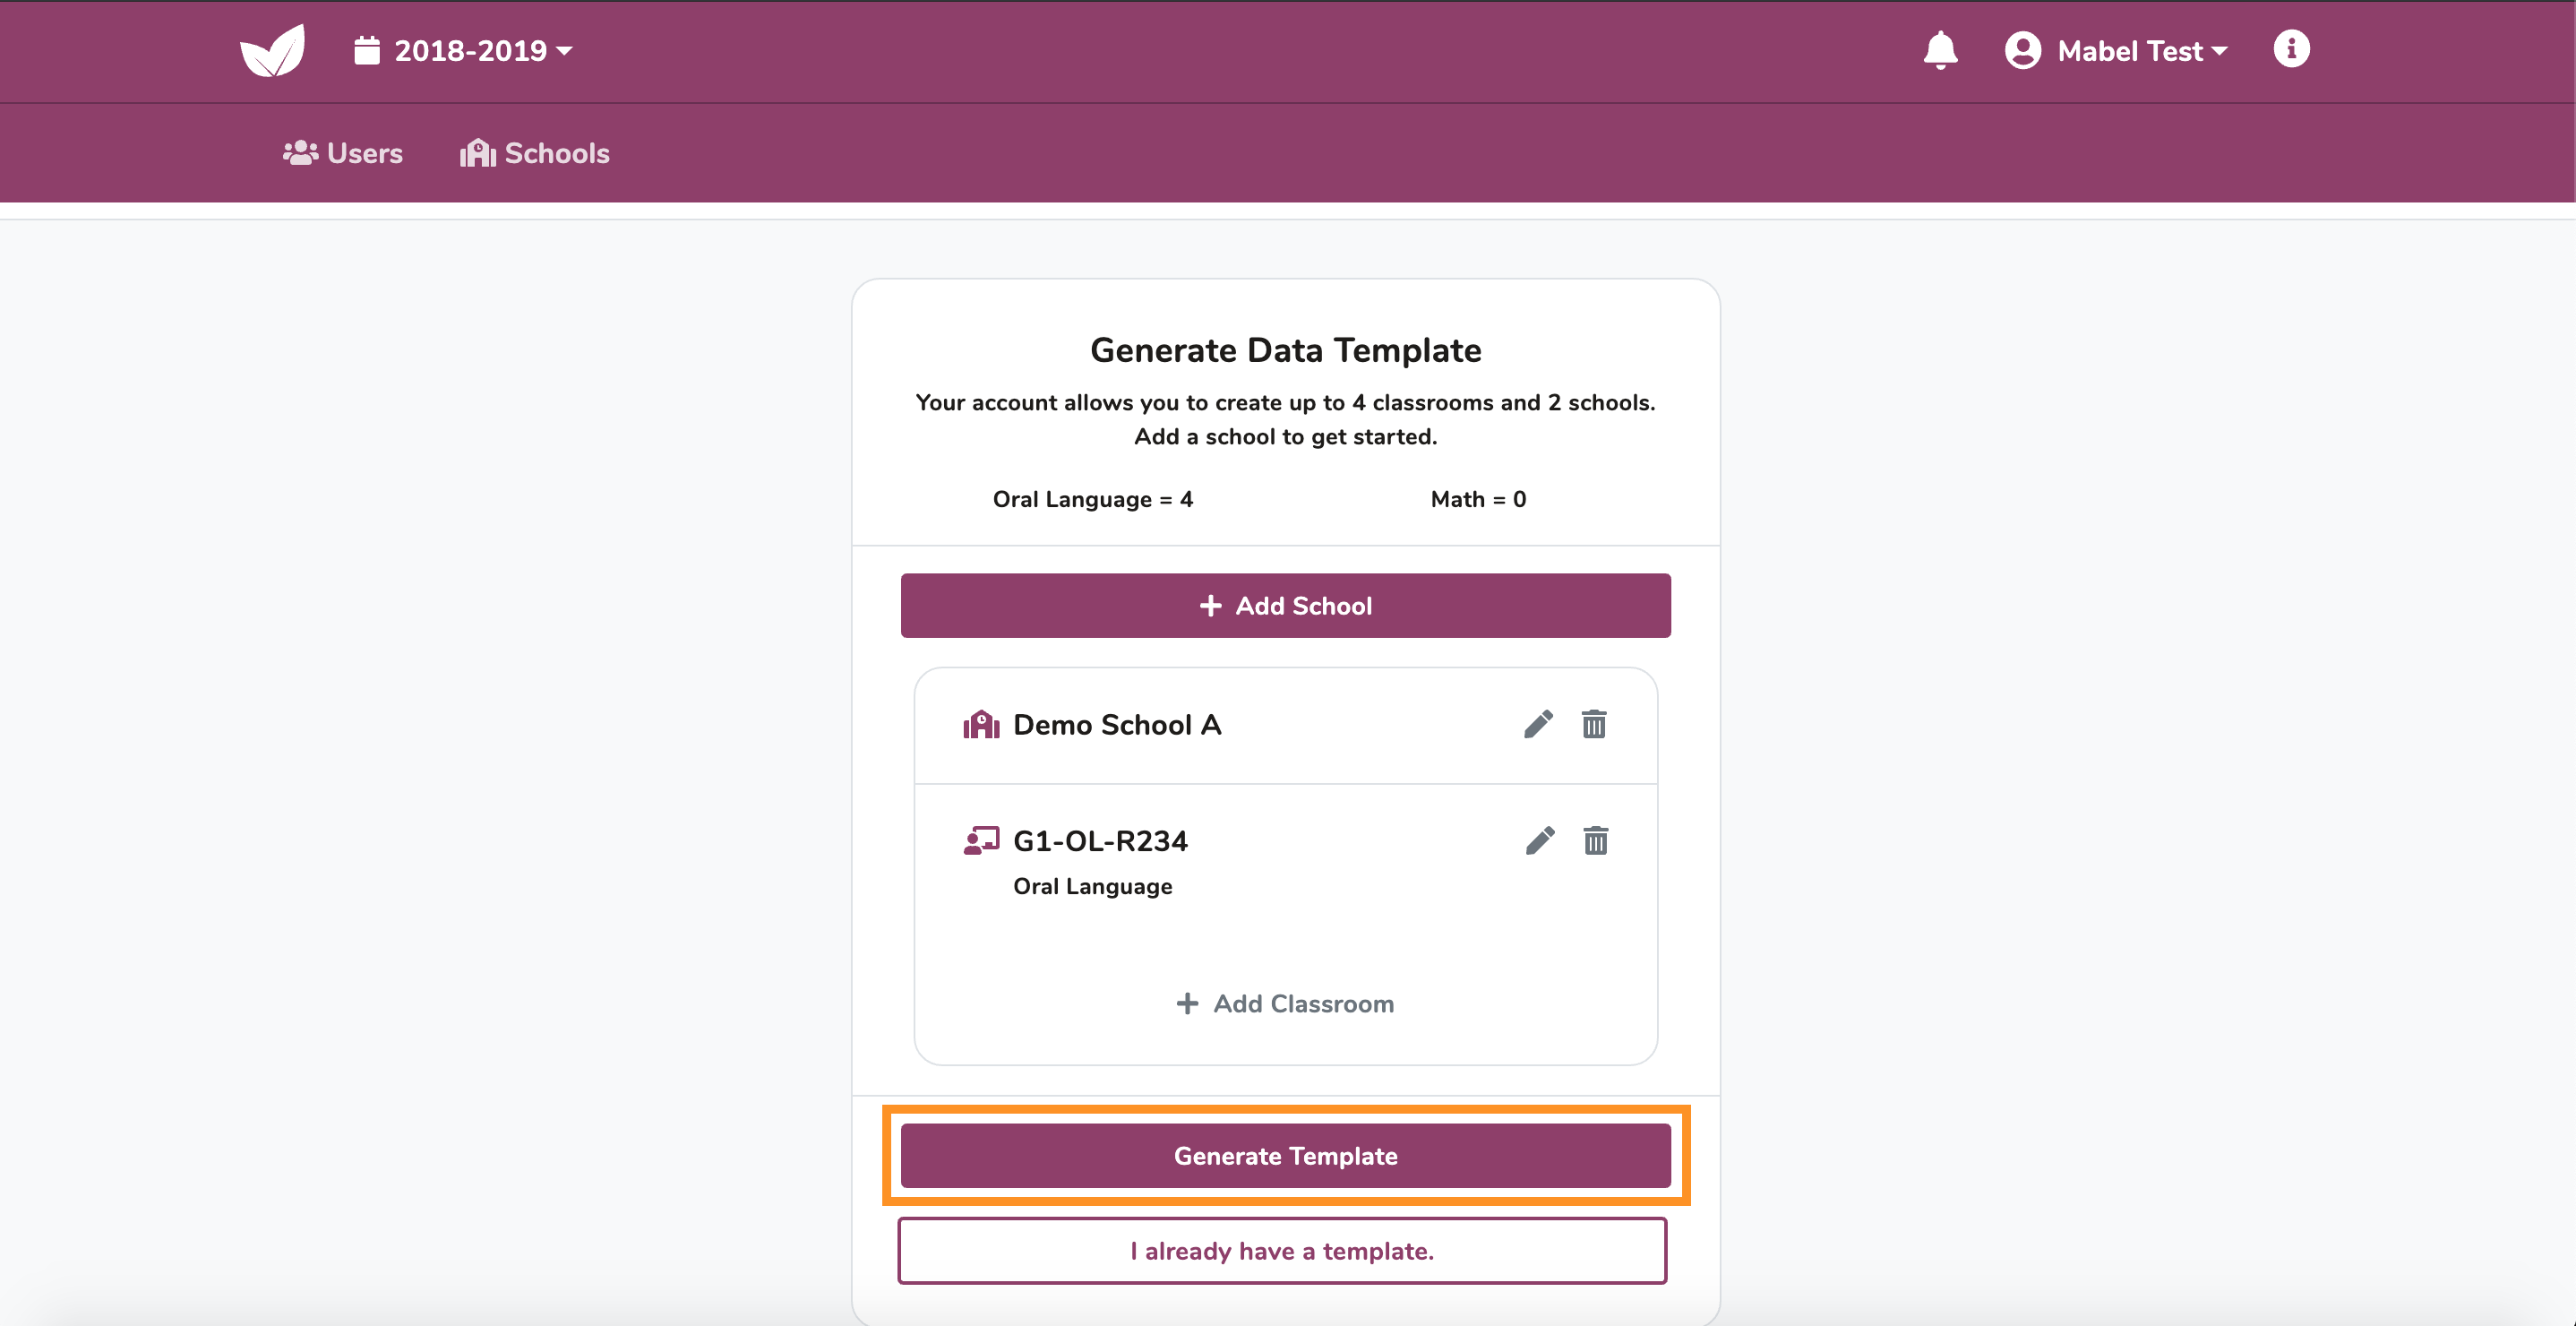
1.3 Generate Template
Once you have added your schools and classrooms, generate your data template by clicking Generate Template.
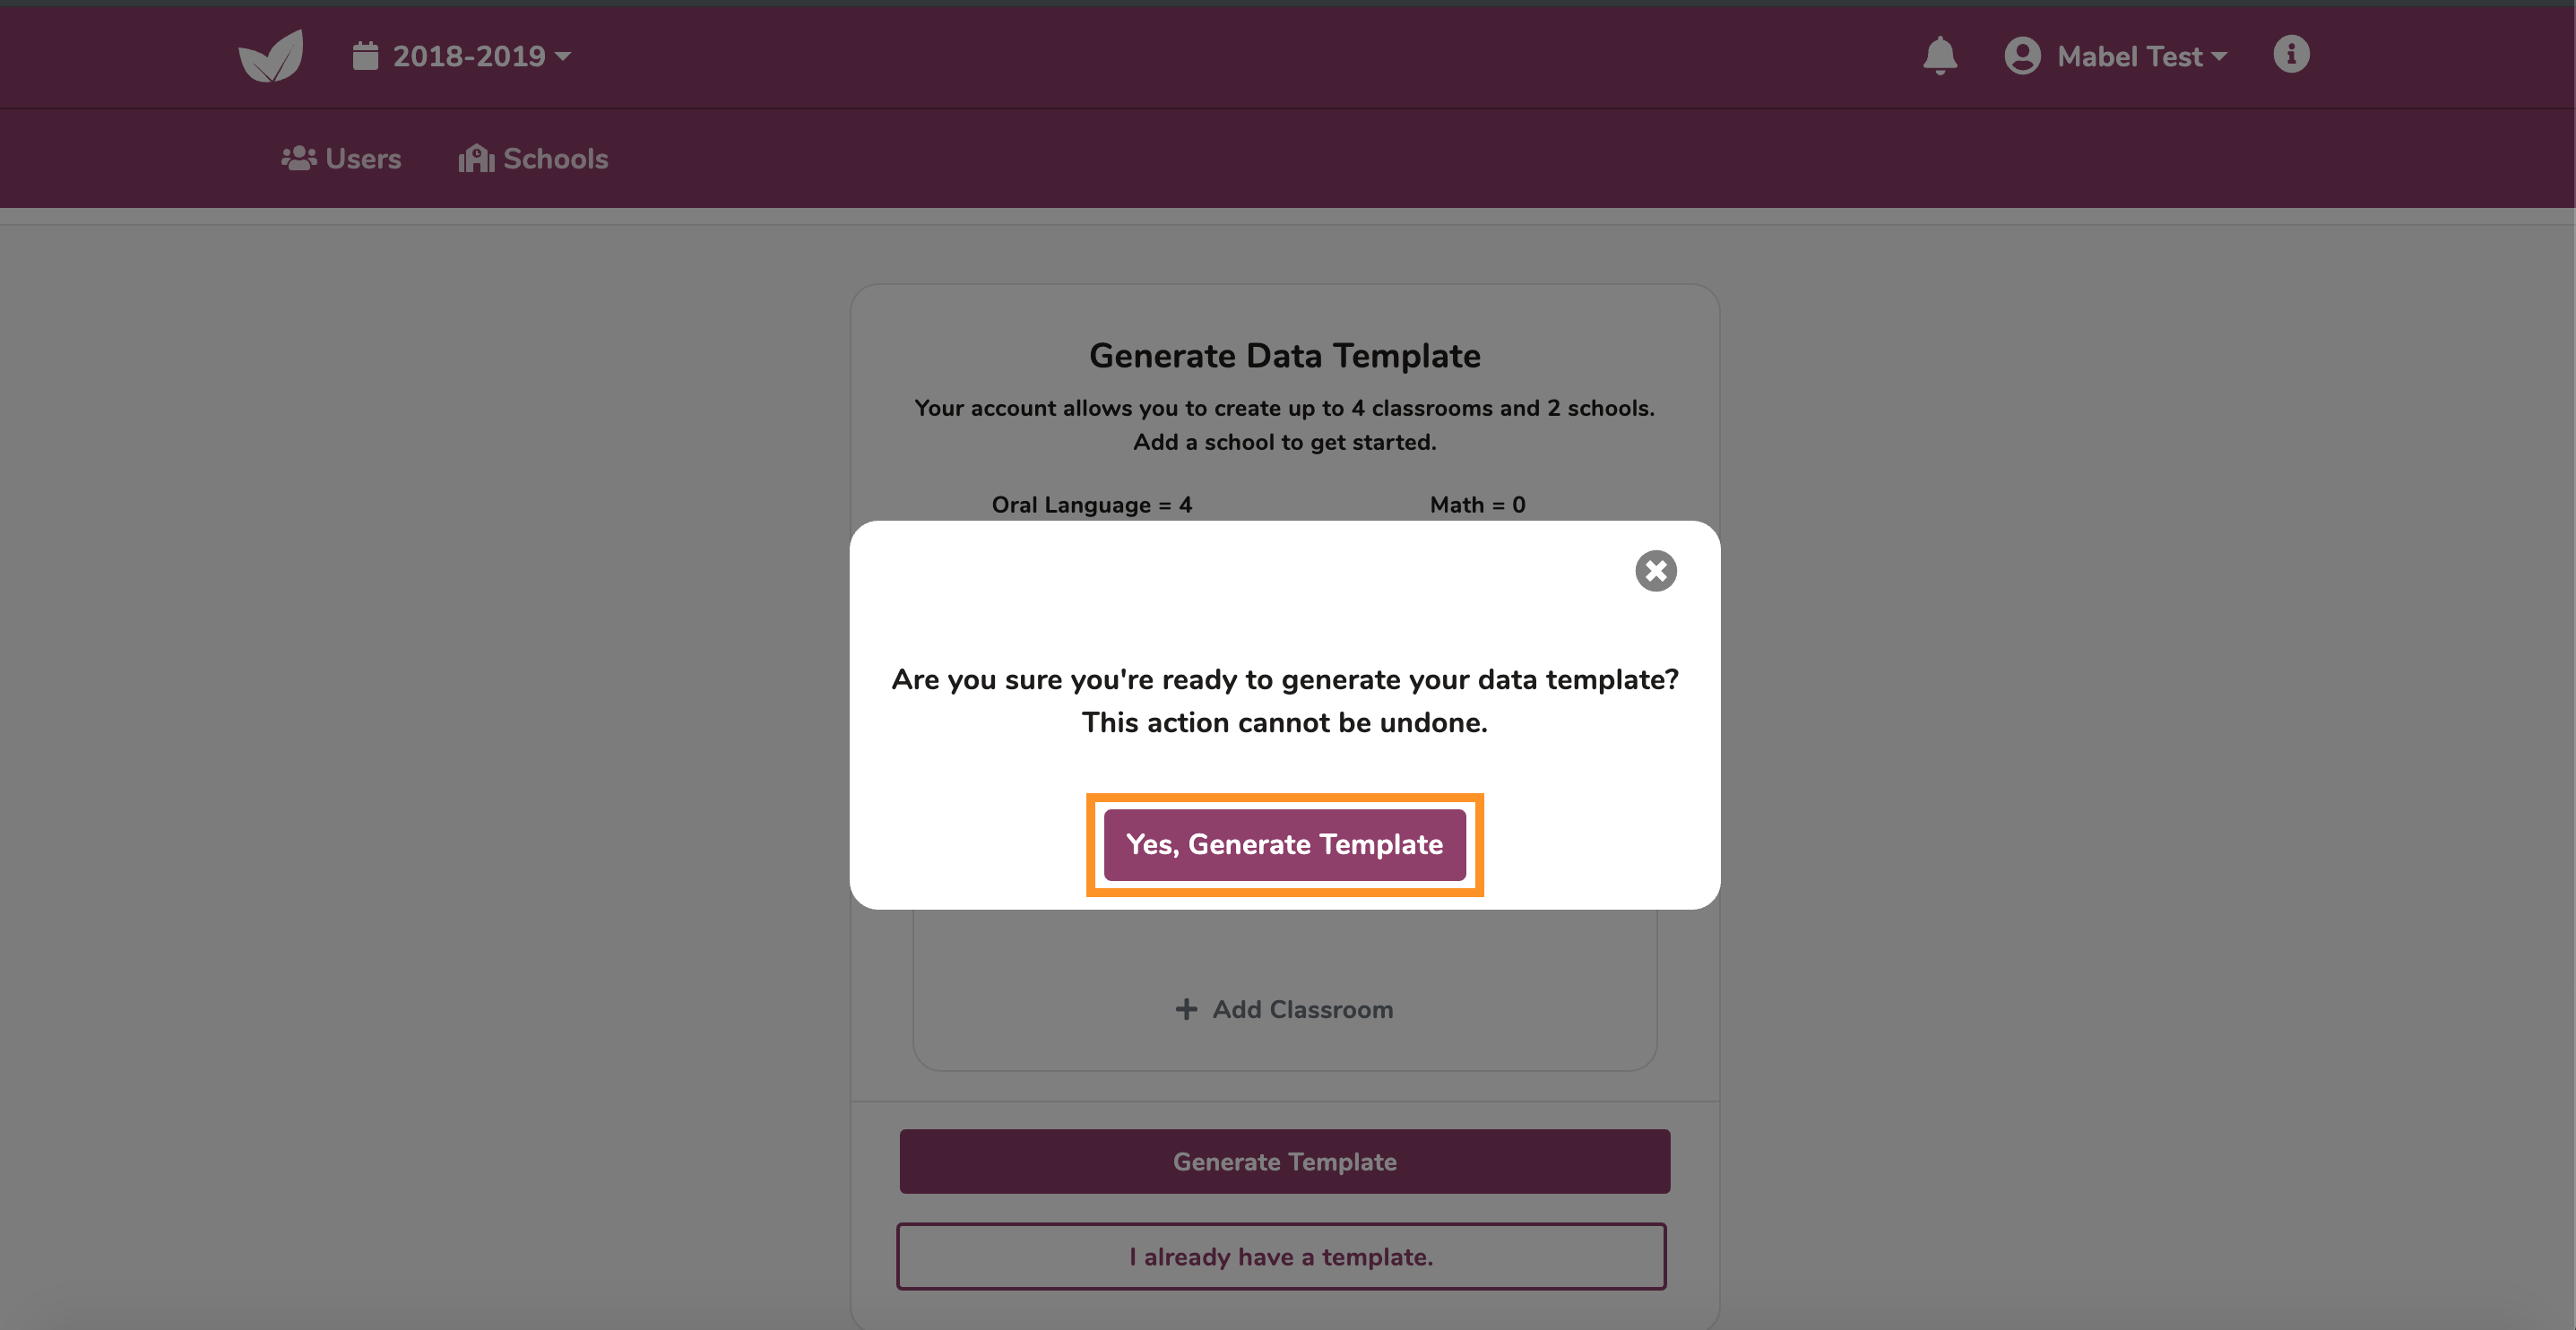
If you have created all of your schools and classrooms, click Yes, Generate Template.
2. Enter School/Classroom Data
2.1 Download Template
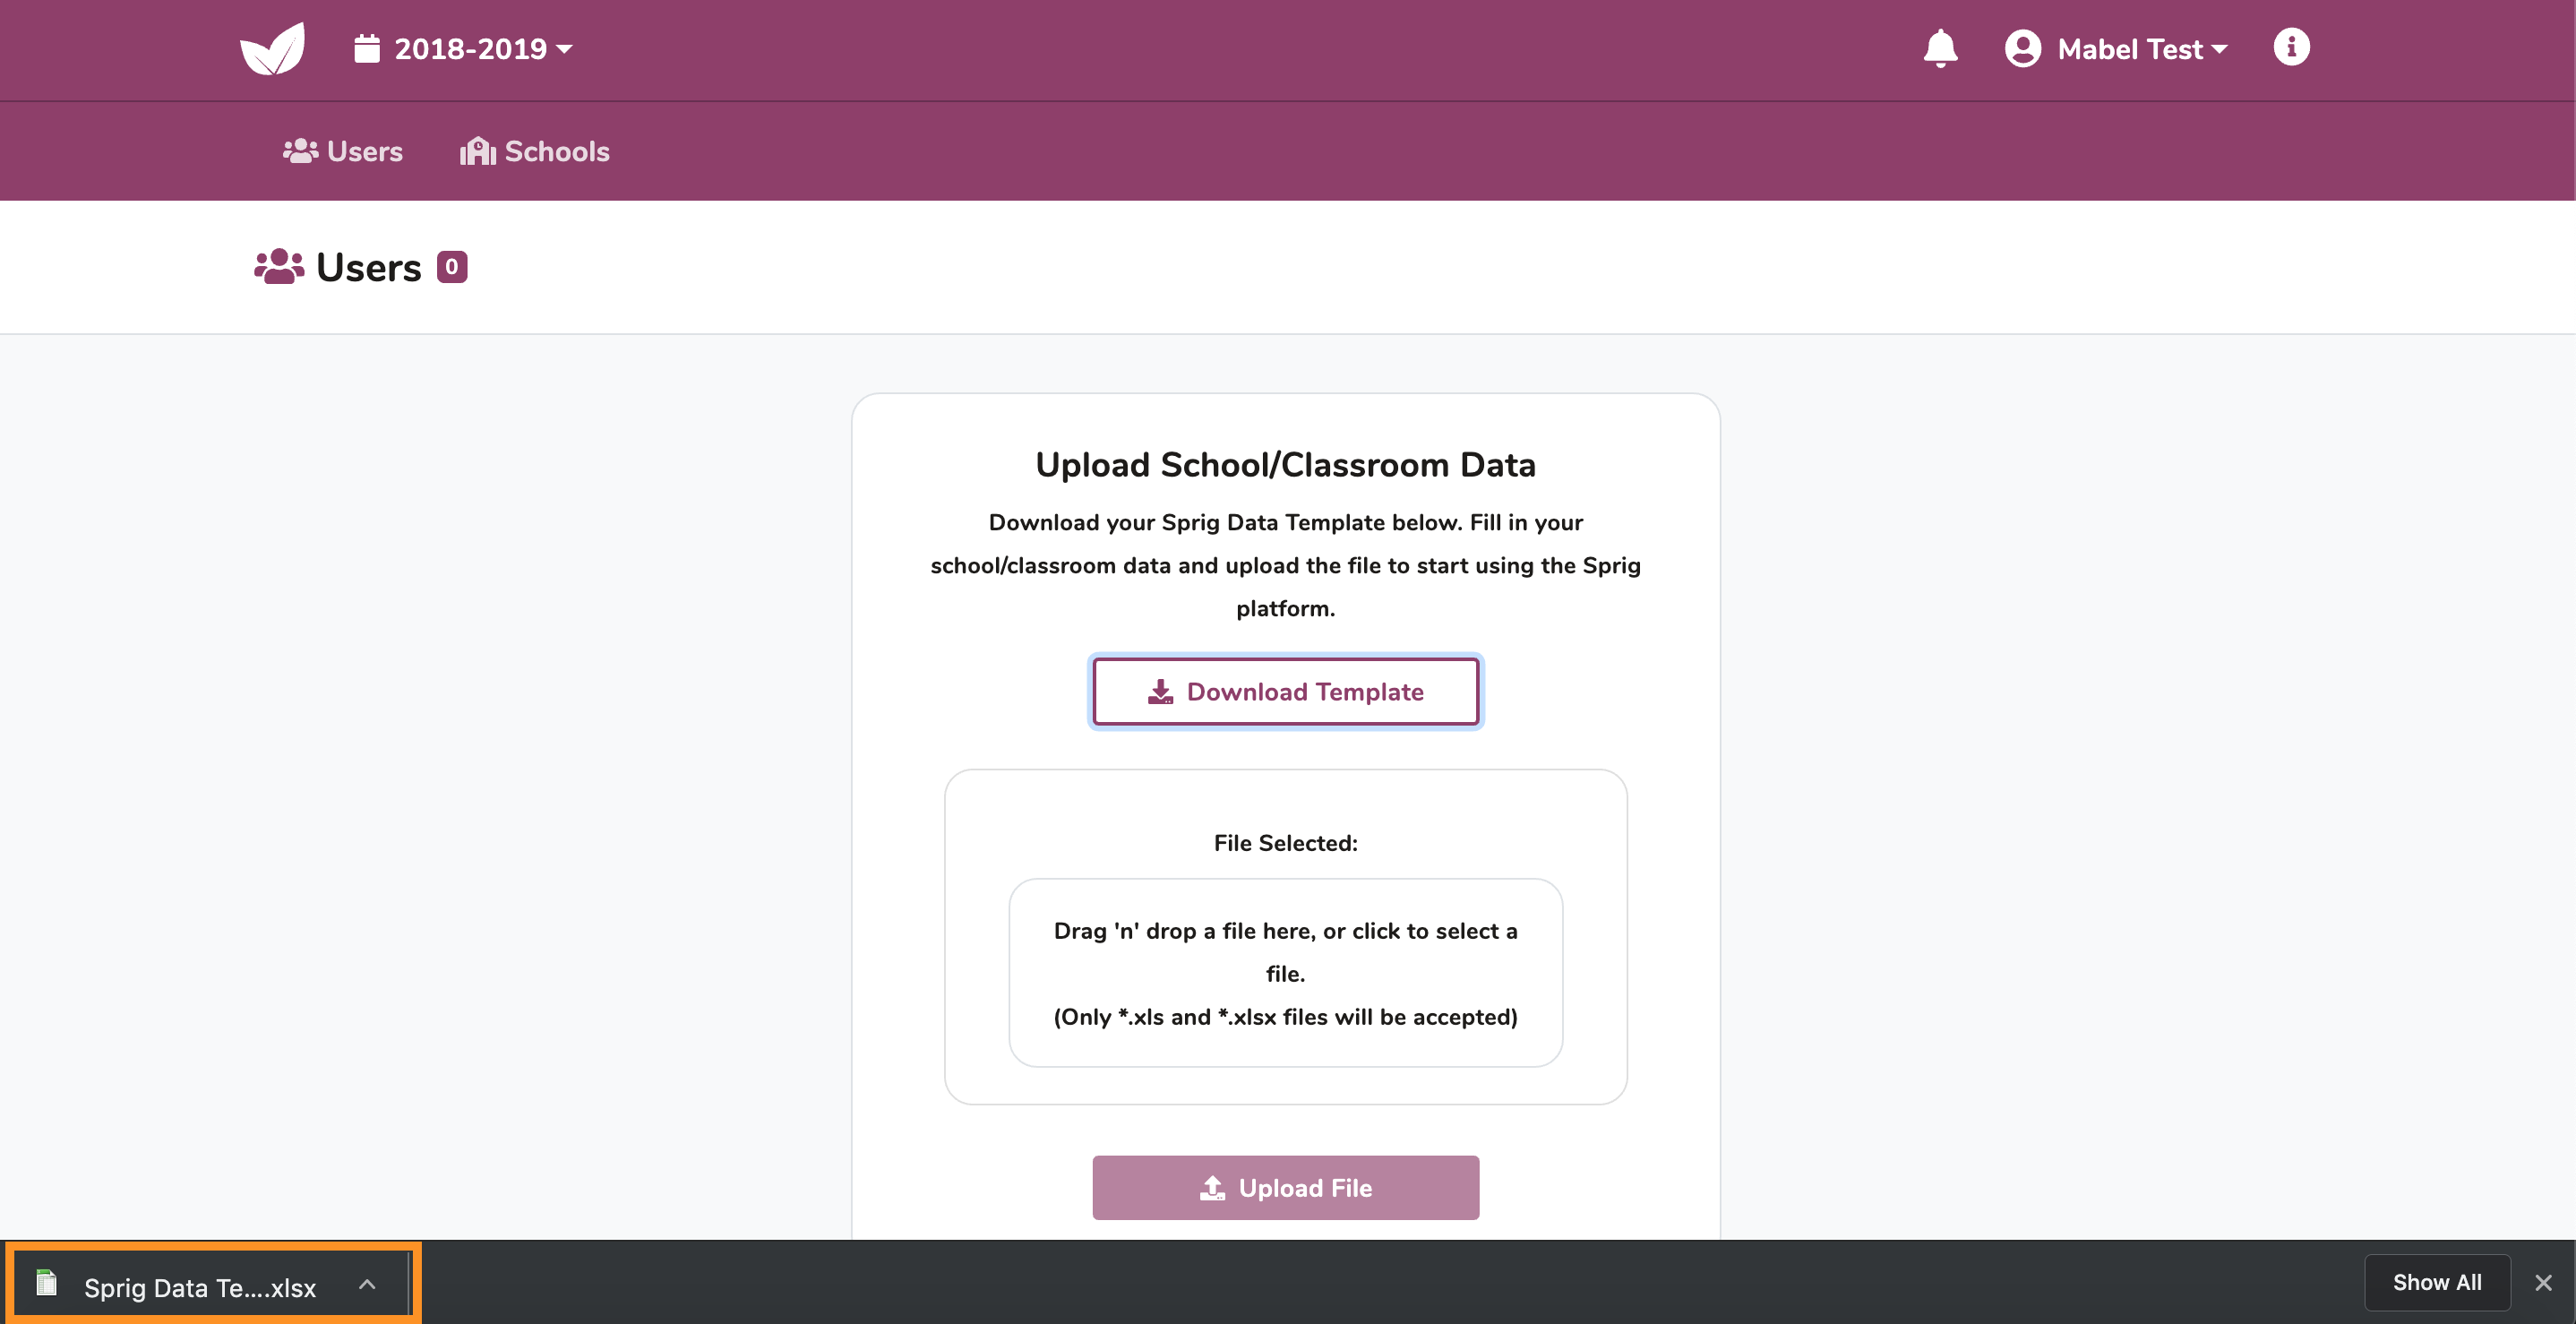
Click Download Template to download the template containing your schools and classrooms.
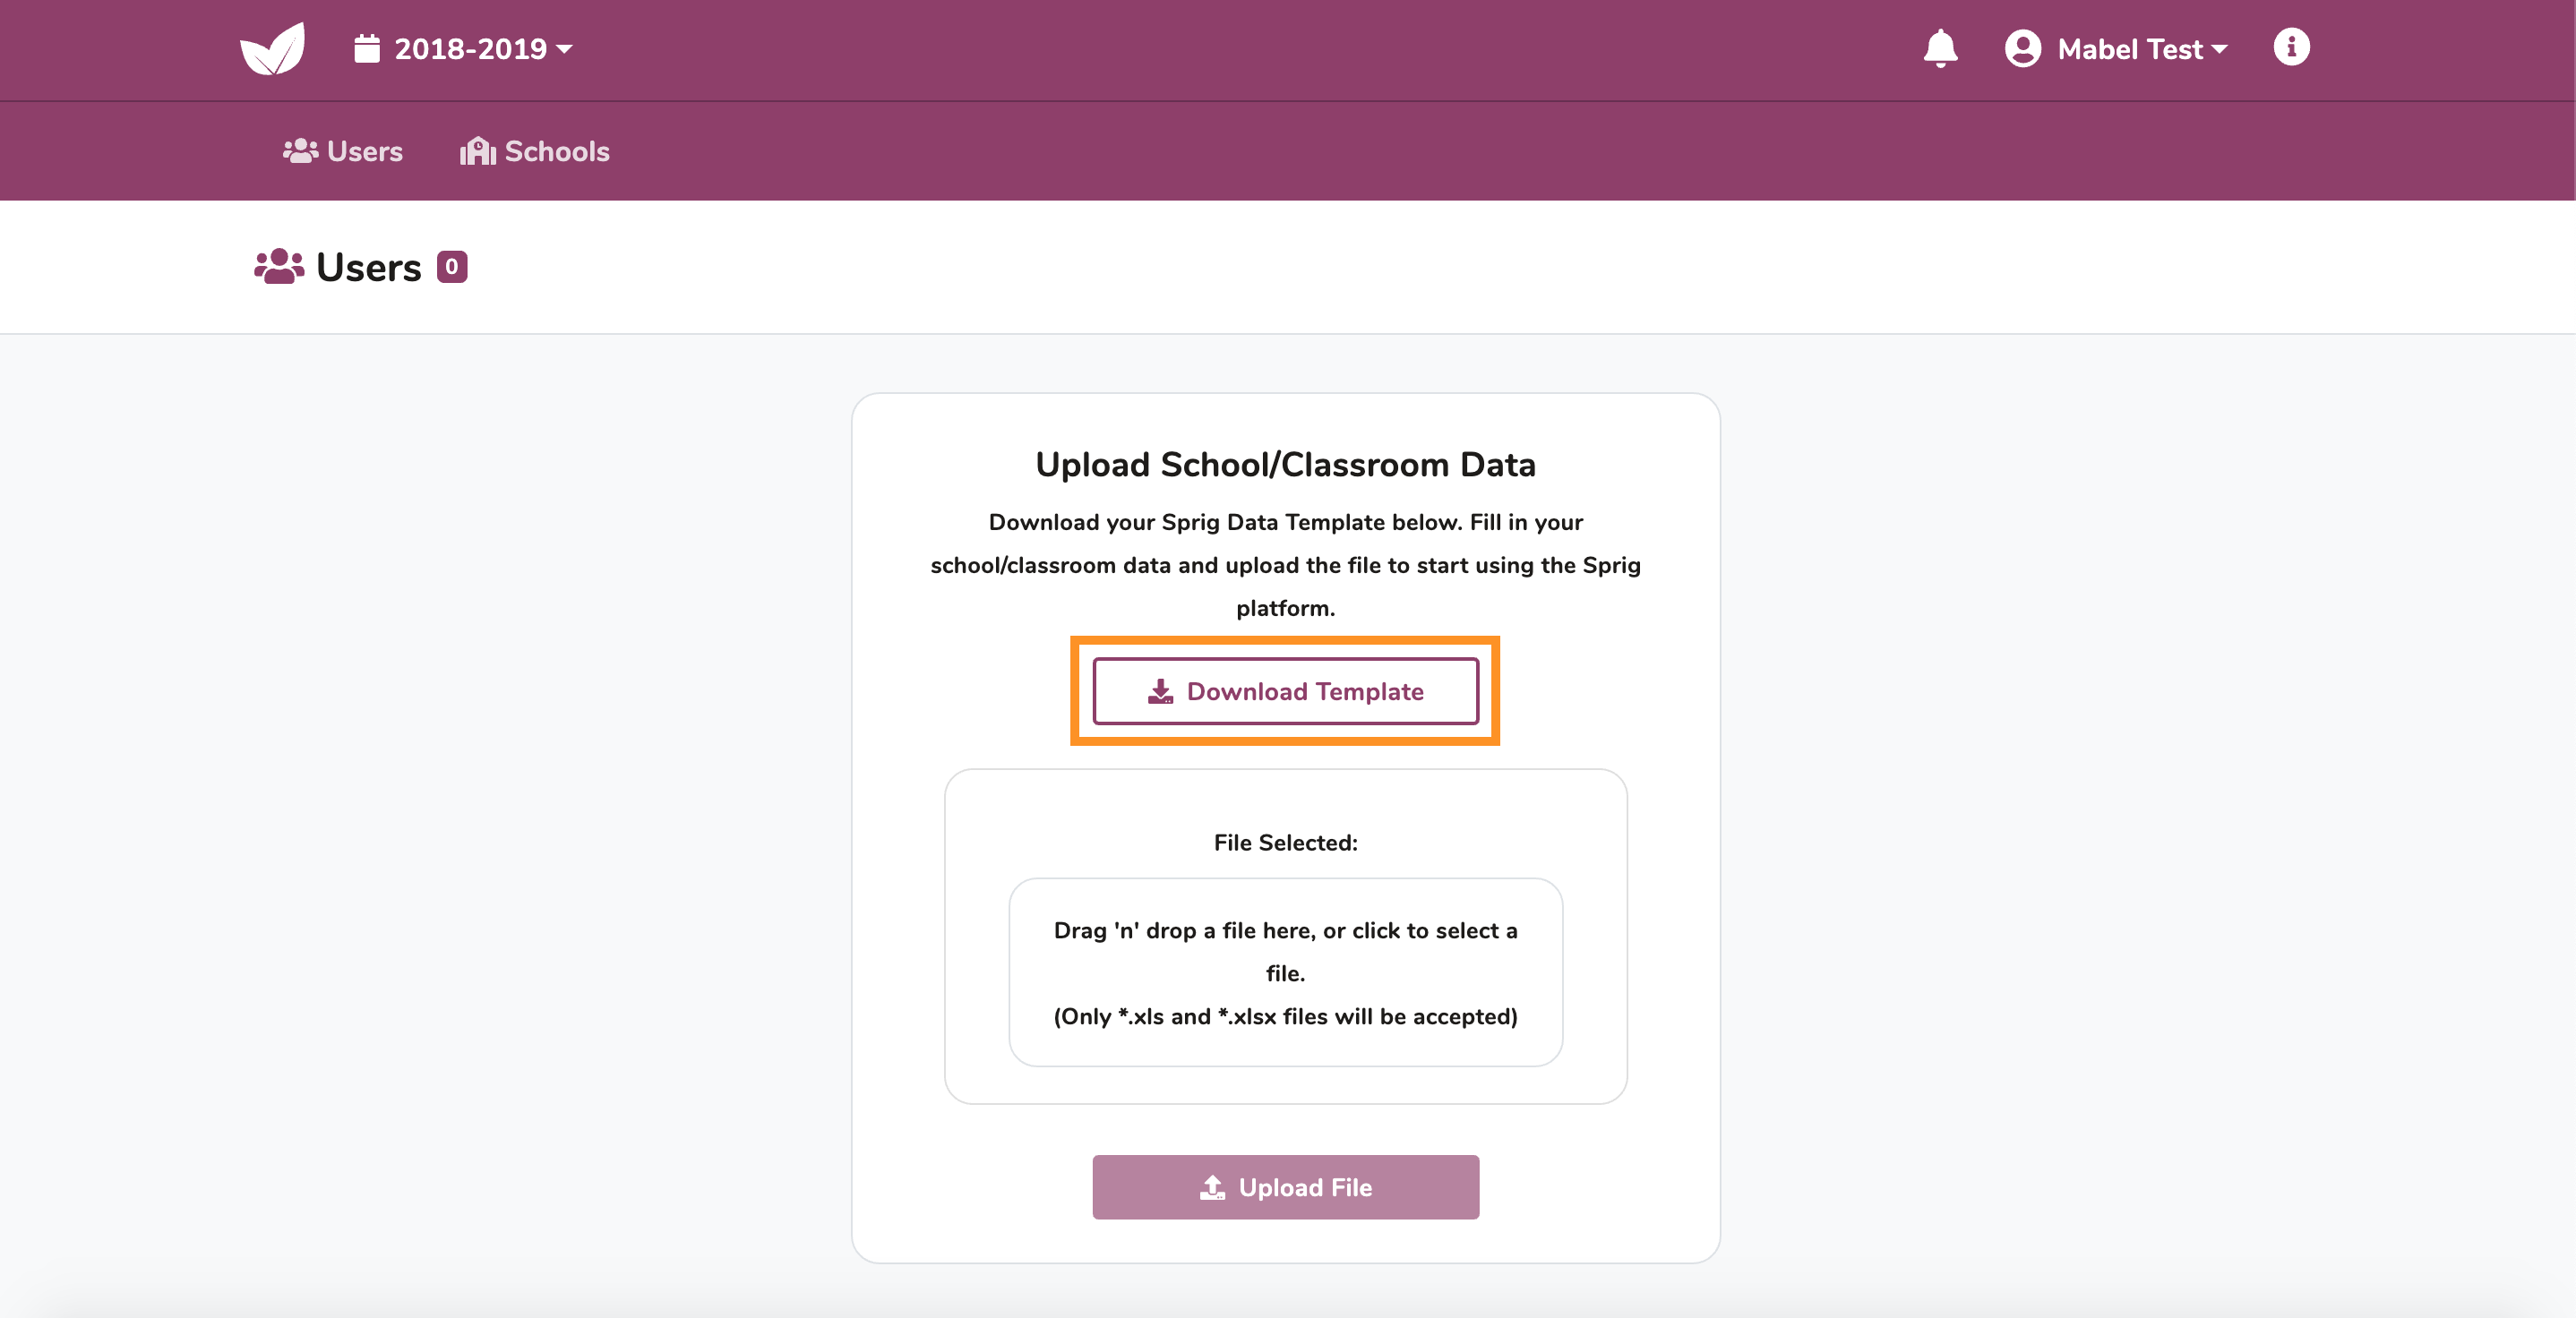
Open Sprig Data Template.xlsx.
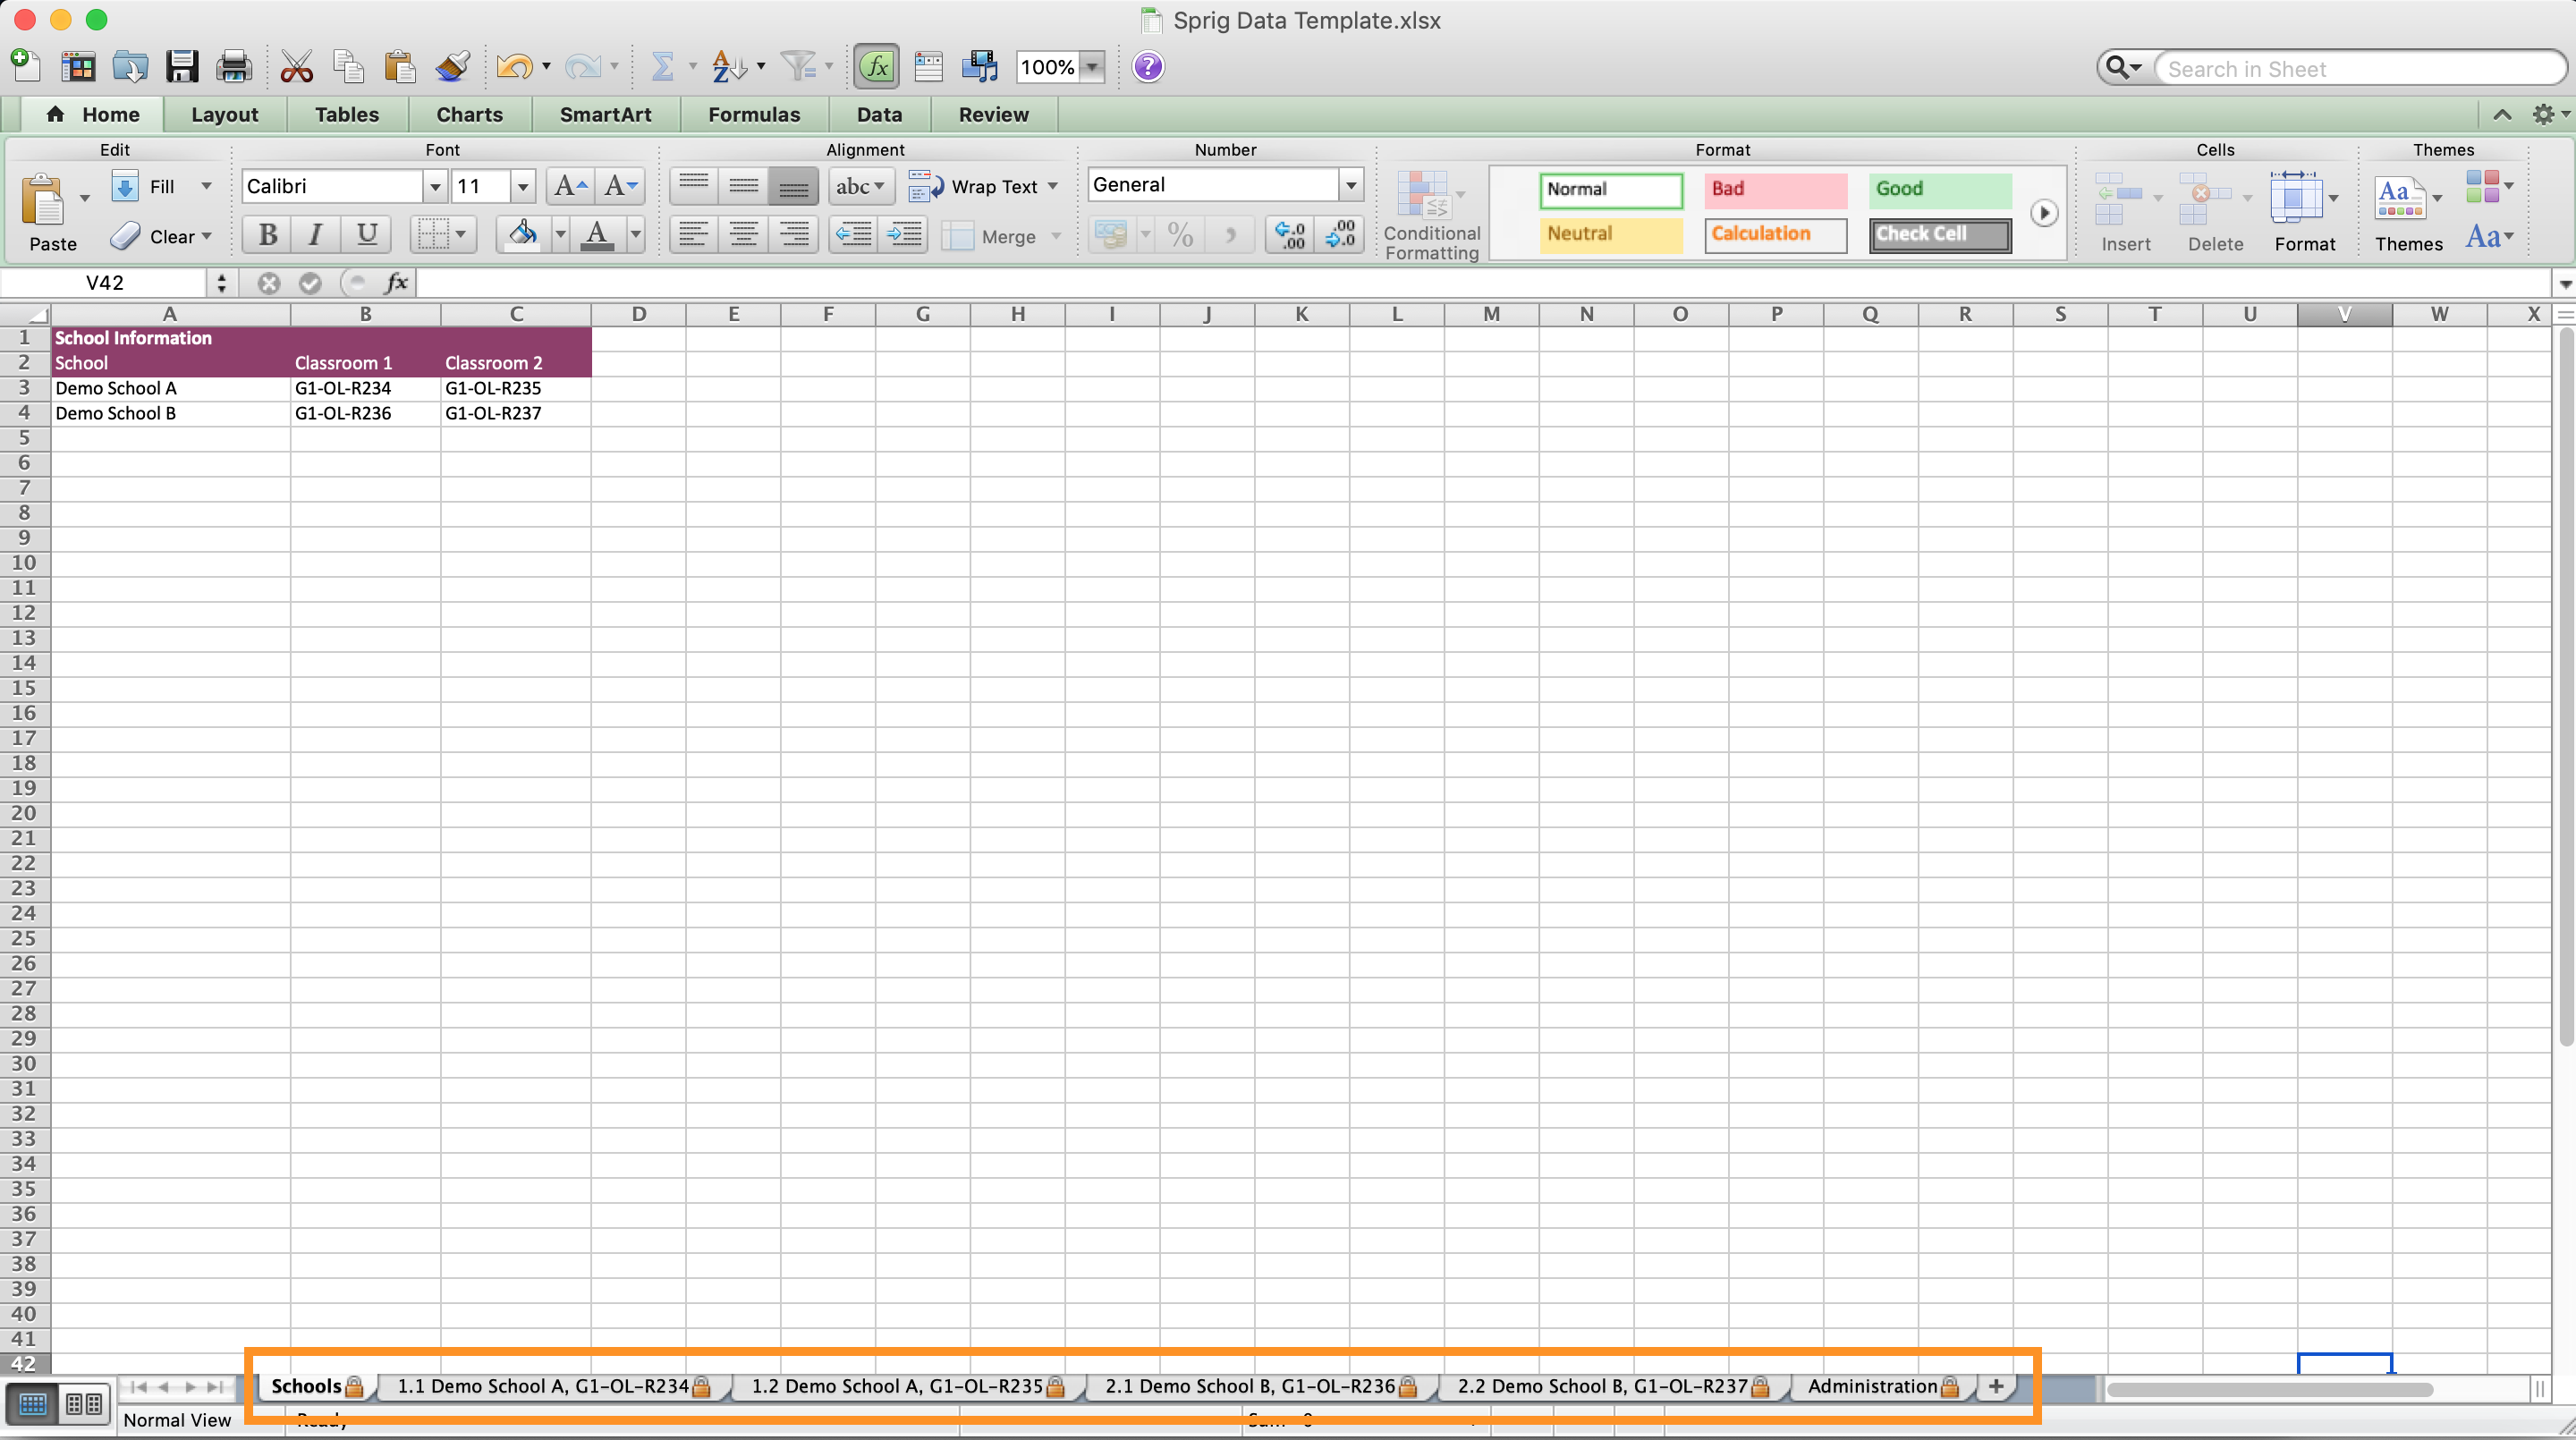
2.2 Data Template
Your template will be used to upload school/classroom data. The template contains three types of worksheets:
- Schools – A snapshot of the schools and classrooms in the template.
- Classroom – This is where you enter classroom specific data (Students/Teacher).
- Administration – This is where you enter client specific data (Administrators/Principals/Additional Teachers).
2.3 Data Template (Classroom Sheet)
Every classroom created when generating your template will have a corresponding Classroom Sheet. You will use this sheet to add student and teacher data to a classroom. Classroom sheets contain two editable tables :
- Student Information -This is where you enter information for the students in the classroom.
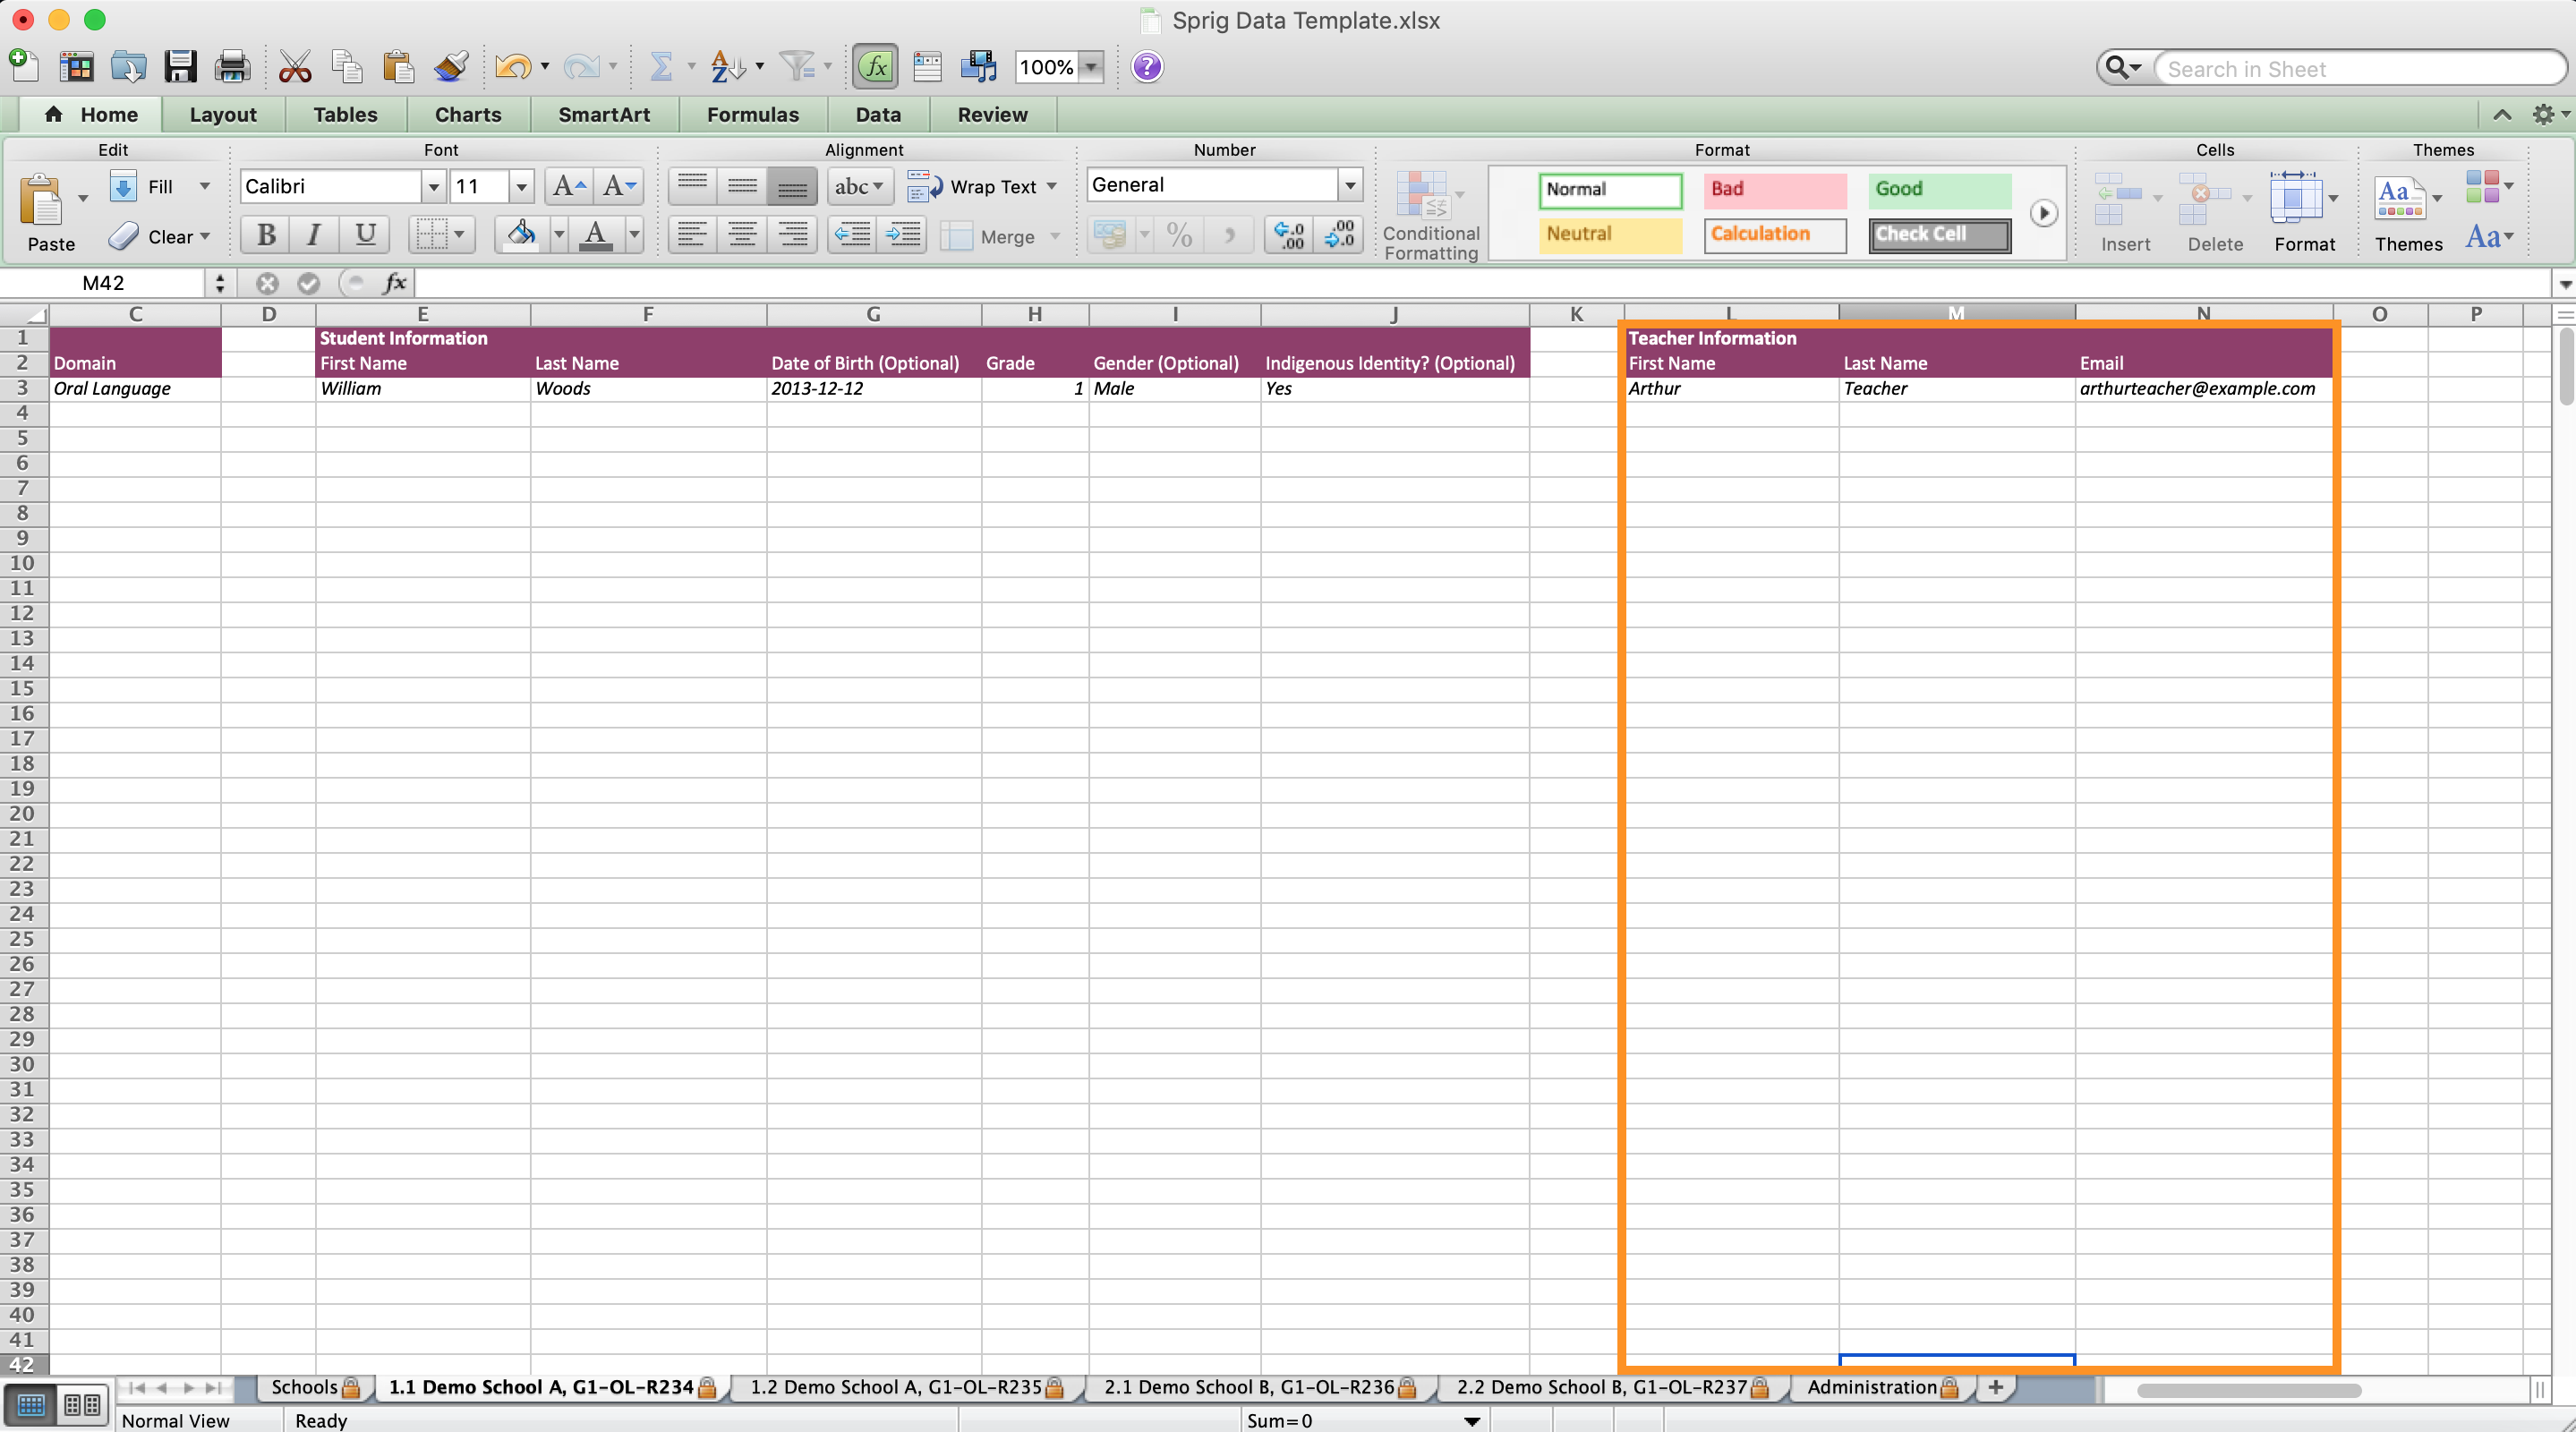
- Teacher Information -This is where you enter information for the teacher(s) in the classroom.
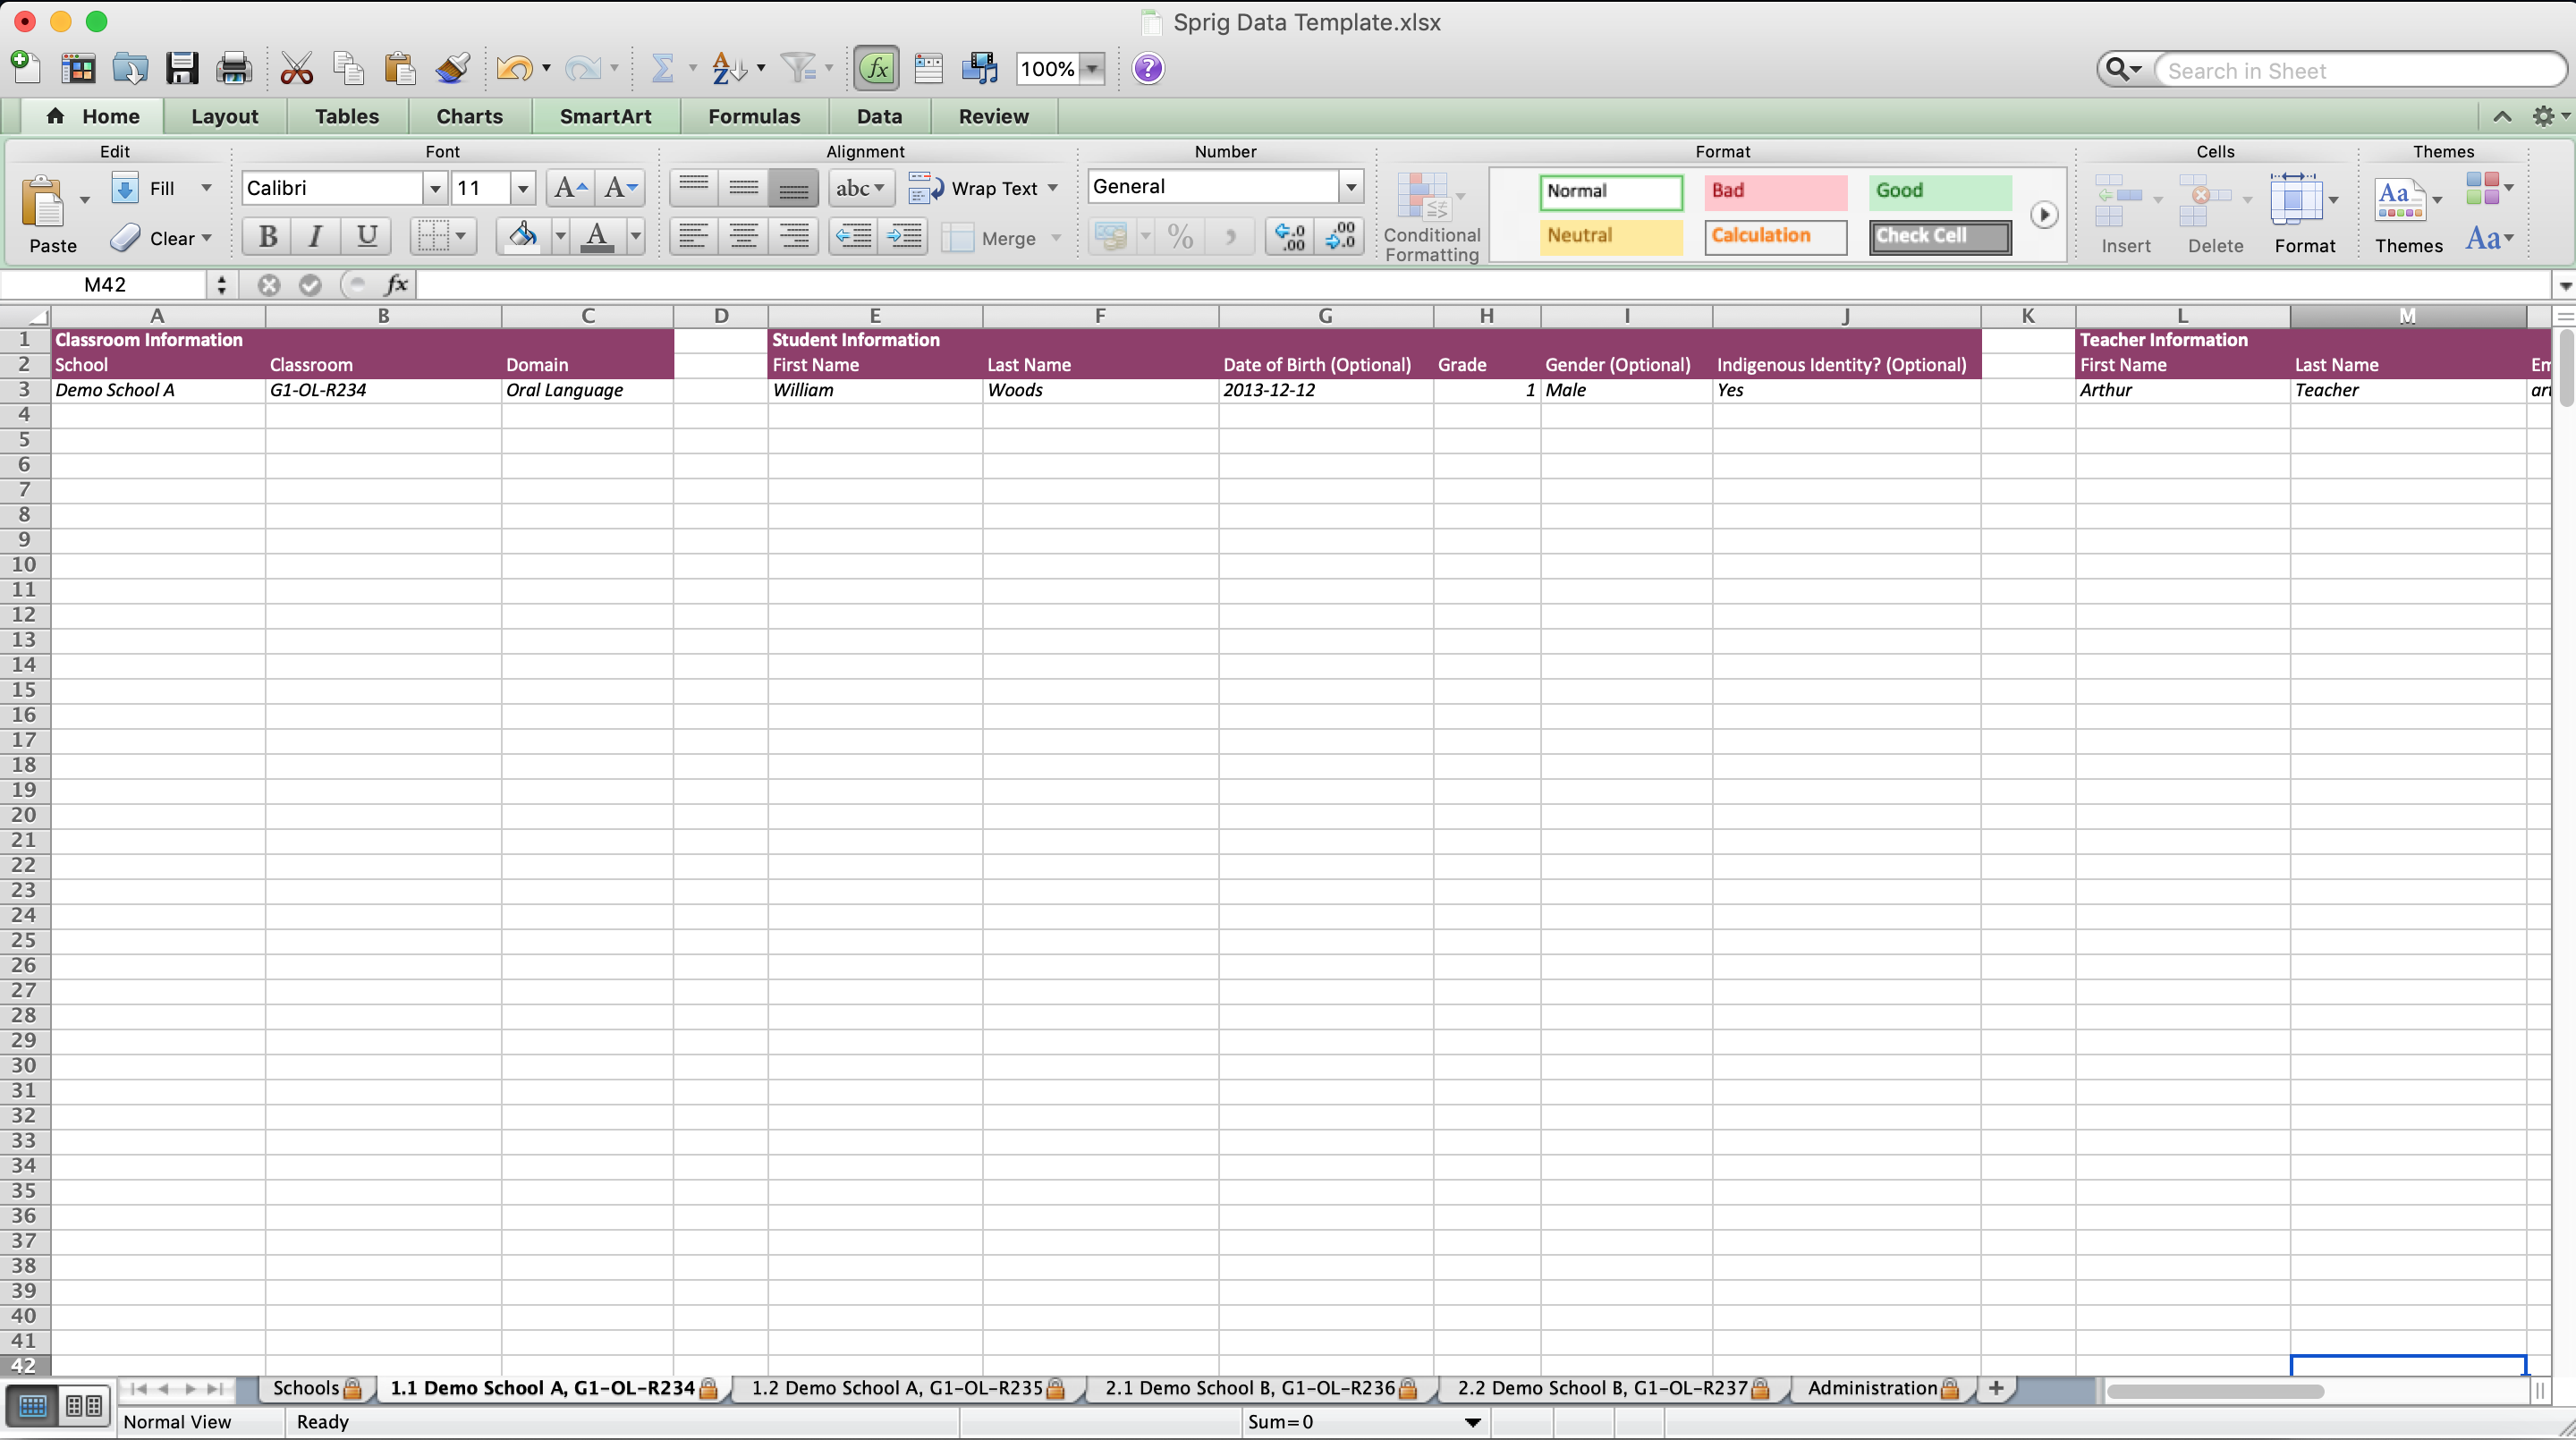
2.3.1 Data Template (Classroom Sheet/Student Information)
Using the first entry as an example in the Student Information table, enter information for all of the students in the classroom. The table asks for the following fields:
- First Name
- Last Name
- Date of Birth (Optional)
- Grade
- Gender (Optional)
- Indigenous Identity? (Optional)
* Grade, Gender & Indigenous Identity? all contain pre-defined options.
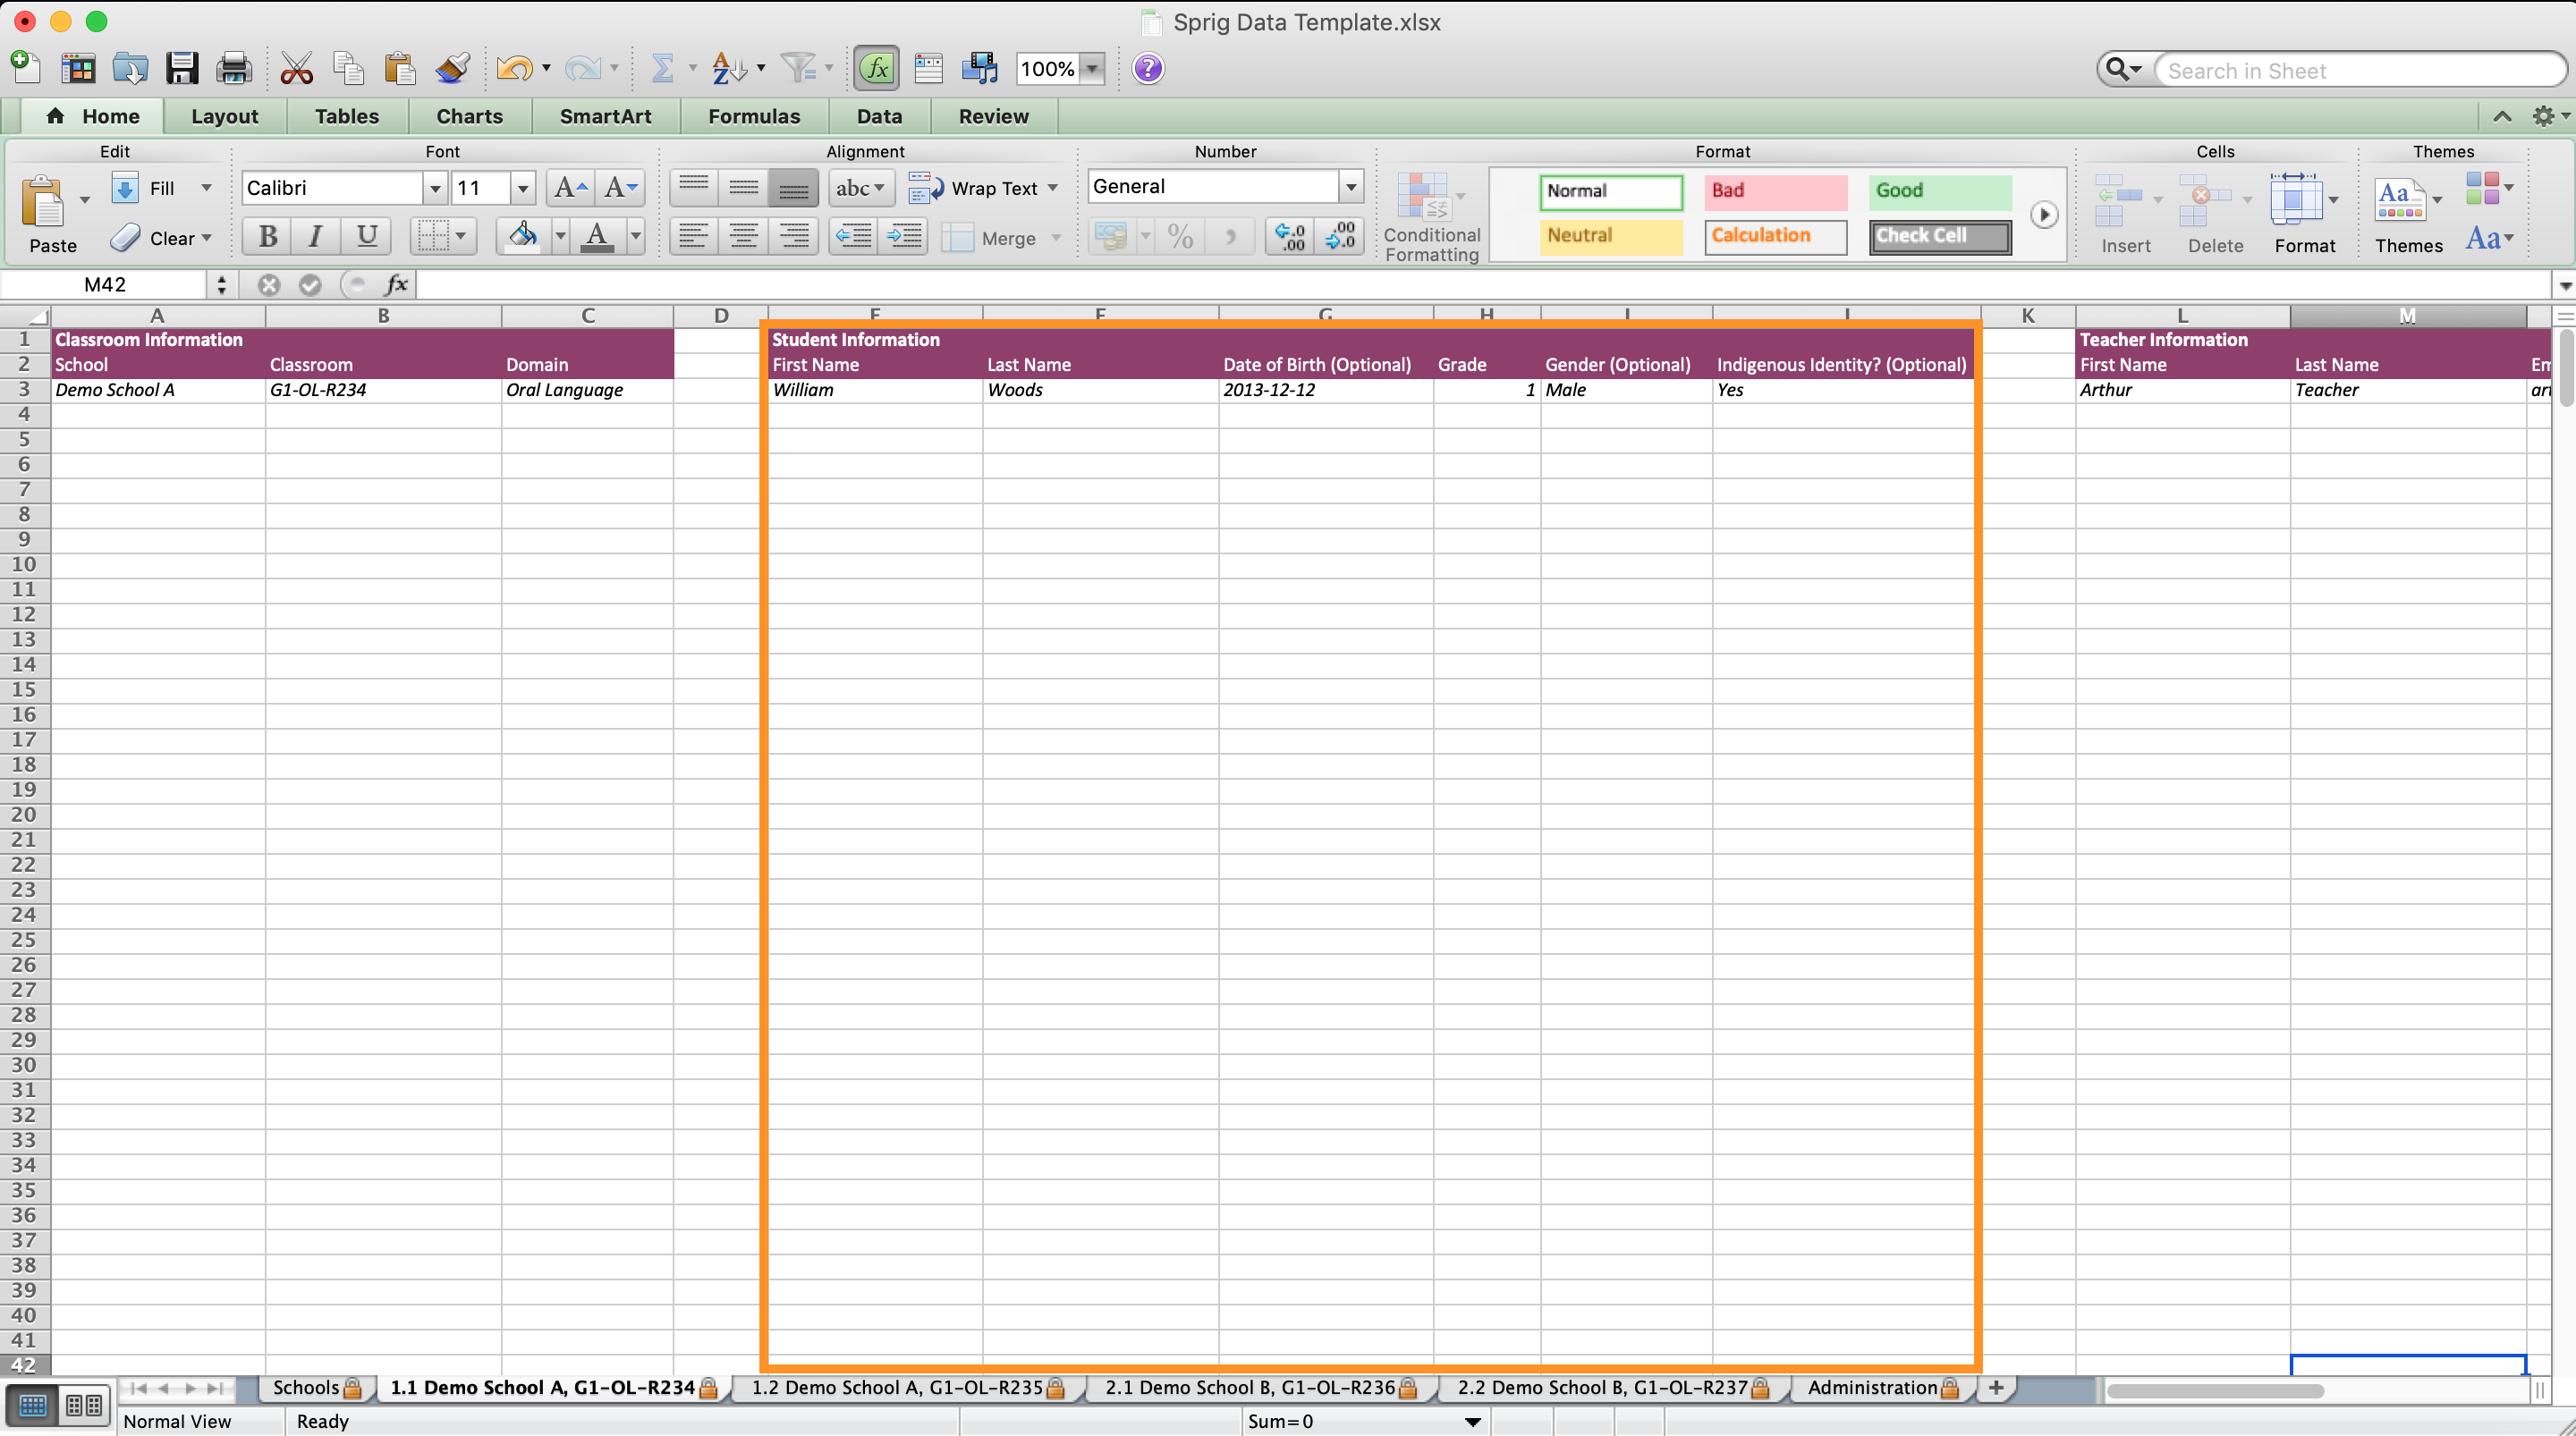
2.3.2 Data Template (Classroom Sheet/Teacher Information)
Using the first entry as an example in the Teacher Information table, enter information for all of the teachers in the classroom. The table asks for the following fields:
- First Name
- Last Name
2.4 Data Template (Administration Sheet)
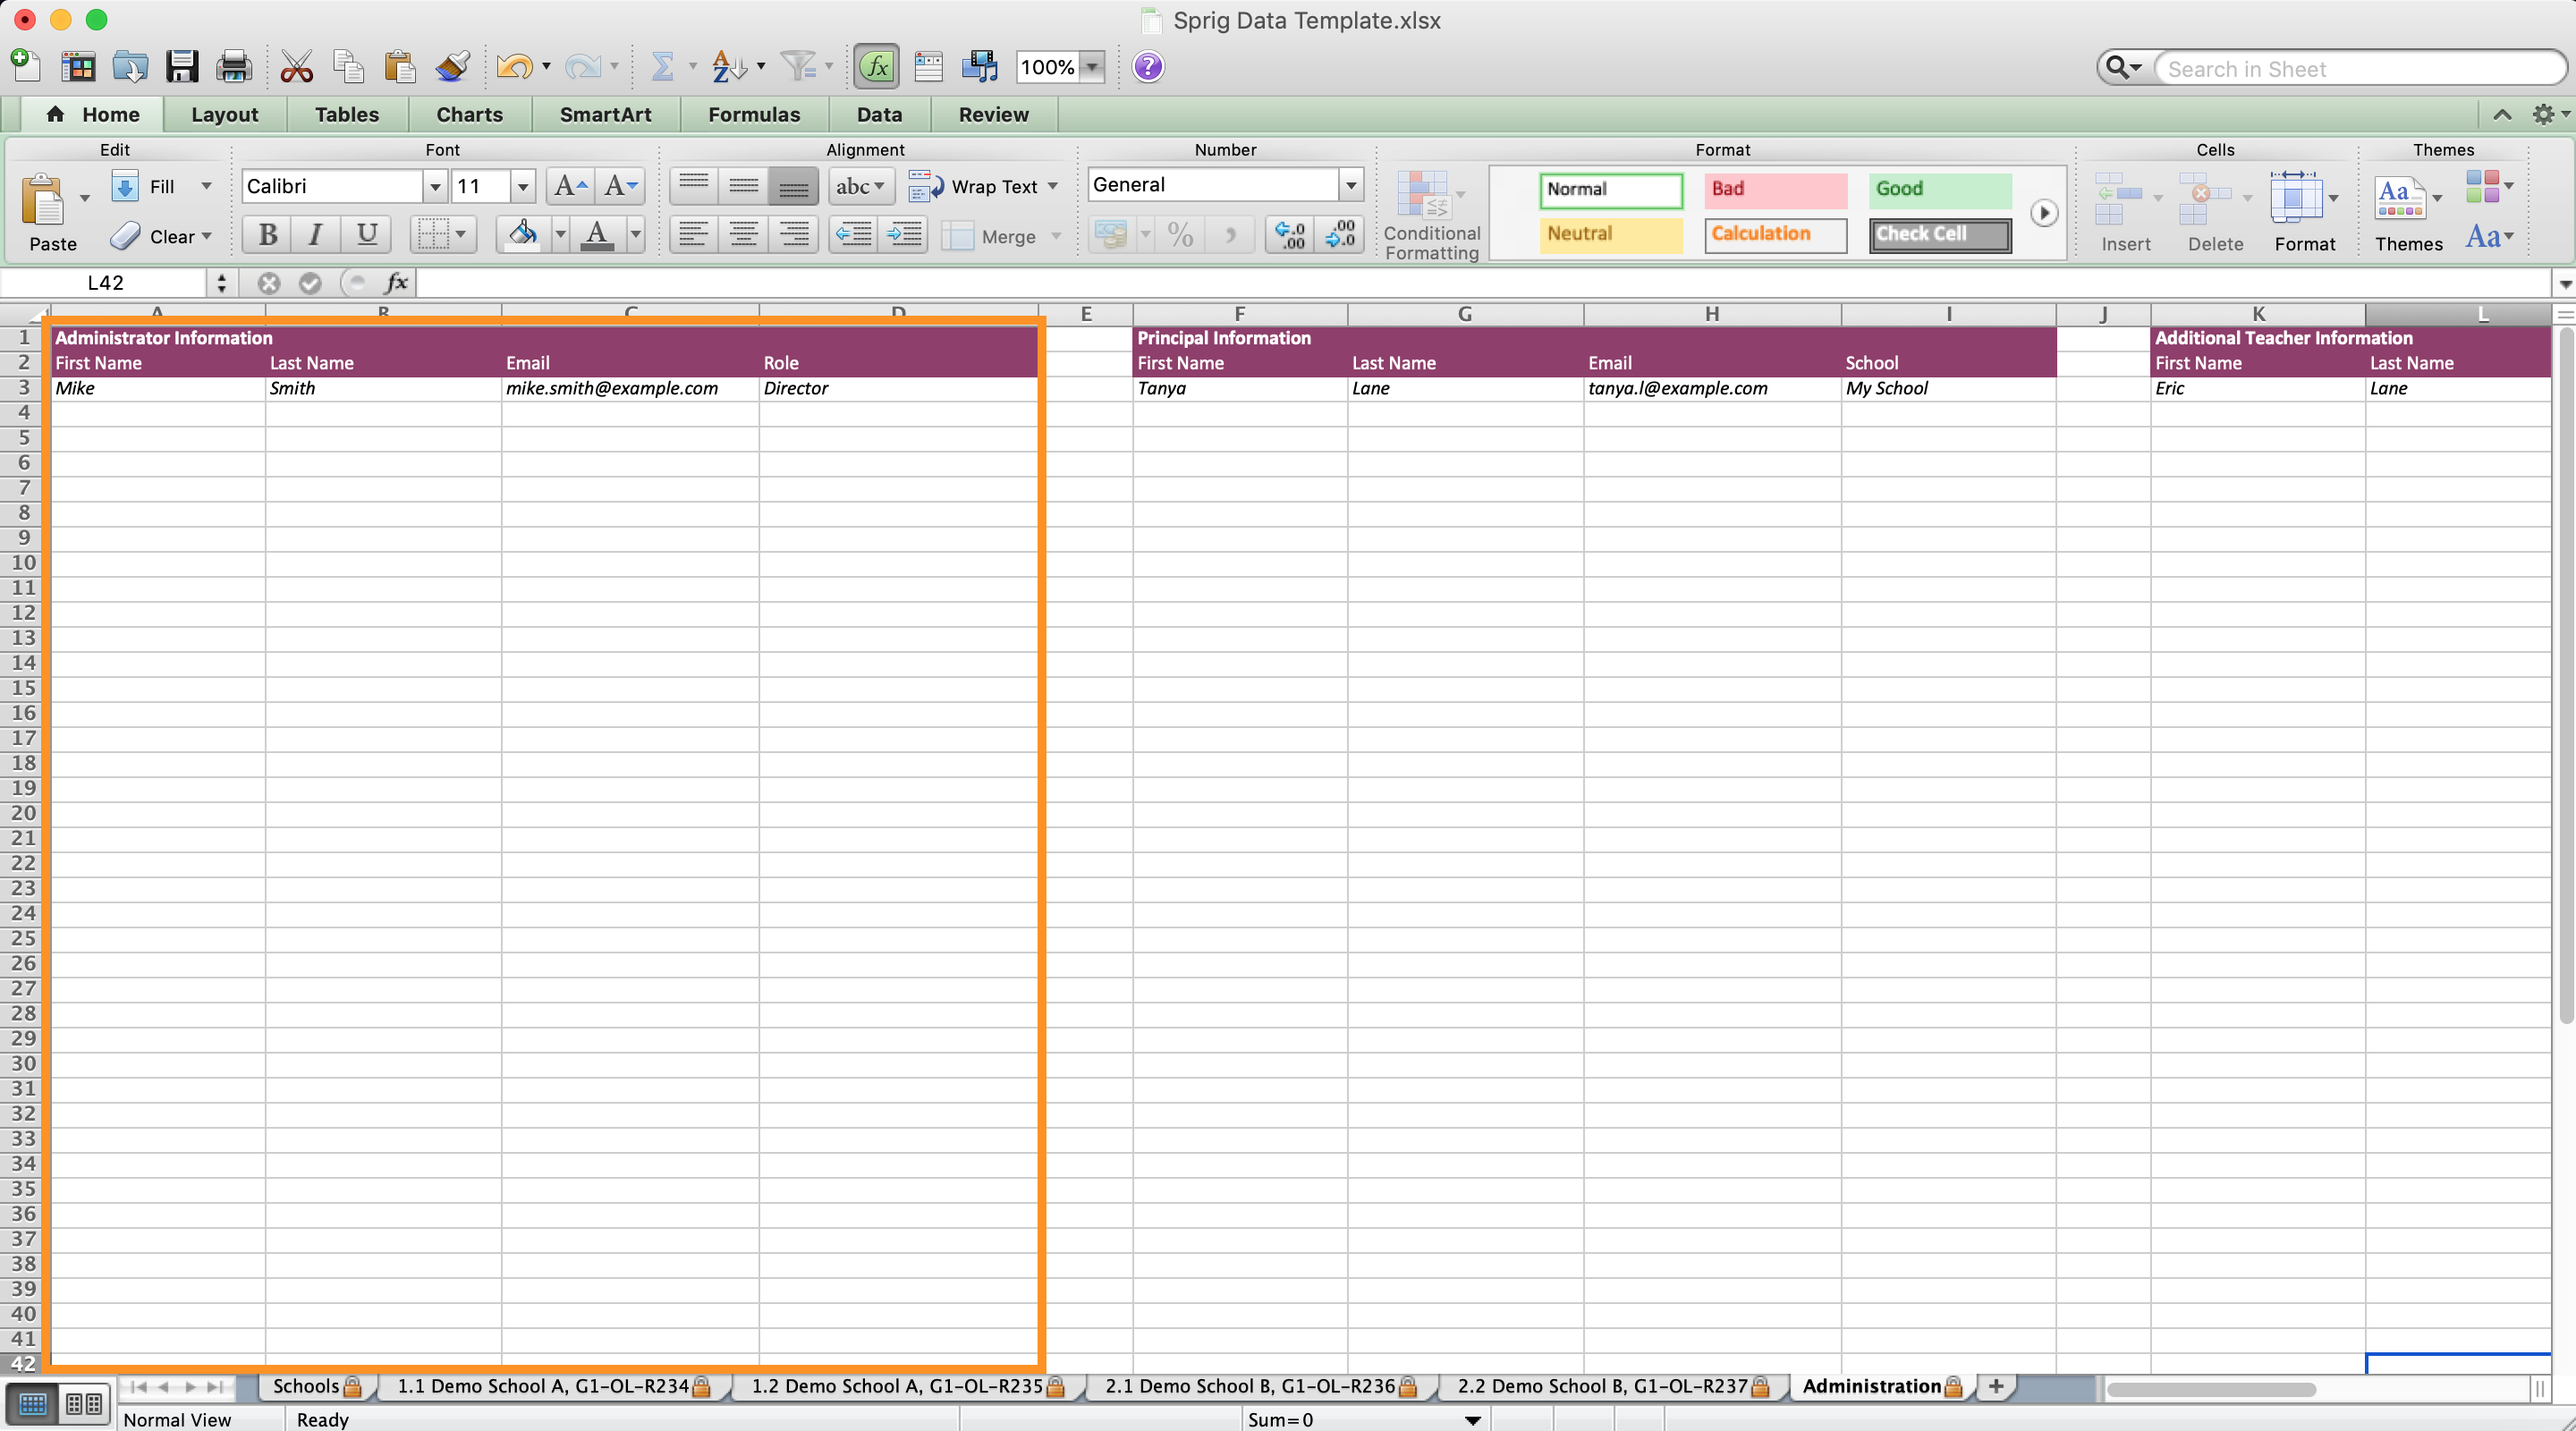
Your template will also contain an Administration Sheet. You will use this sheet to add directors, superintendents, principals and additional teachers to the program. The administration sheet contains three editable tables :
- Administration Information -This is where you enter information for directors and superintendents participating in the program.
- Principal Information -This is where you enter information for principals participating in the program.
- Additional Teacher Information -This is where you enter information for additional teachers participating in the program but haven’t been added to classroom yet.
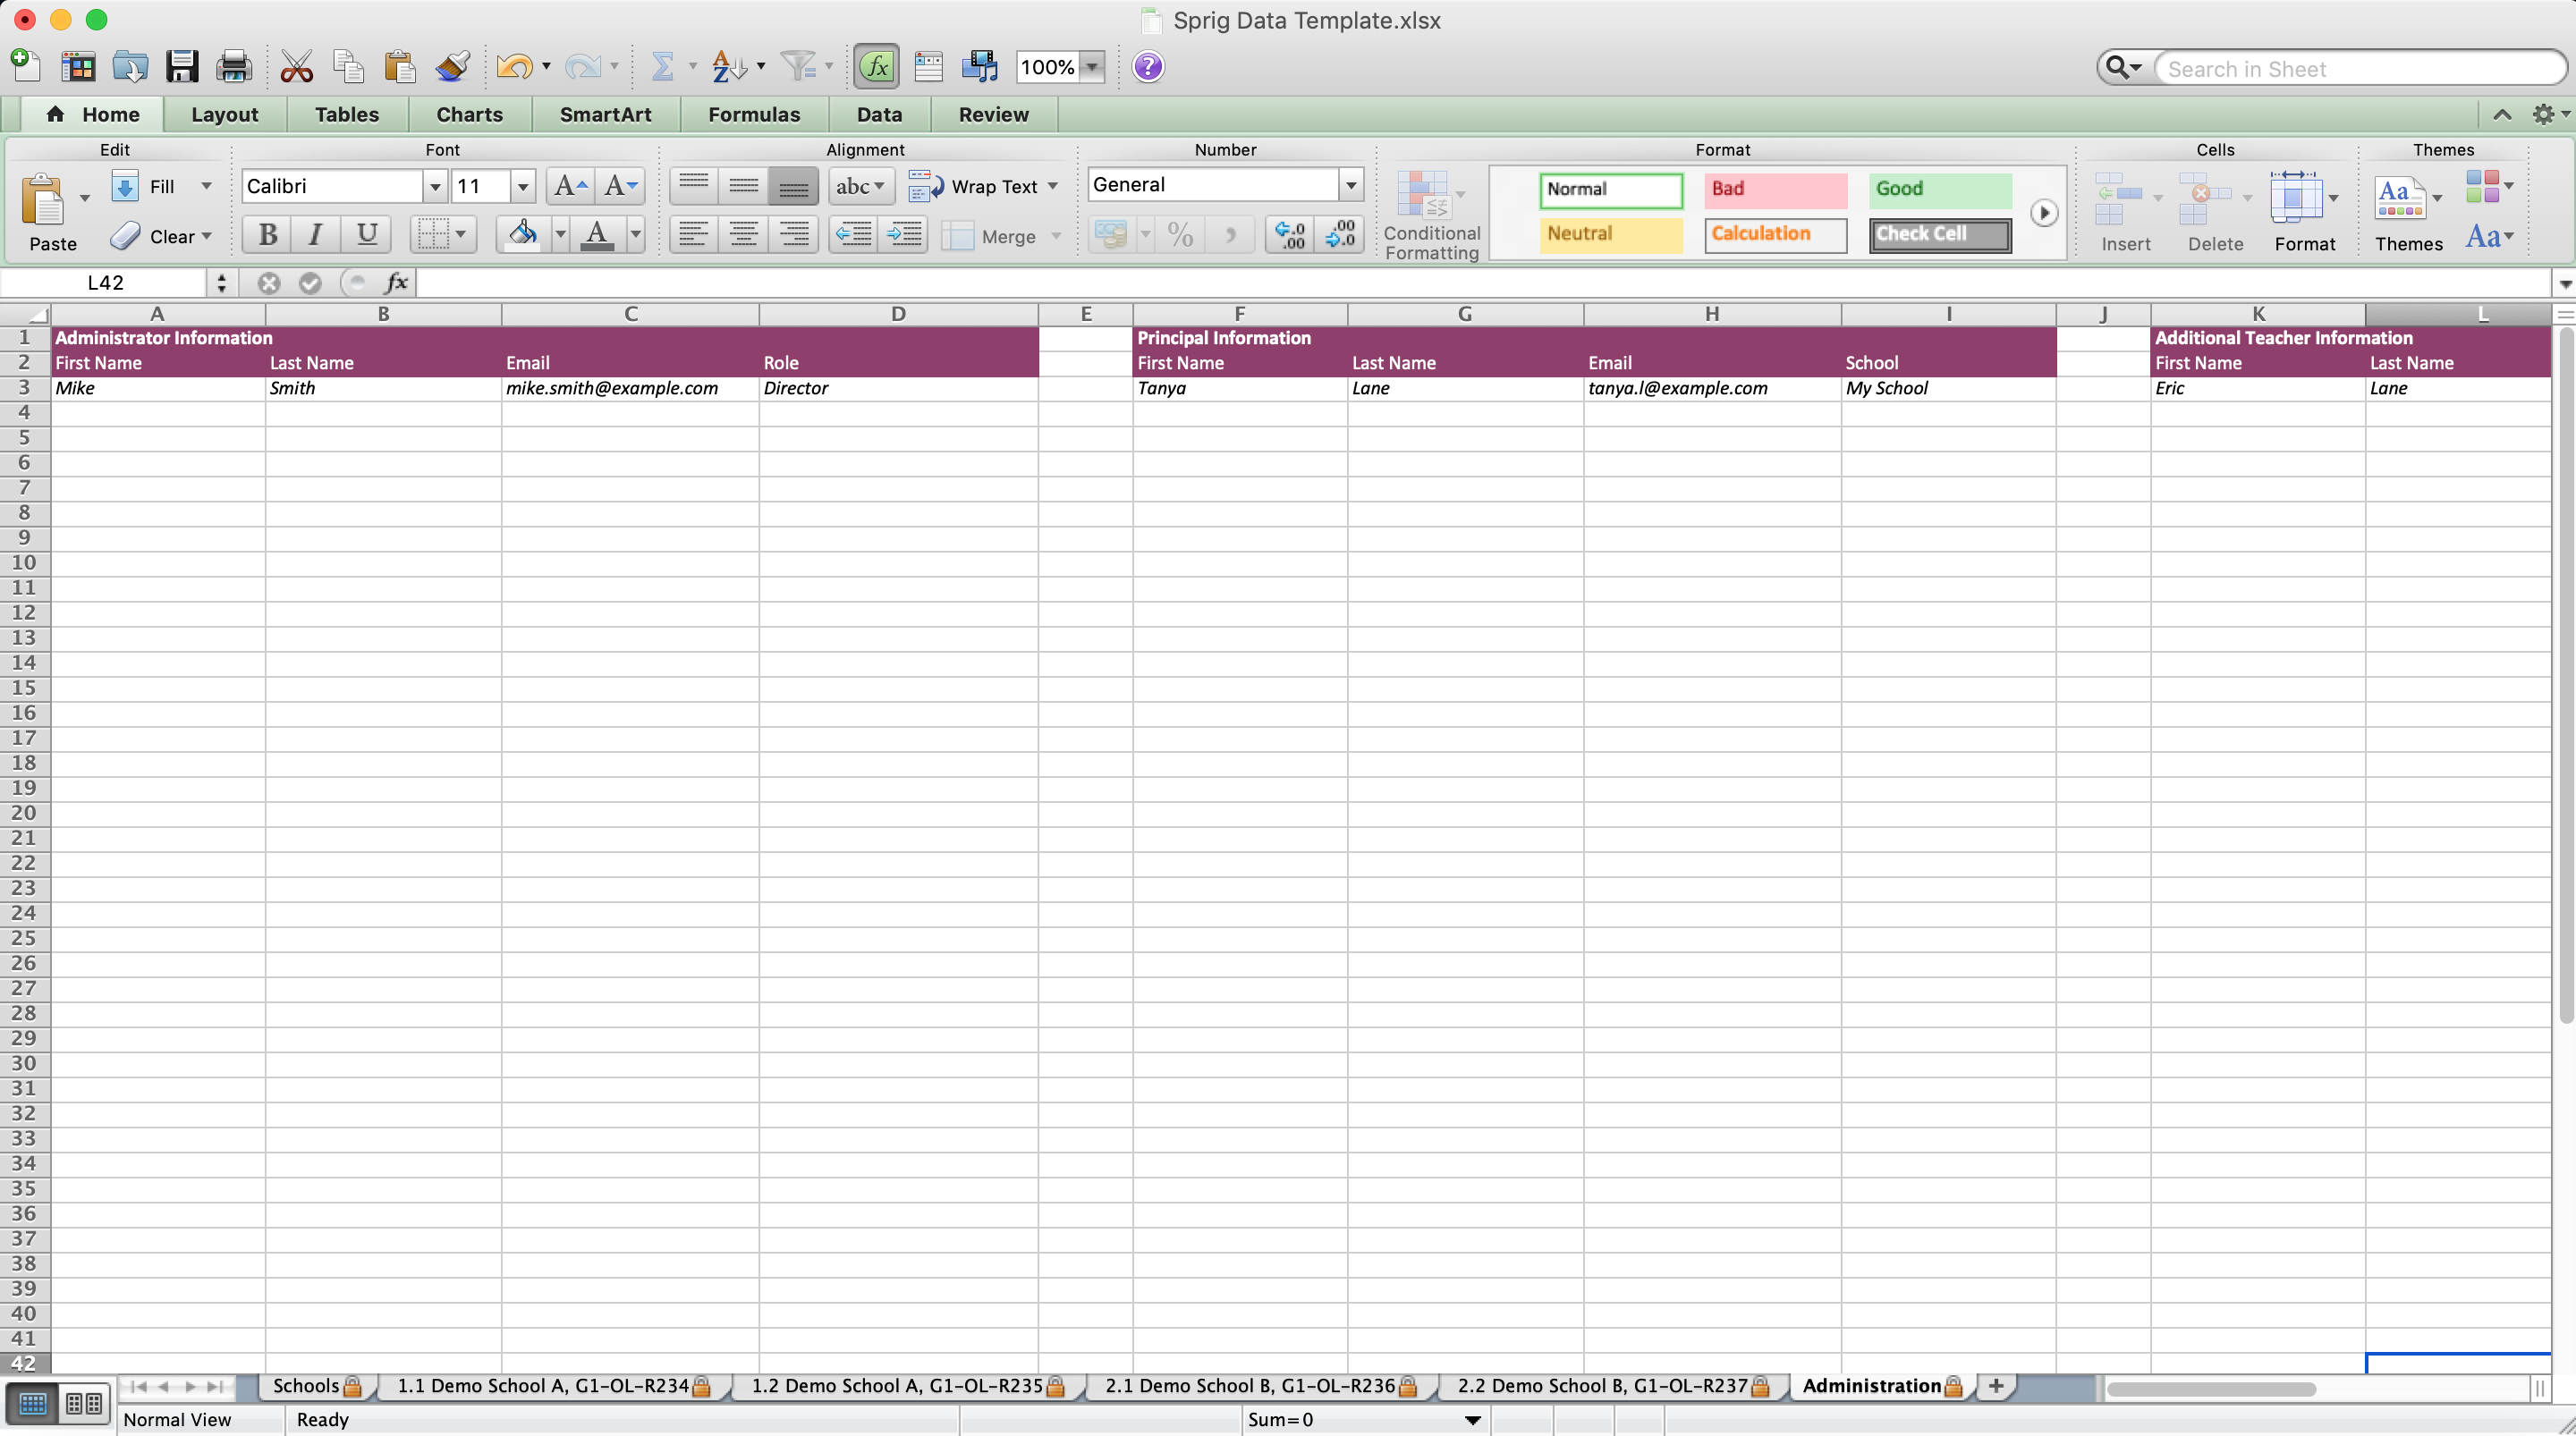
2.4.1 Data Template (Administration Sheet/Administrator Information)
Using the first entry as an example in the Administrator Information table, enter information for any directors or superintendents participating in the program. The table asks for the following fields:
- First Name
- Last Name
- Role
* Role contains pre-defined options (Director/Superintendent).
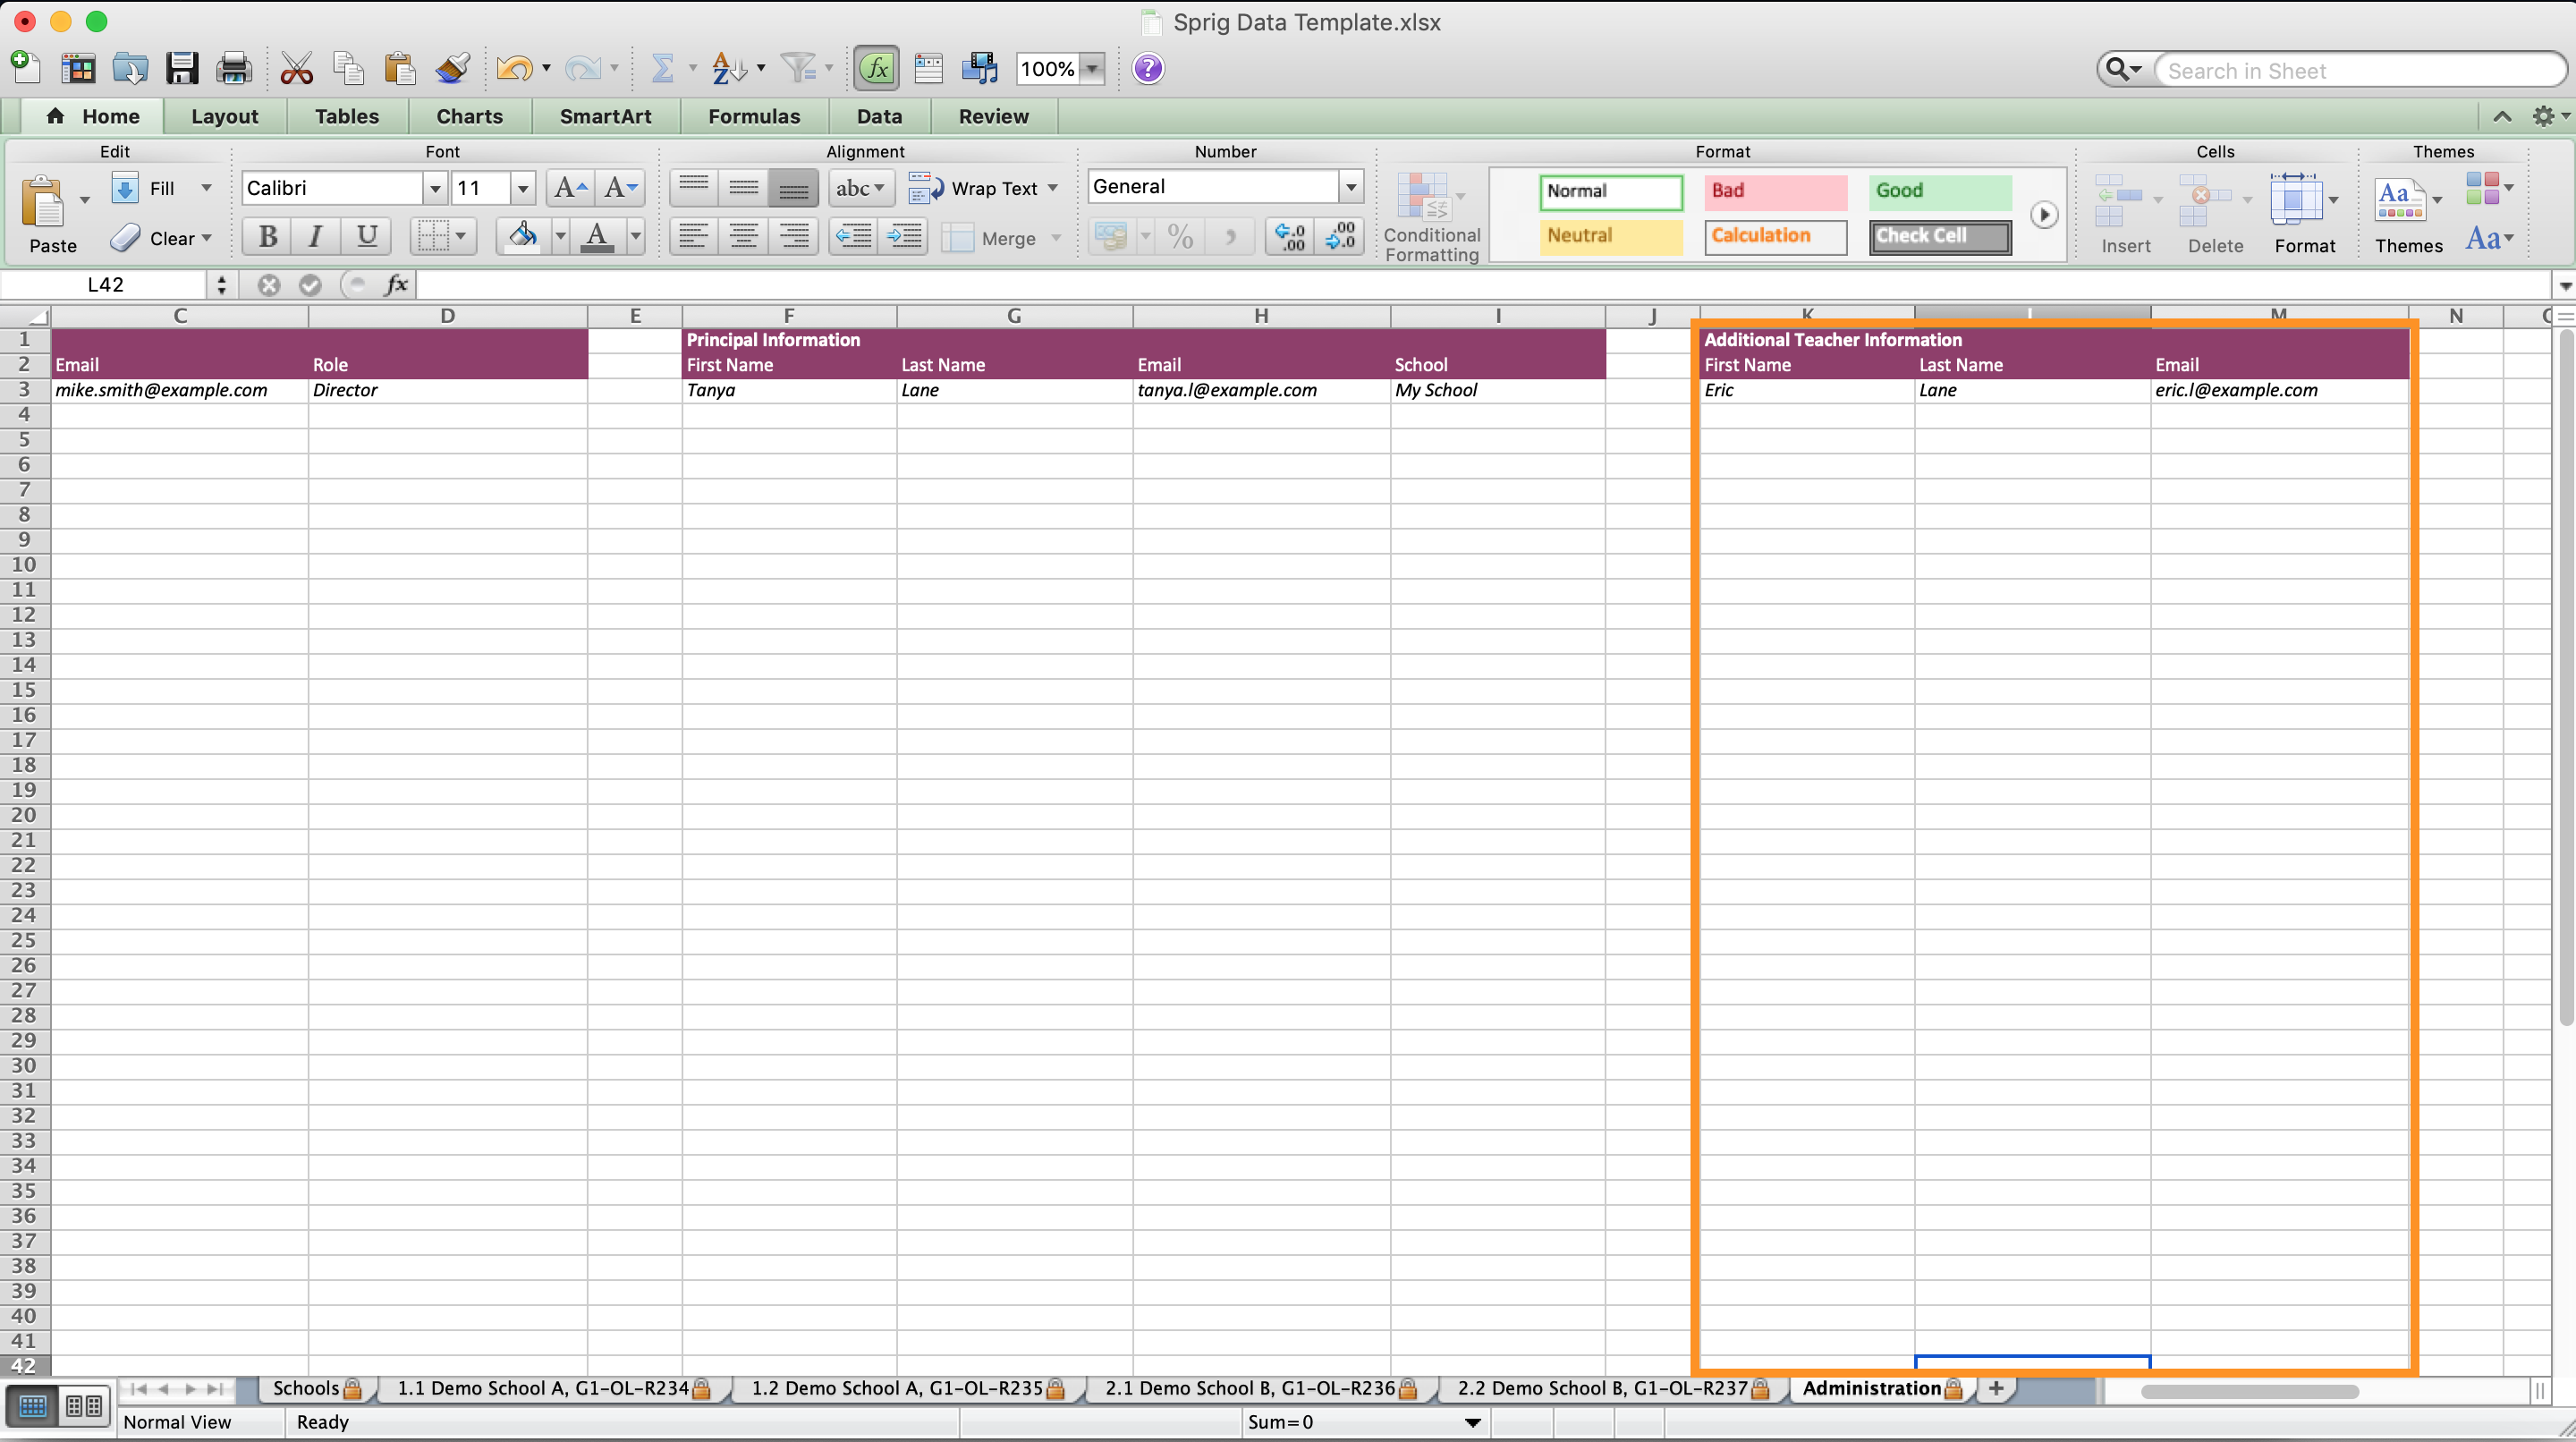
2.4.2 Data Template (Administration Sheet/Principal Information)
Using the first entry as an example in the Principal Information table, enter information for any principals participating in the program. The table asks for the following fields:
- First Name
- Last Name
- School
* School contains pre-defined options.
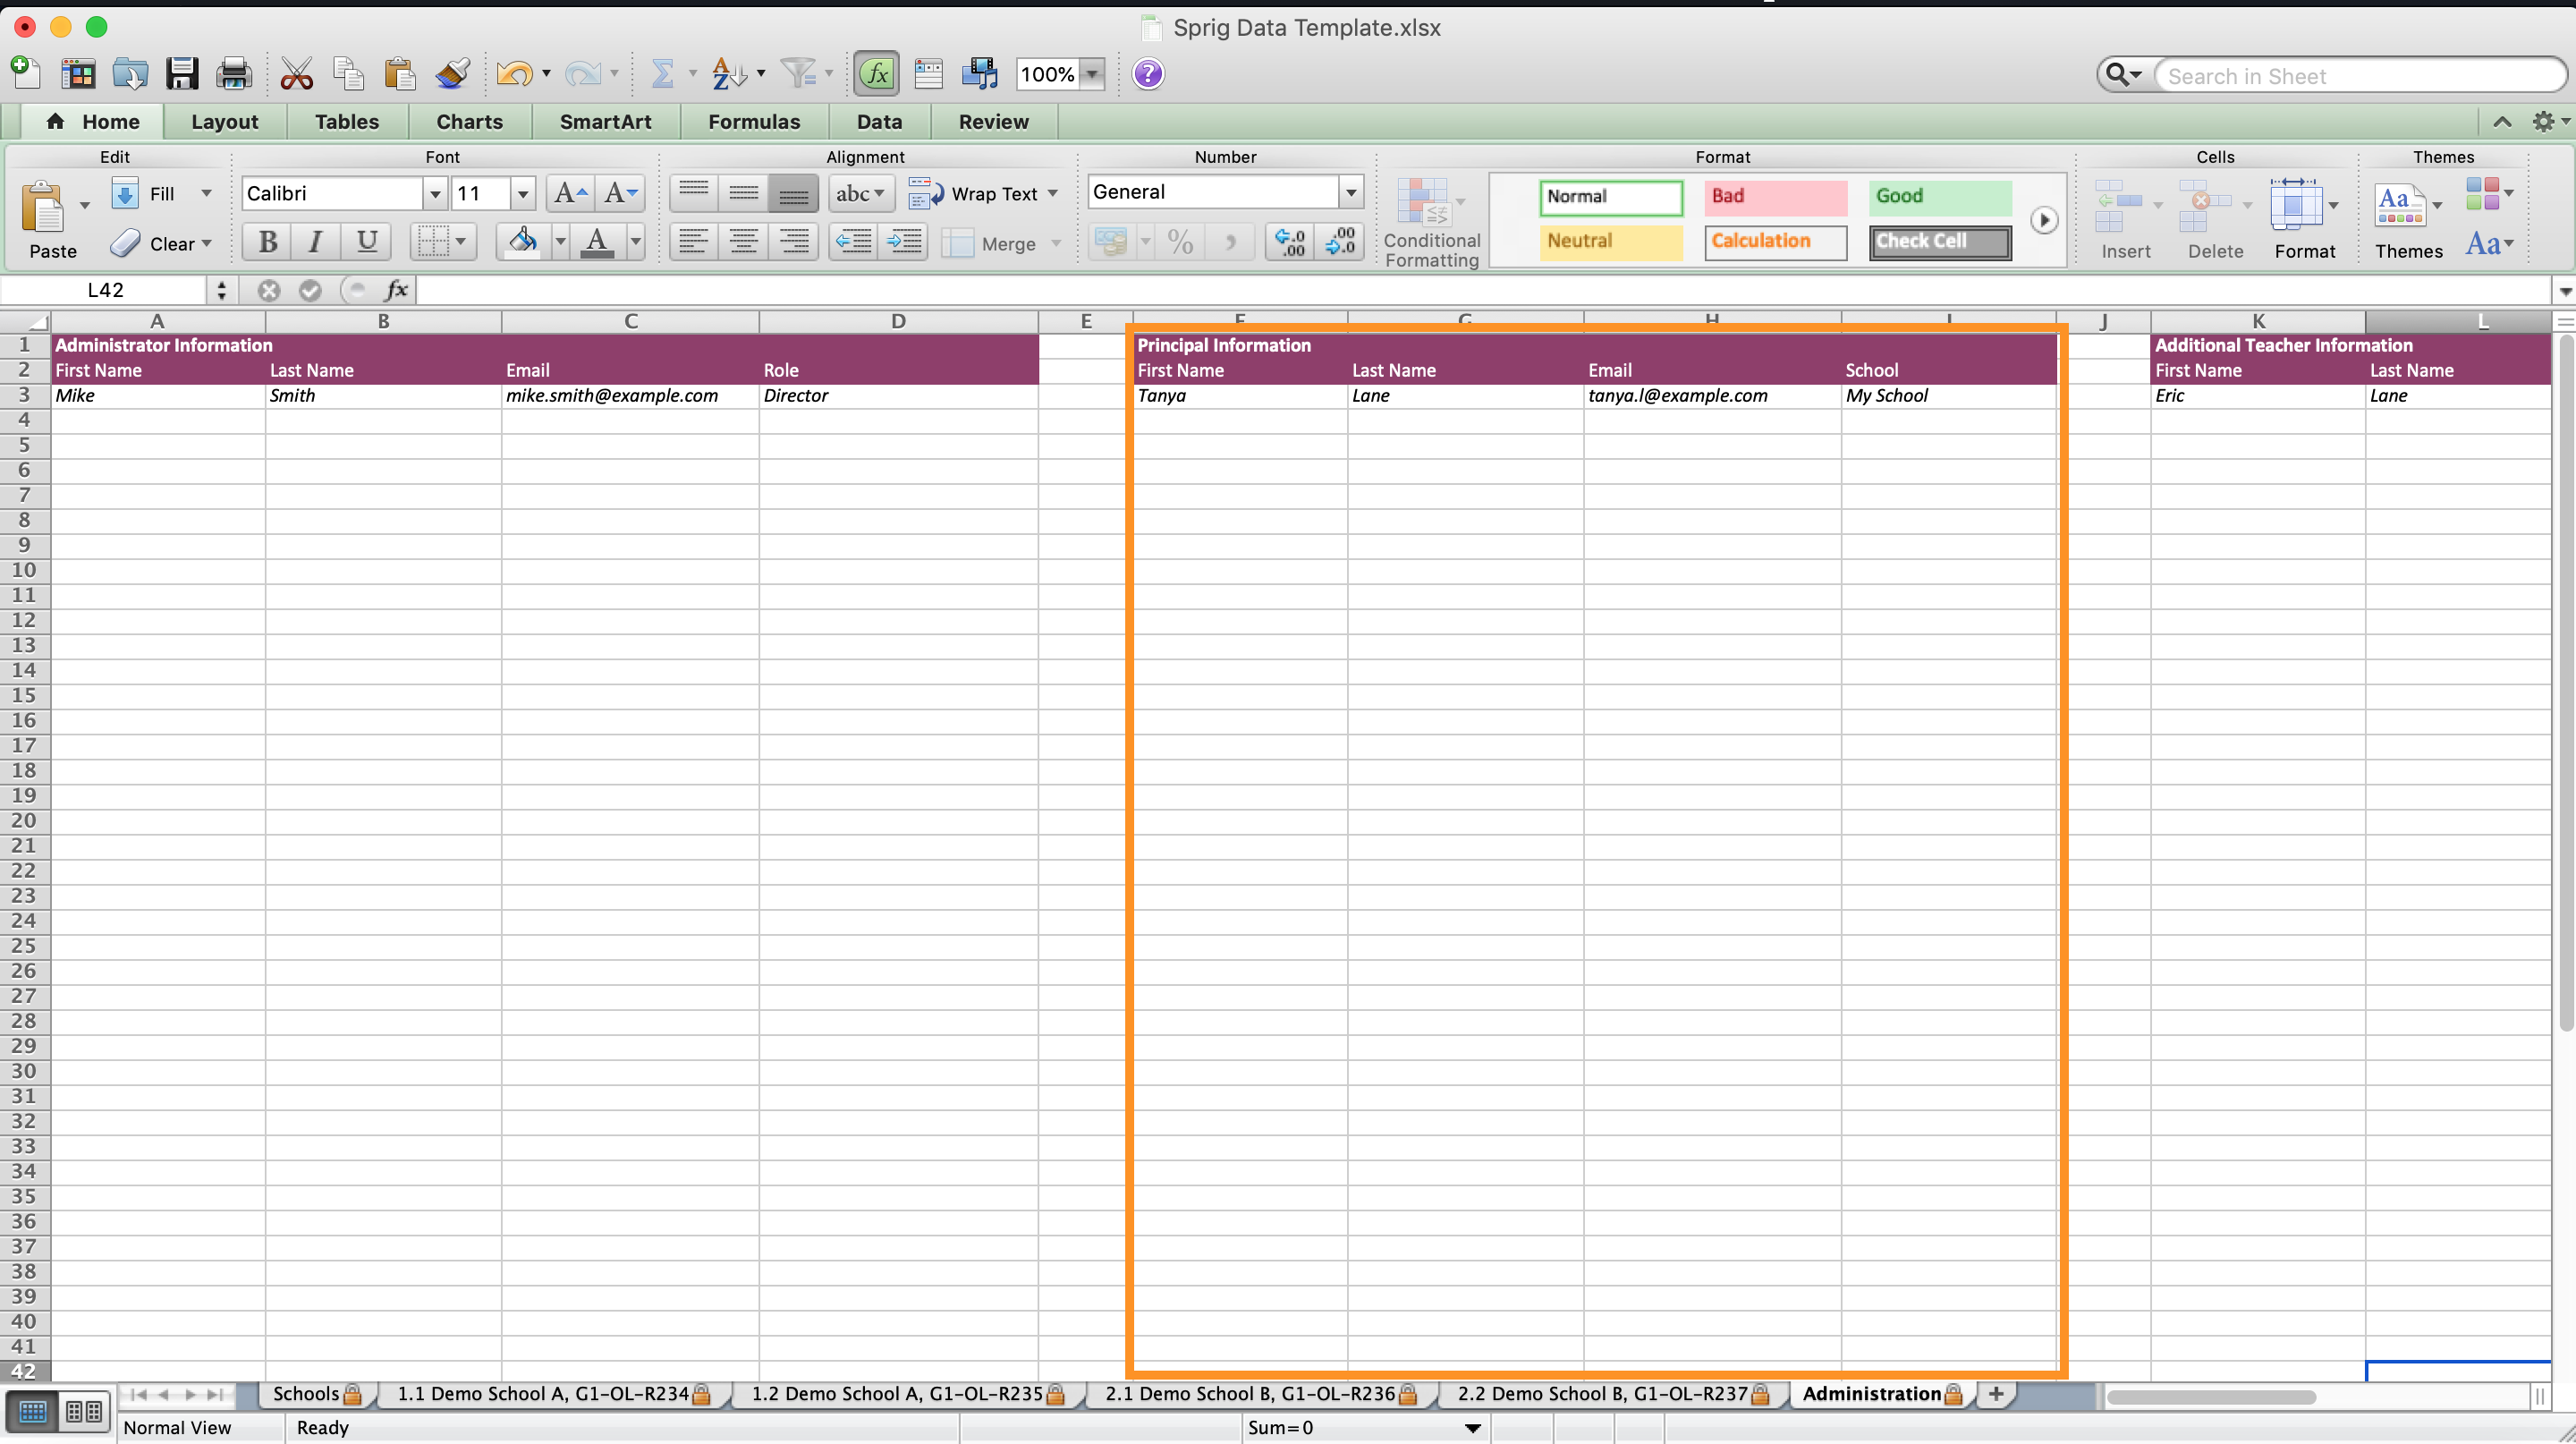
2.4.3 Data Template (Administration Sheet/Additional Teacher Information)
Using the first entry as an example in the Additional Teacher Information table, enter information for any additional teachers participating in the program but haven’t been added to classroom yet. The table asks for the following fields:
- First Name
- Last Name
Once you have finished entering all of your school/classroom data in your template, save the file and return to the Upload School/Classroom Data page in the portal.
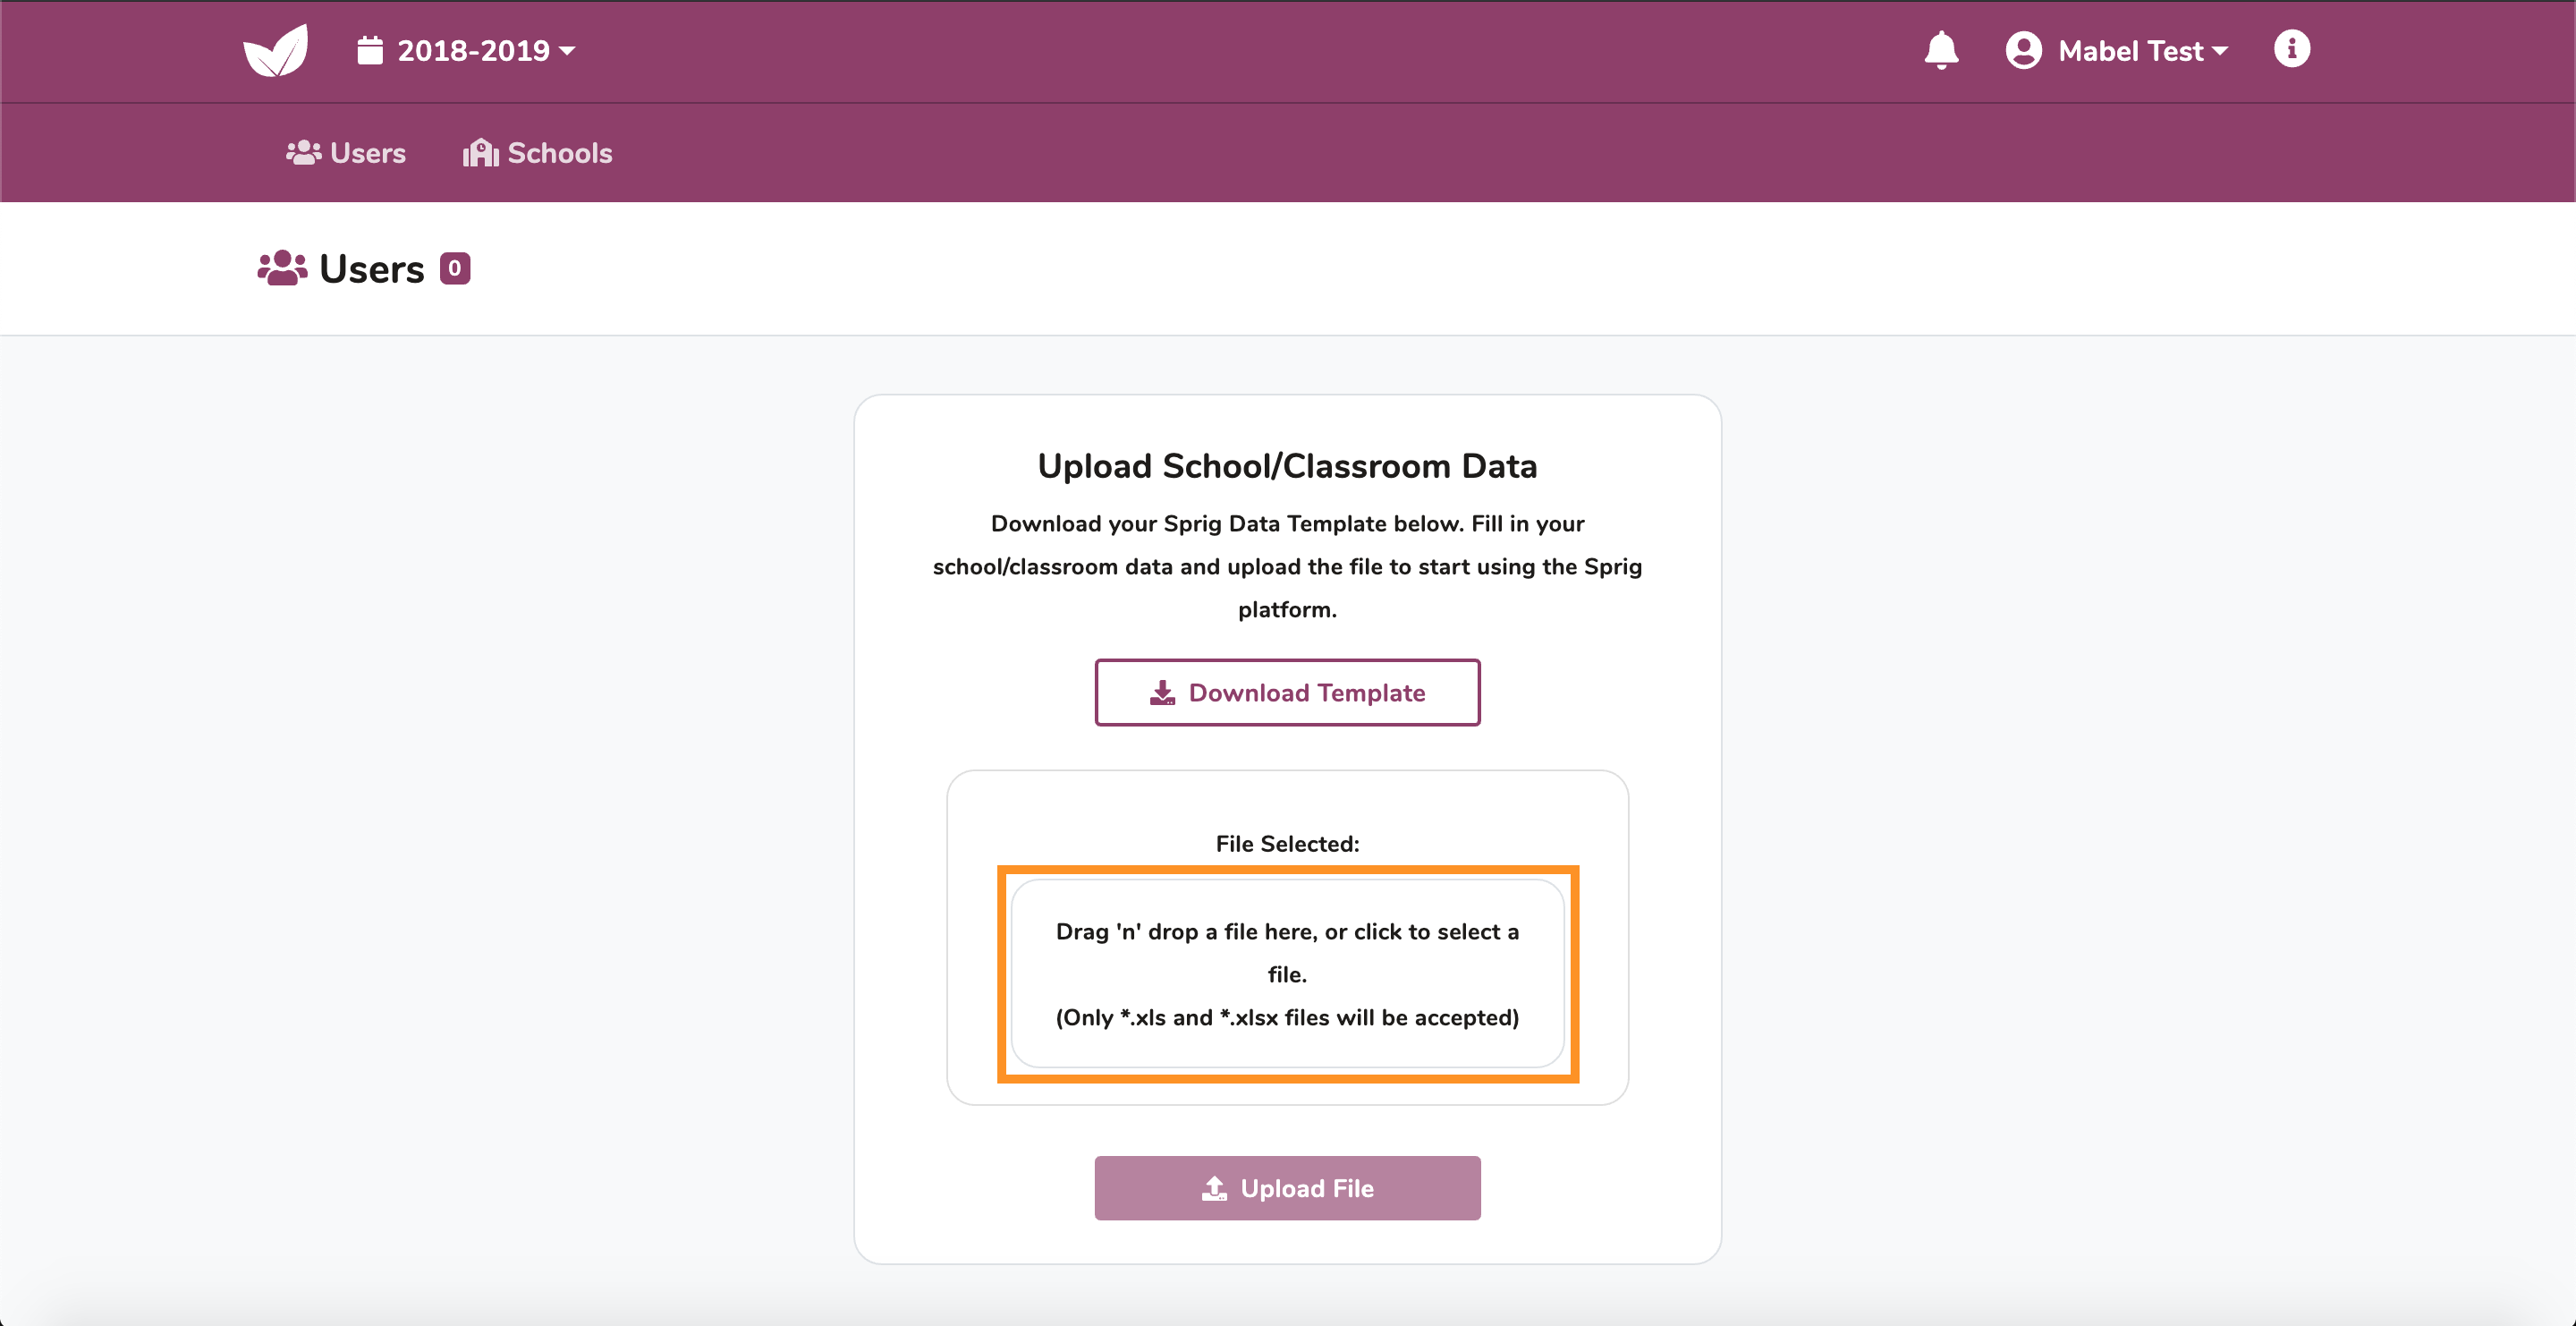
3. Upload School/Classroom Data
3.1 Select/Upload Data
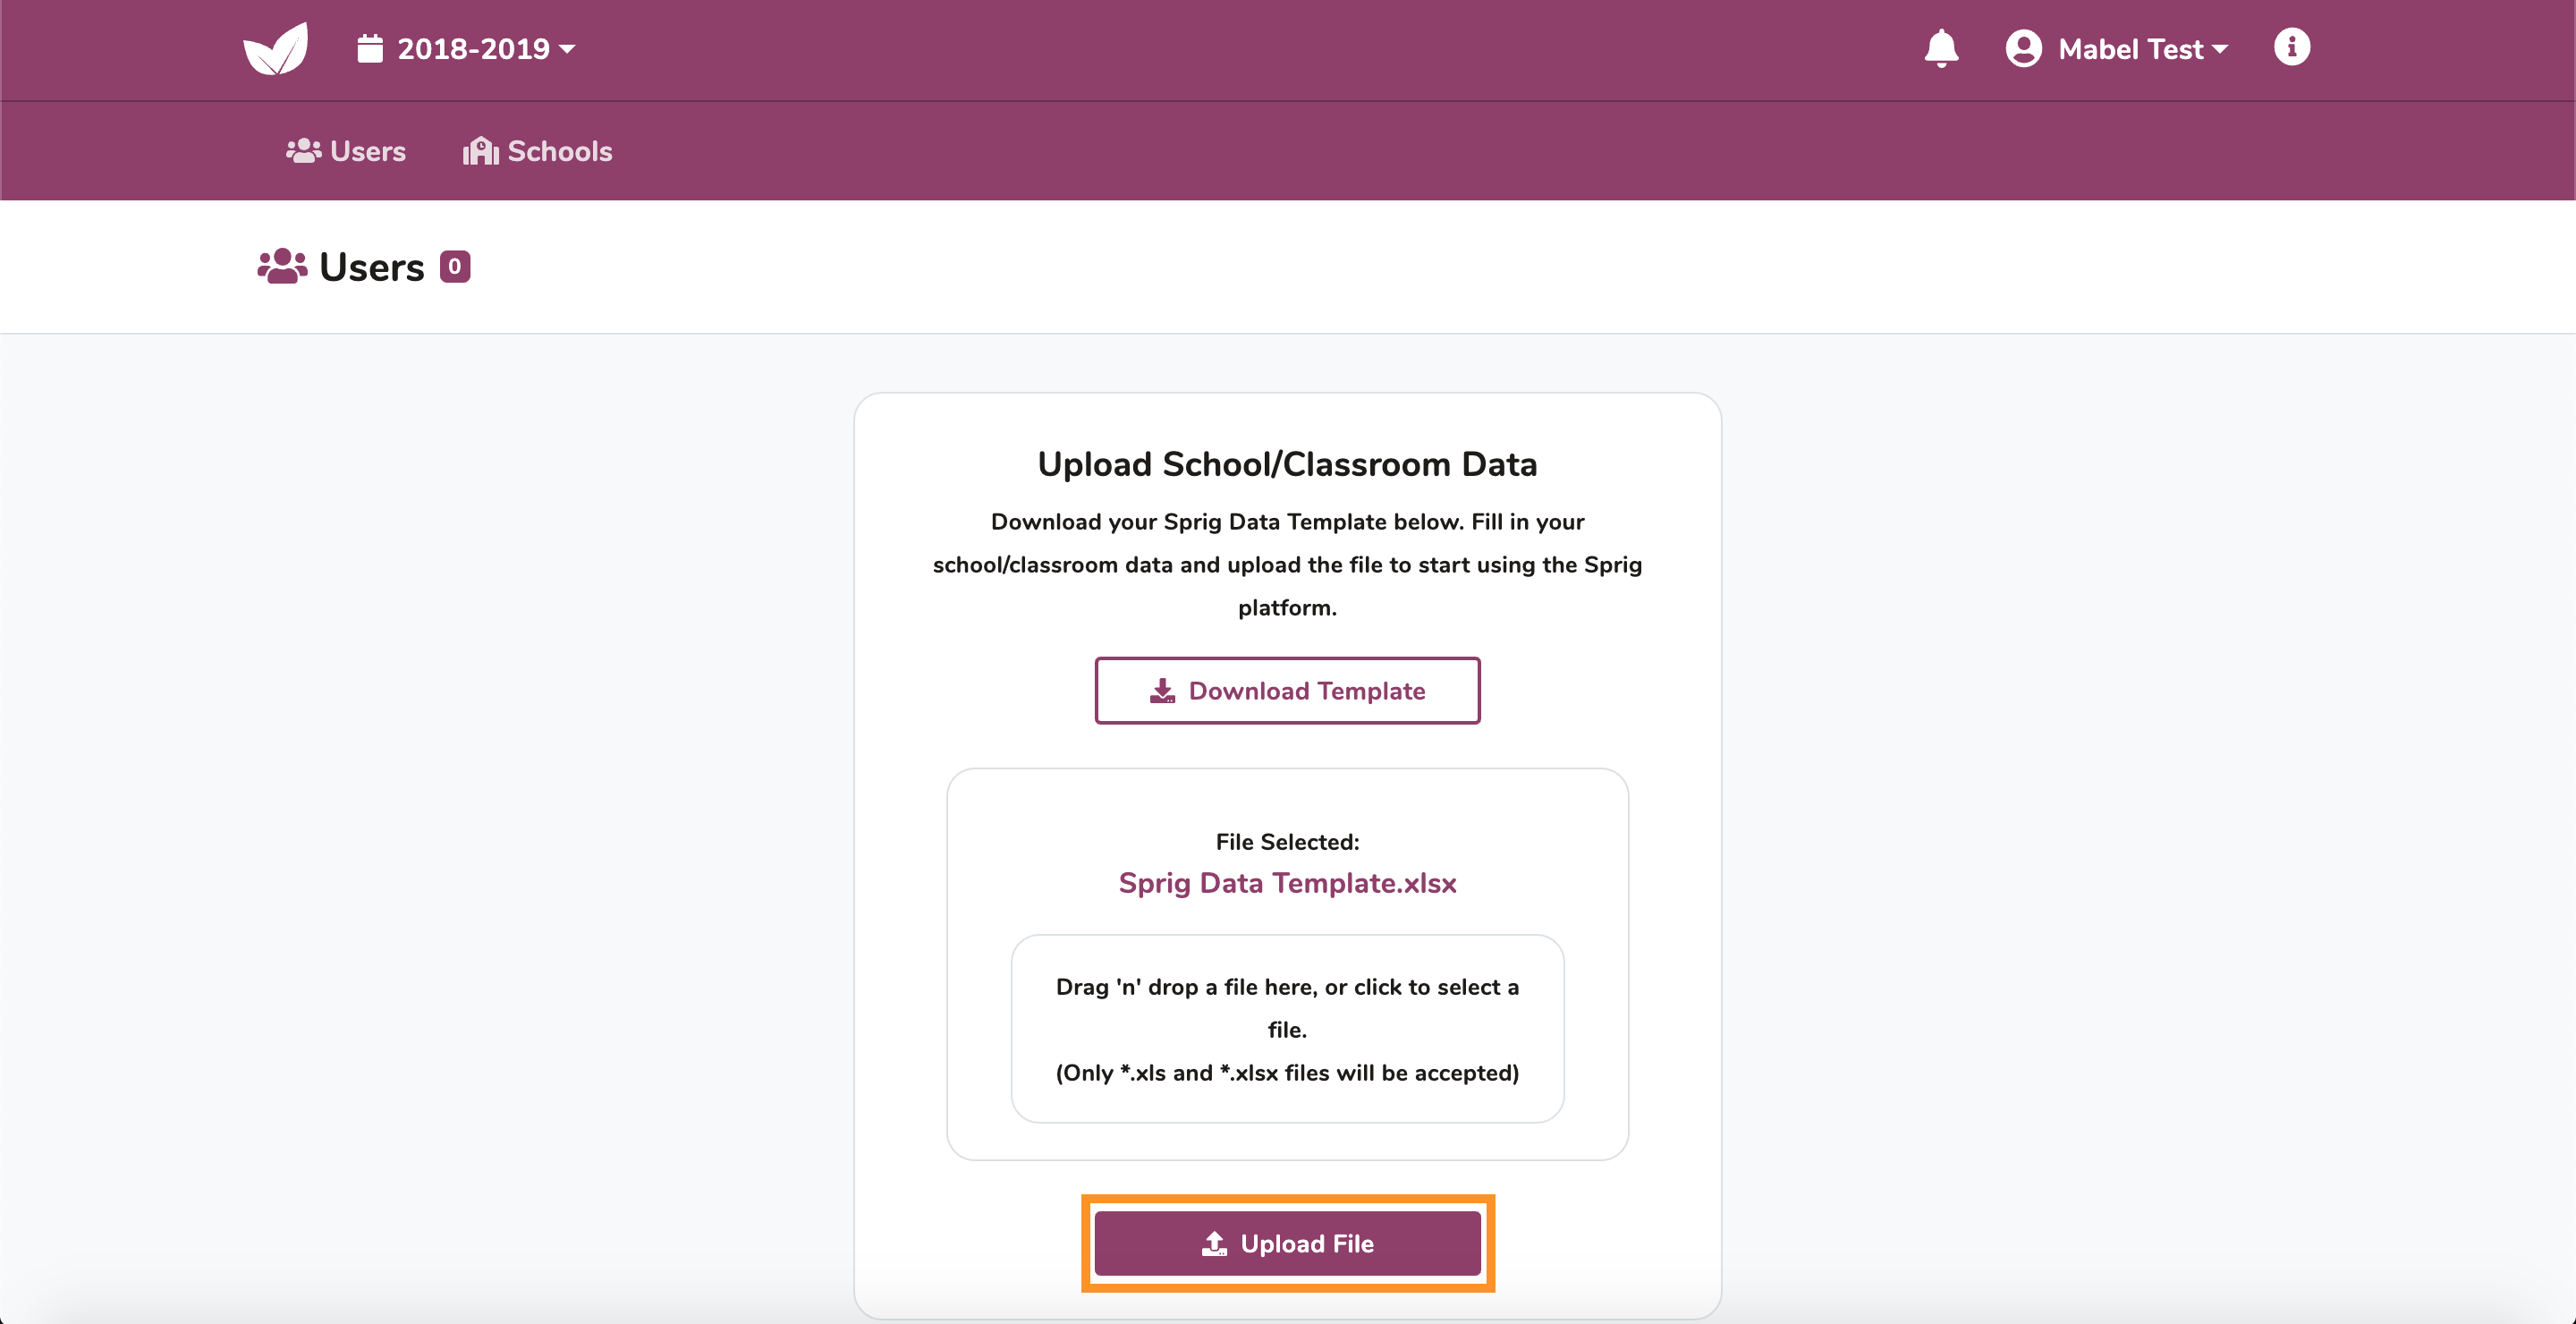
Click the box below File Selected: to select and attach your data template. You can also drag ‘n’ drop your file over the box.
Once you have selected your template, click Upload File. The app will then check your template for any data errors, if errors are found you will have to resolve them before you can successfully upload your data.
If your template produced errors continue to the next step, if no errors were produced skip to section 3.3 Upload Success.
3.2 Upload Error(s)
If your template produced errors you will need to resolve them, save your template and re-upload it. An error contains the following three pieces of information:
- Sheet Name – The sheet where the error is found.
- Cell – The cell in the sheet where the error is found.
- Error Message – A description of the error.
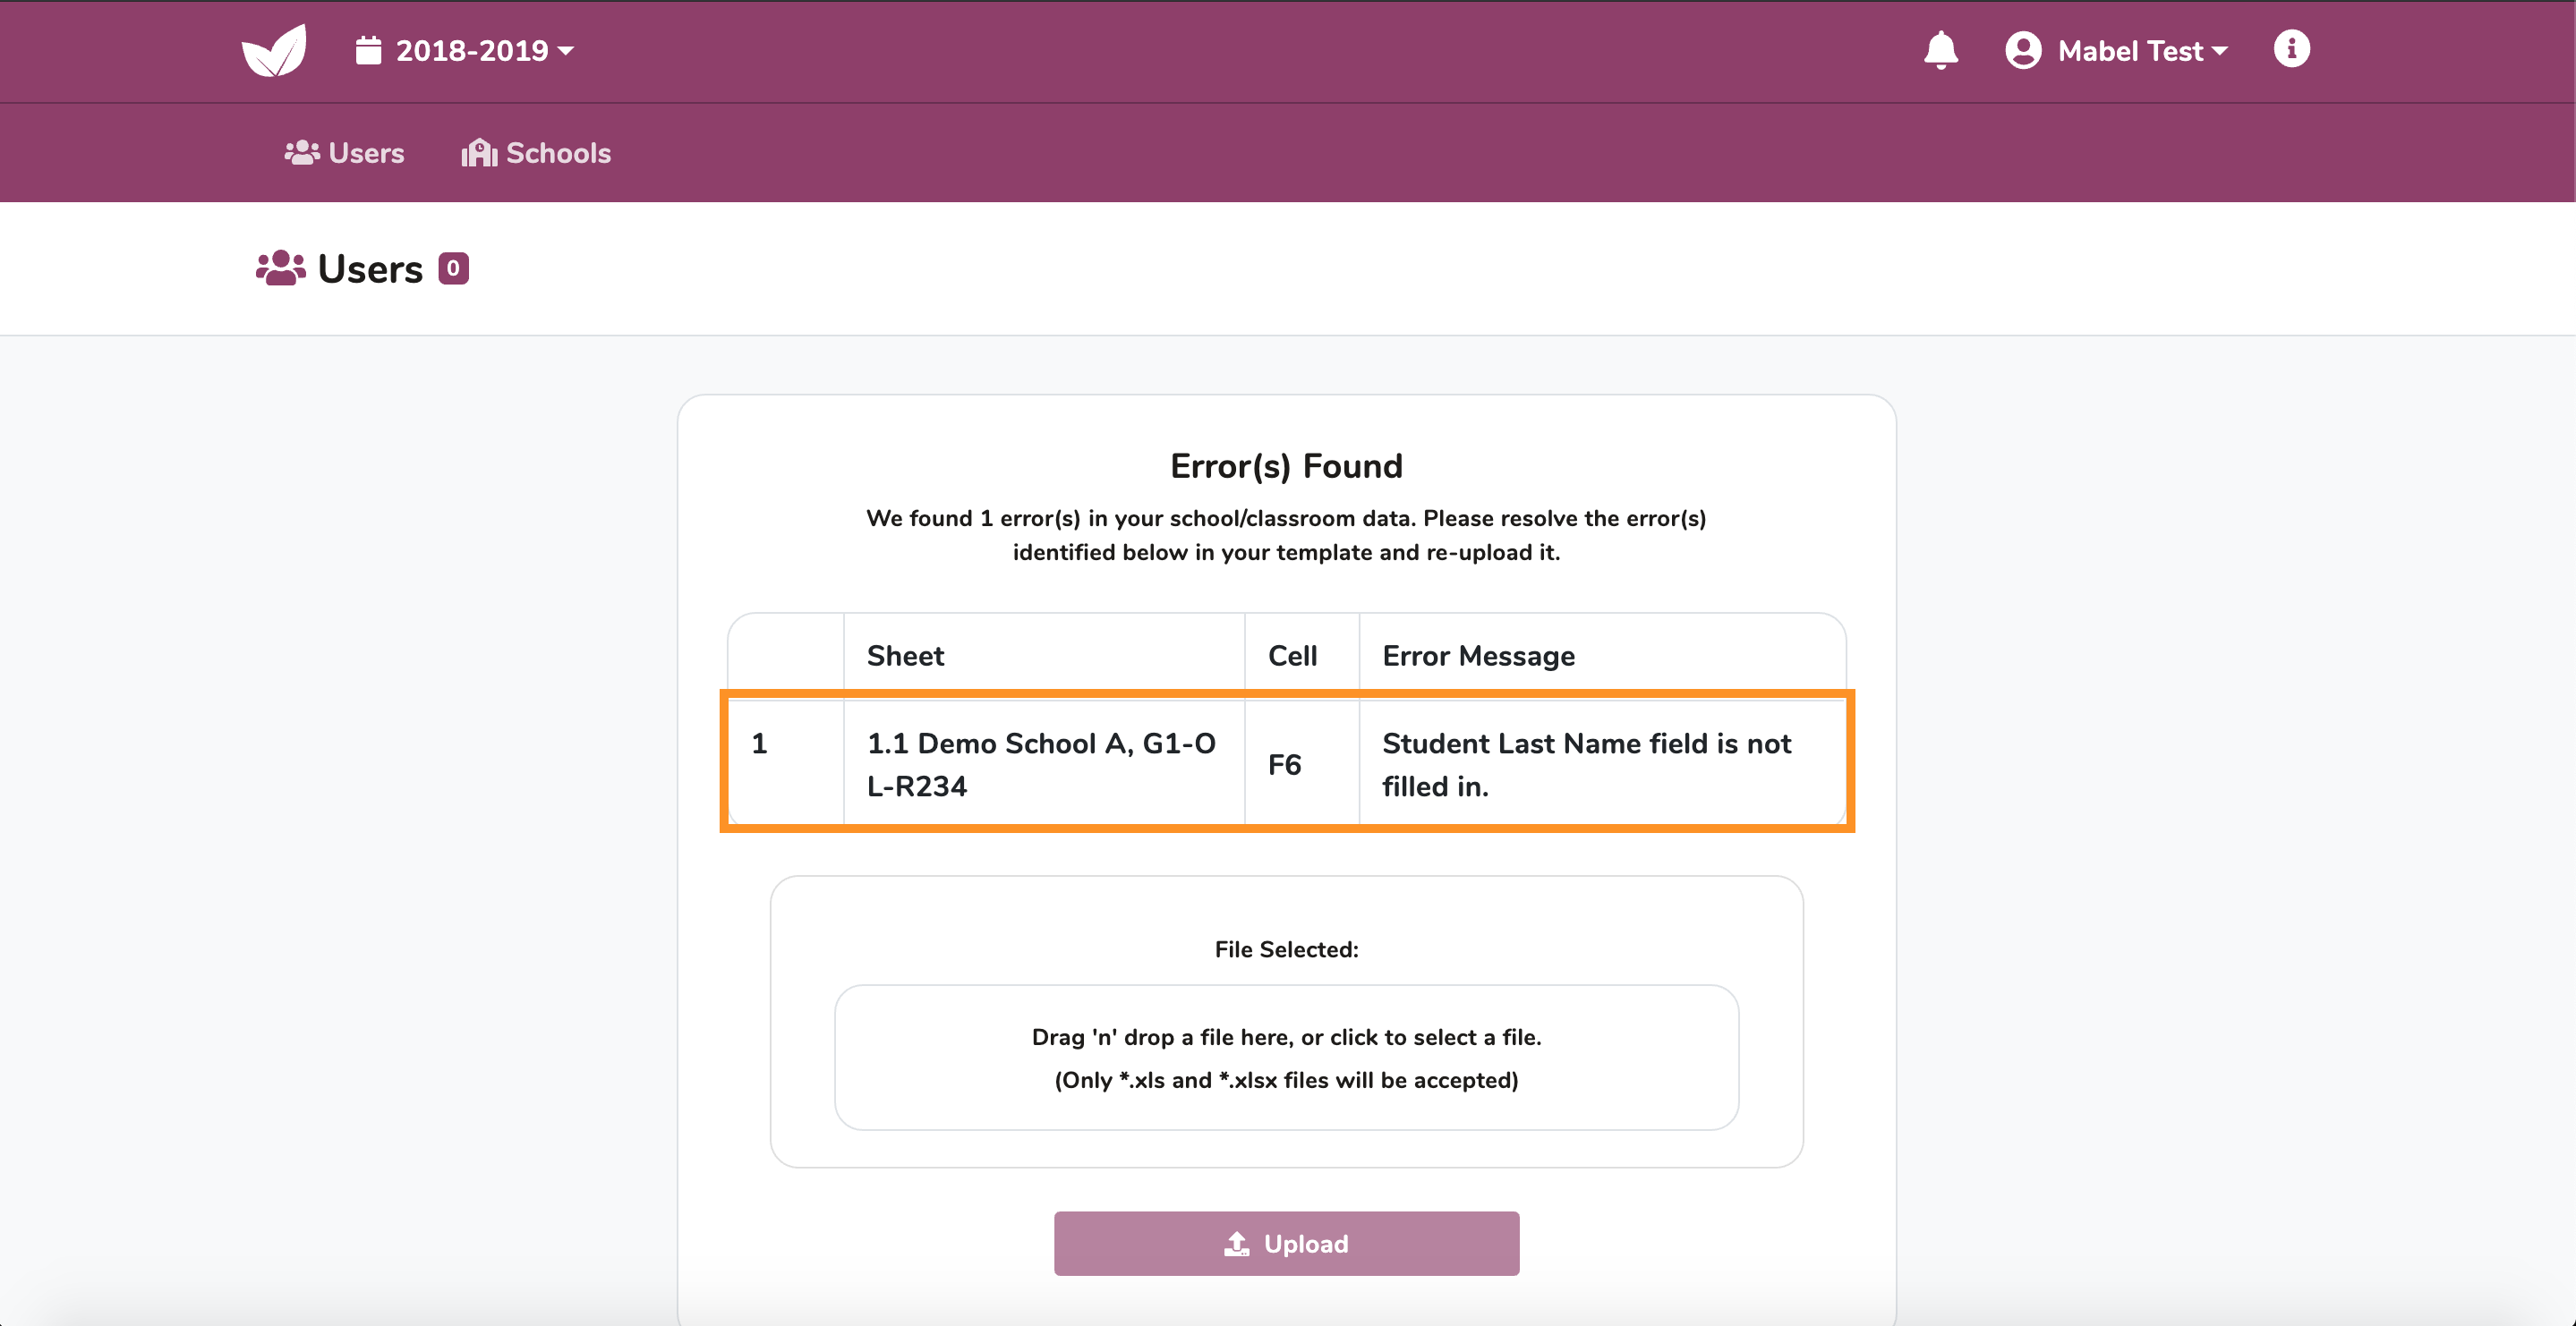
Identify the sheet and cell in which the error is found. Re-open your data template and locate the error. Using the Error Message description resolve the error(s) and save the template.

Re-upload your data template.
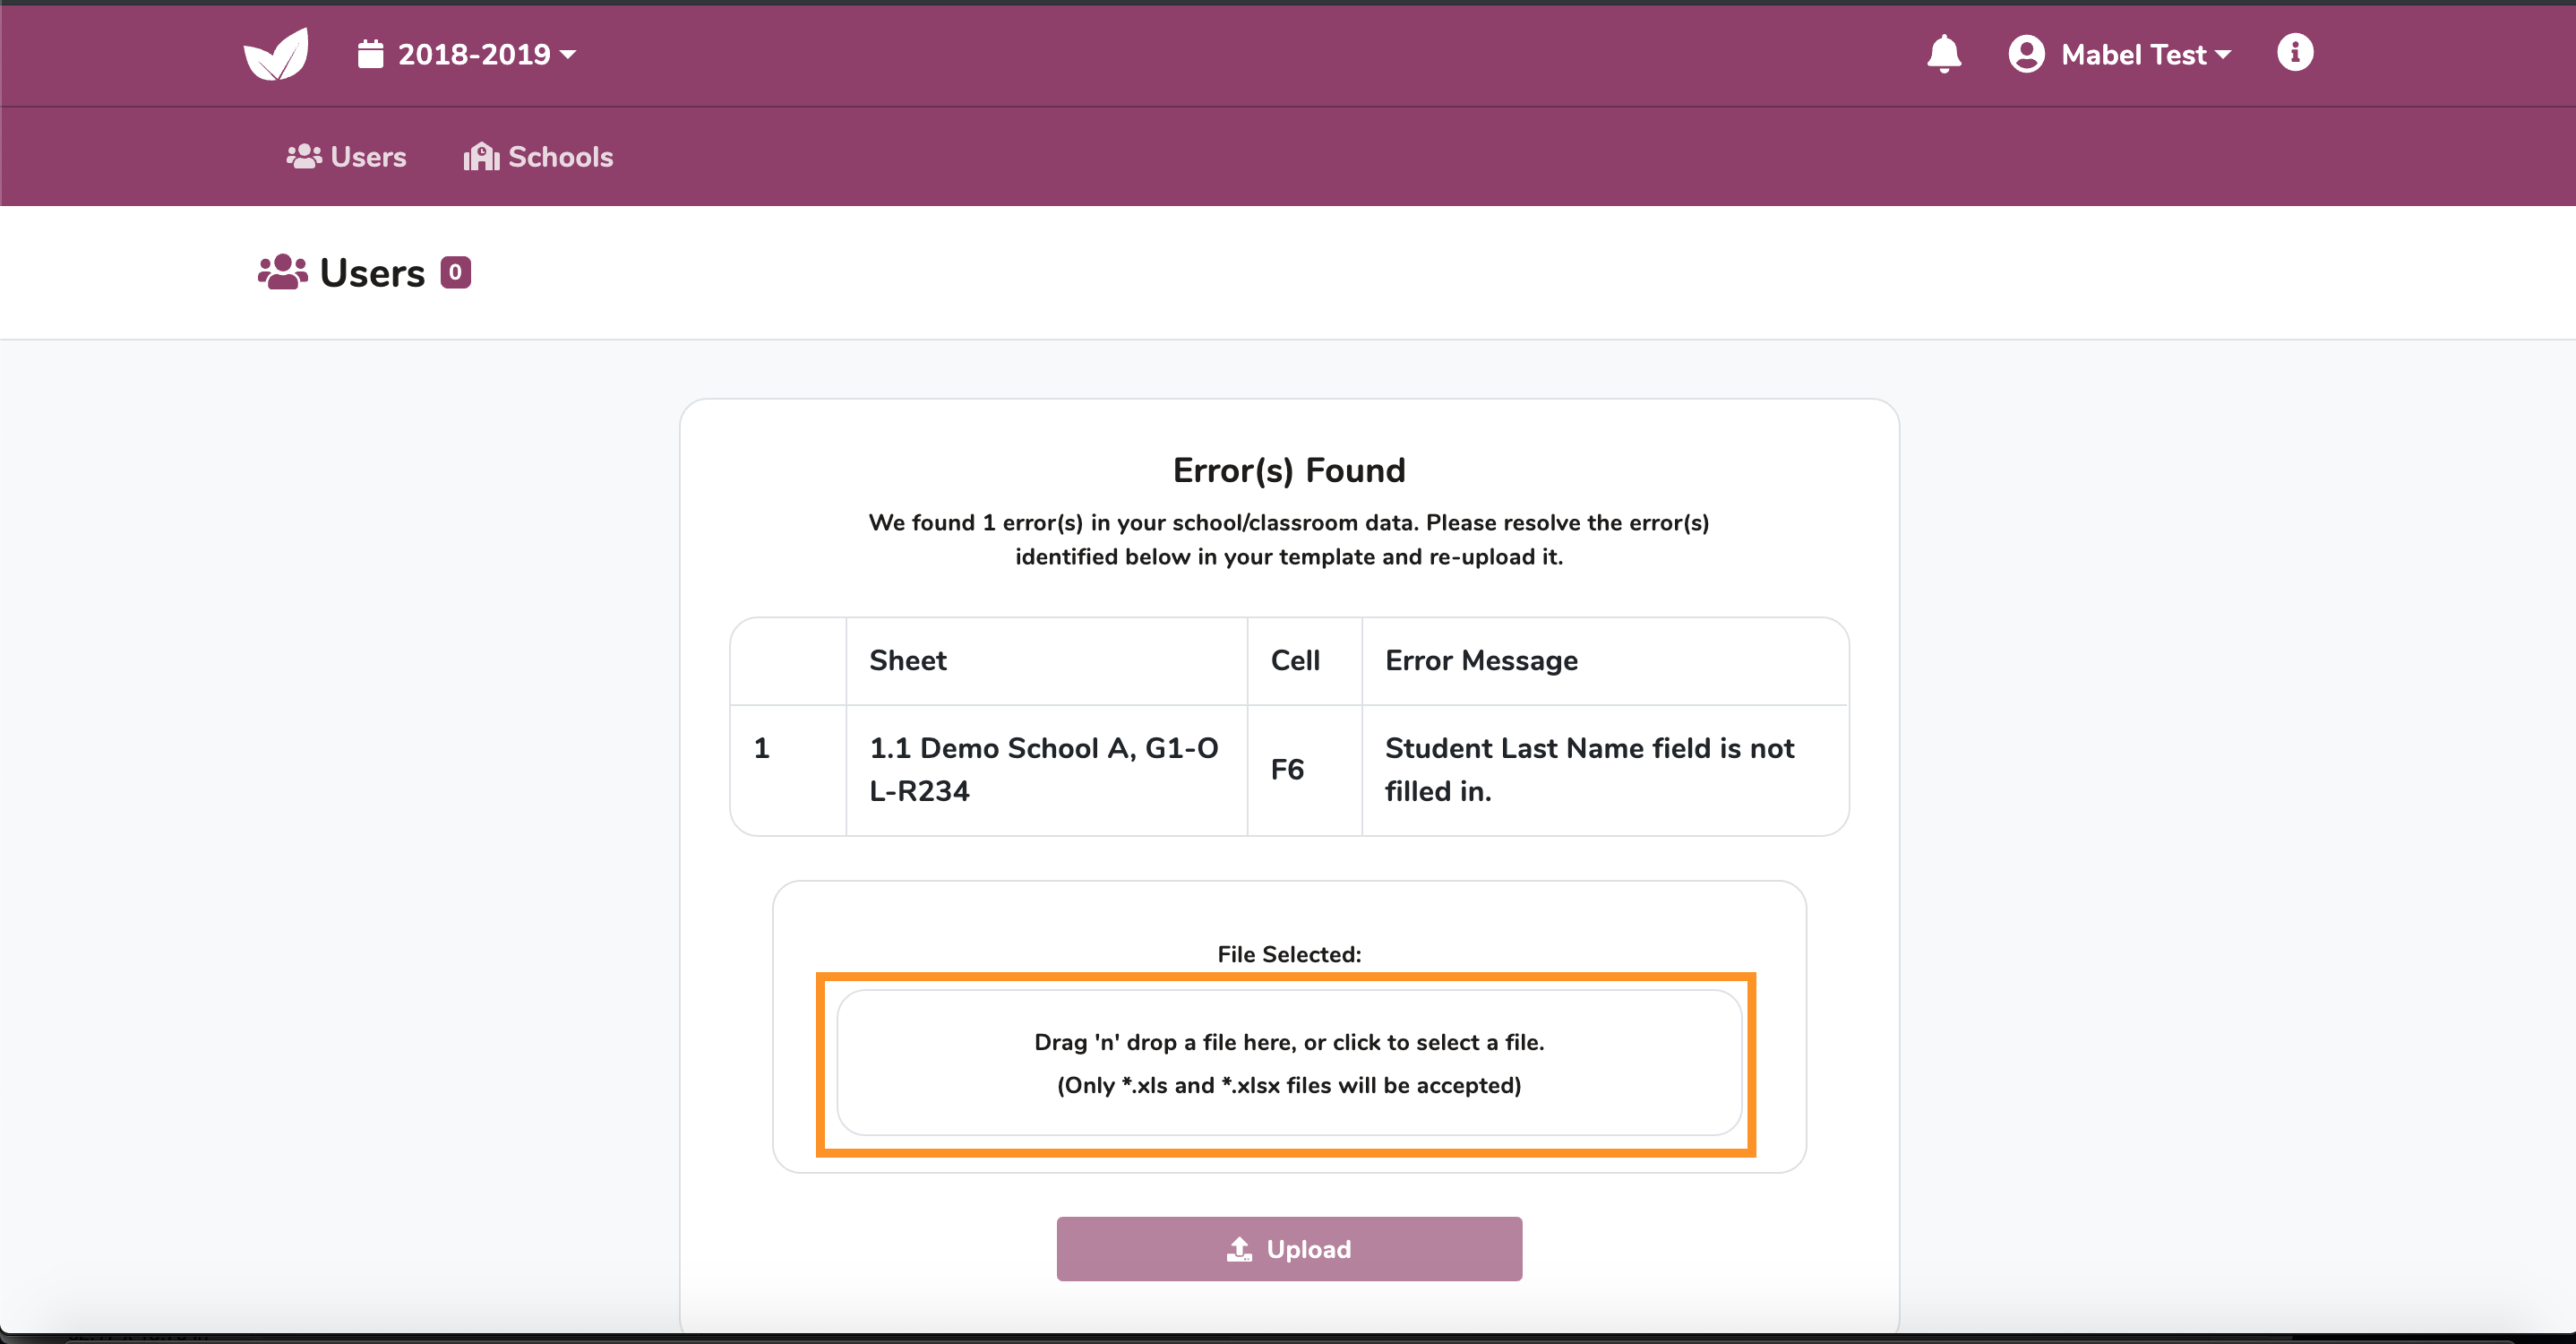
Once you have selected your template, click Upload.
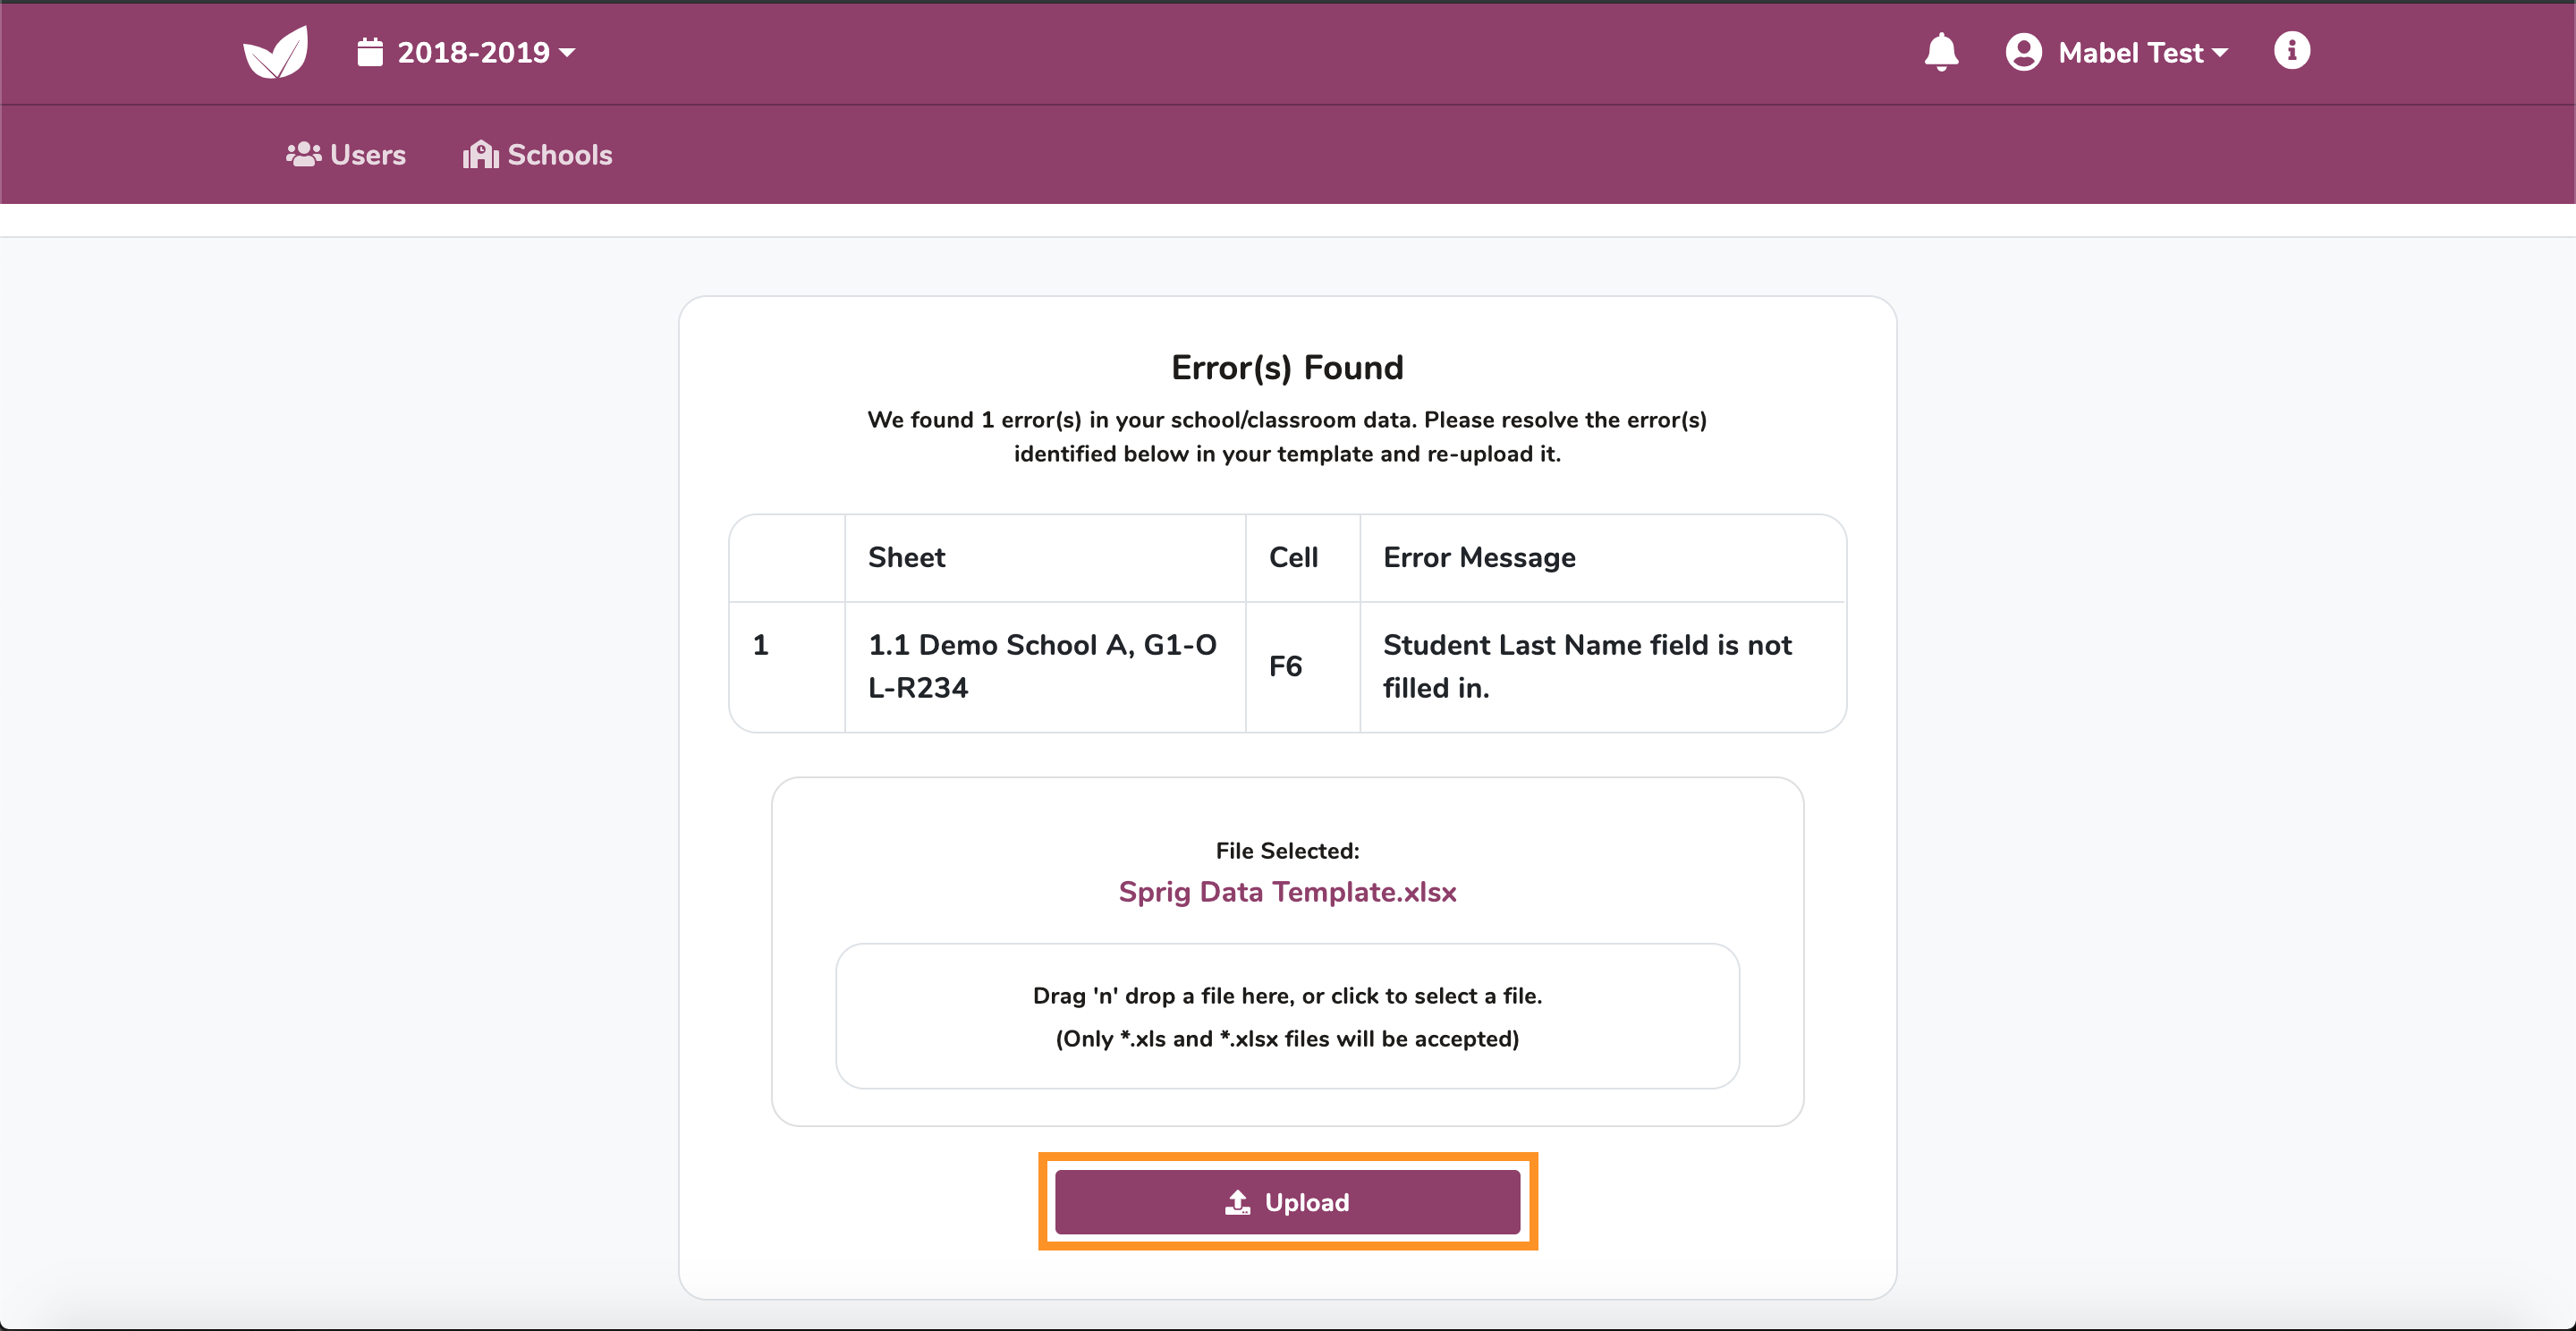
If your template continues to produce errors, re-open the template file, attempt to resolve the errors and upload it again until no errors are produced. If the file no longer produces any errors move onto the next step.
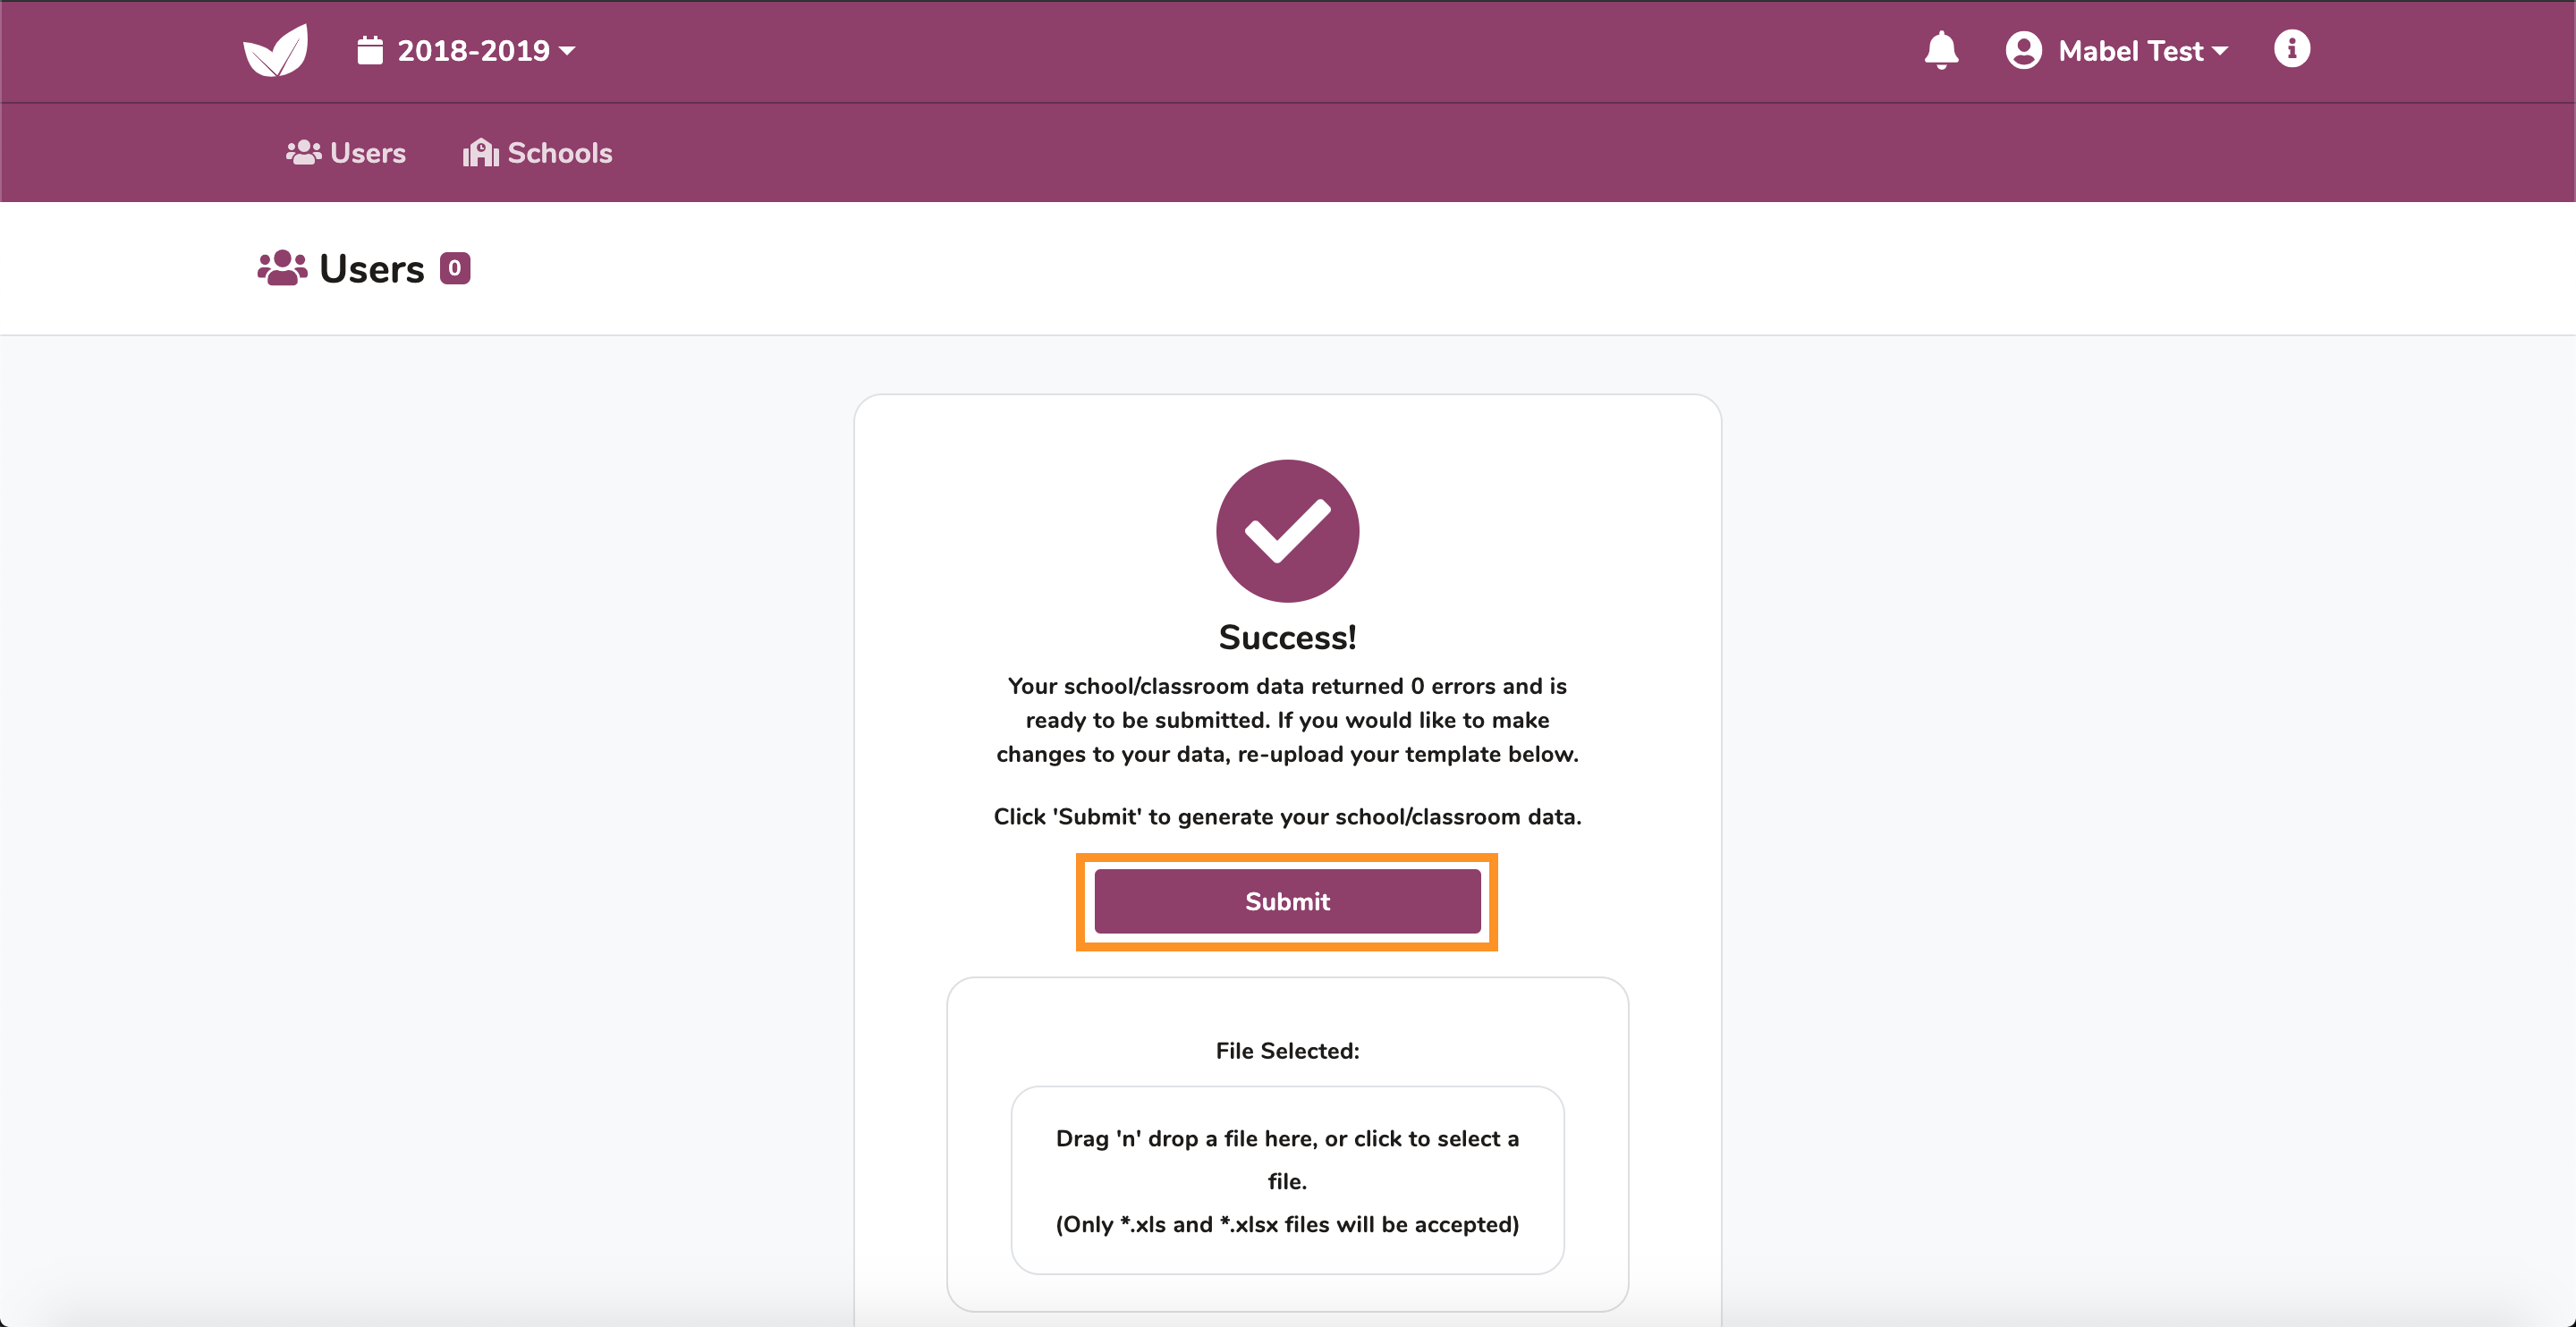
3.3 Upload Success
Once you have successfully uploaded your school/classroom data, click Submit. This action will create all of the user accounts, schools and classrooms defined in your data template.
4.Review Data in Portal
Once you have created all of the user accounts, schools and classrooms for your client, it is important to review the data in the portal to ensure all schools and classrooms contain correct data.
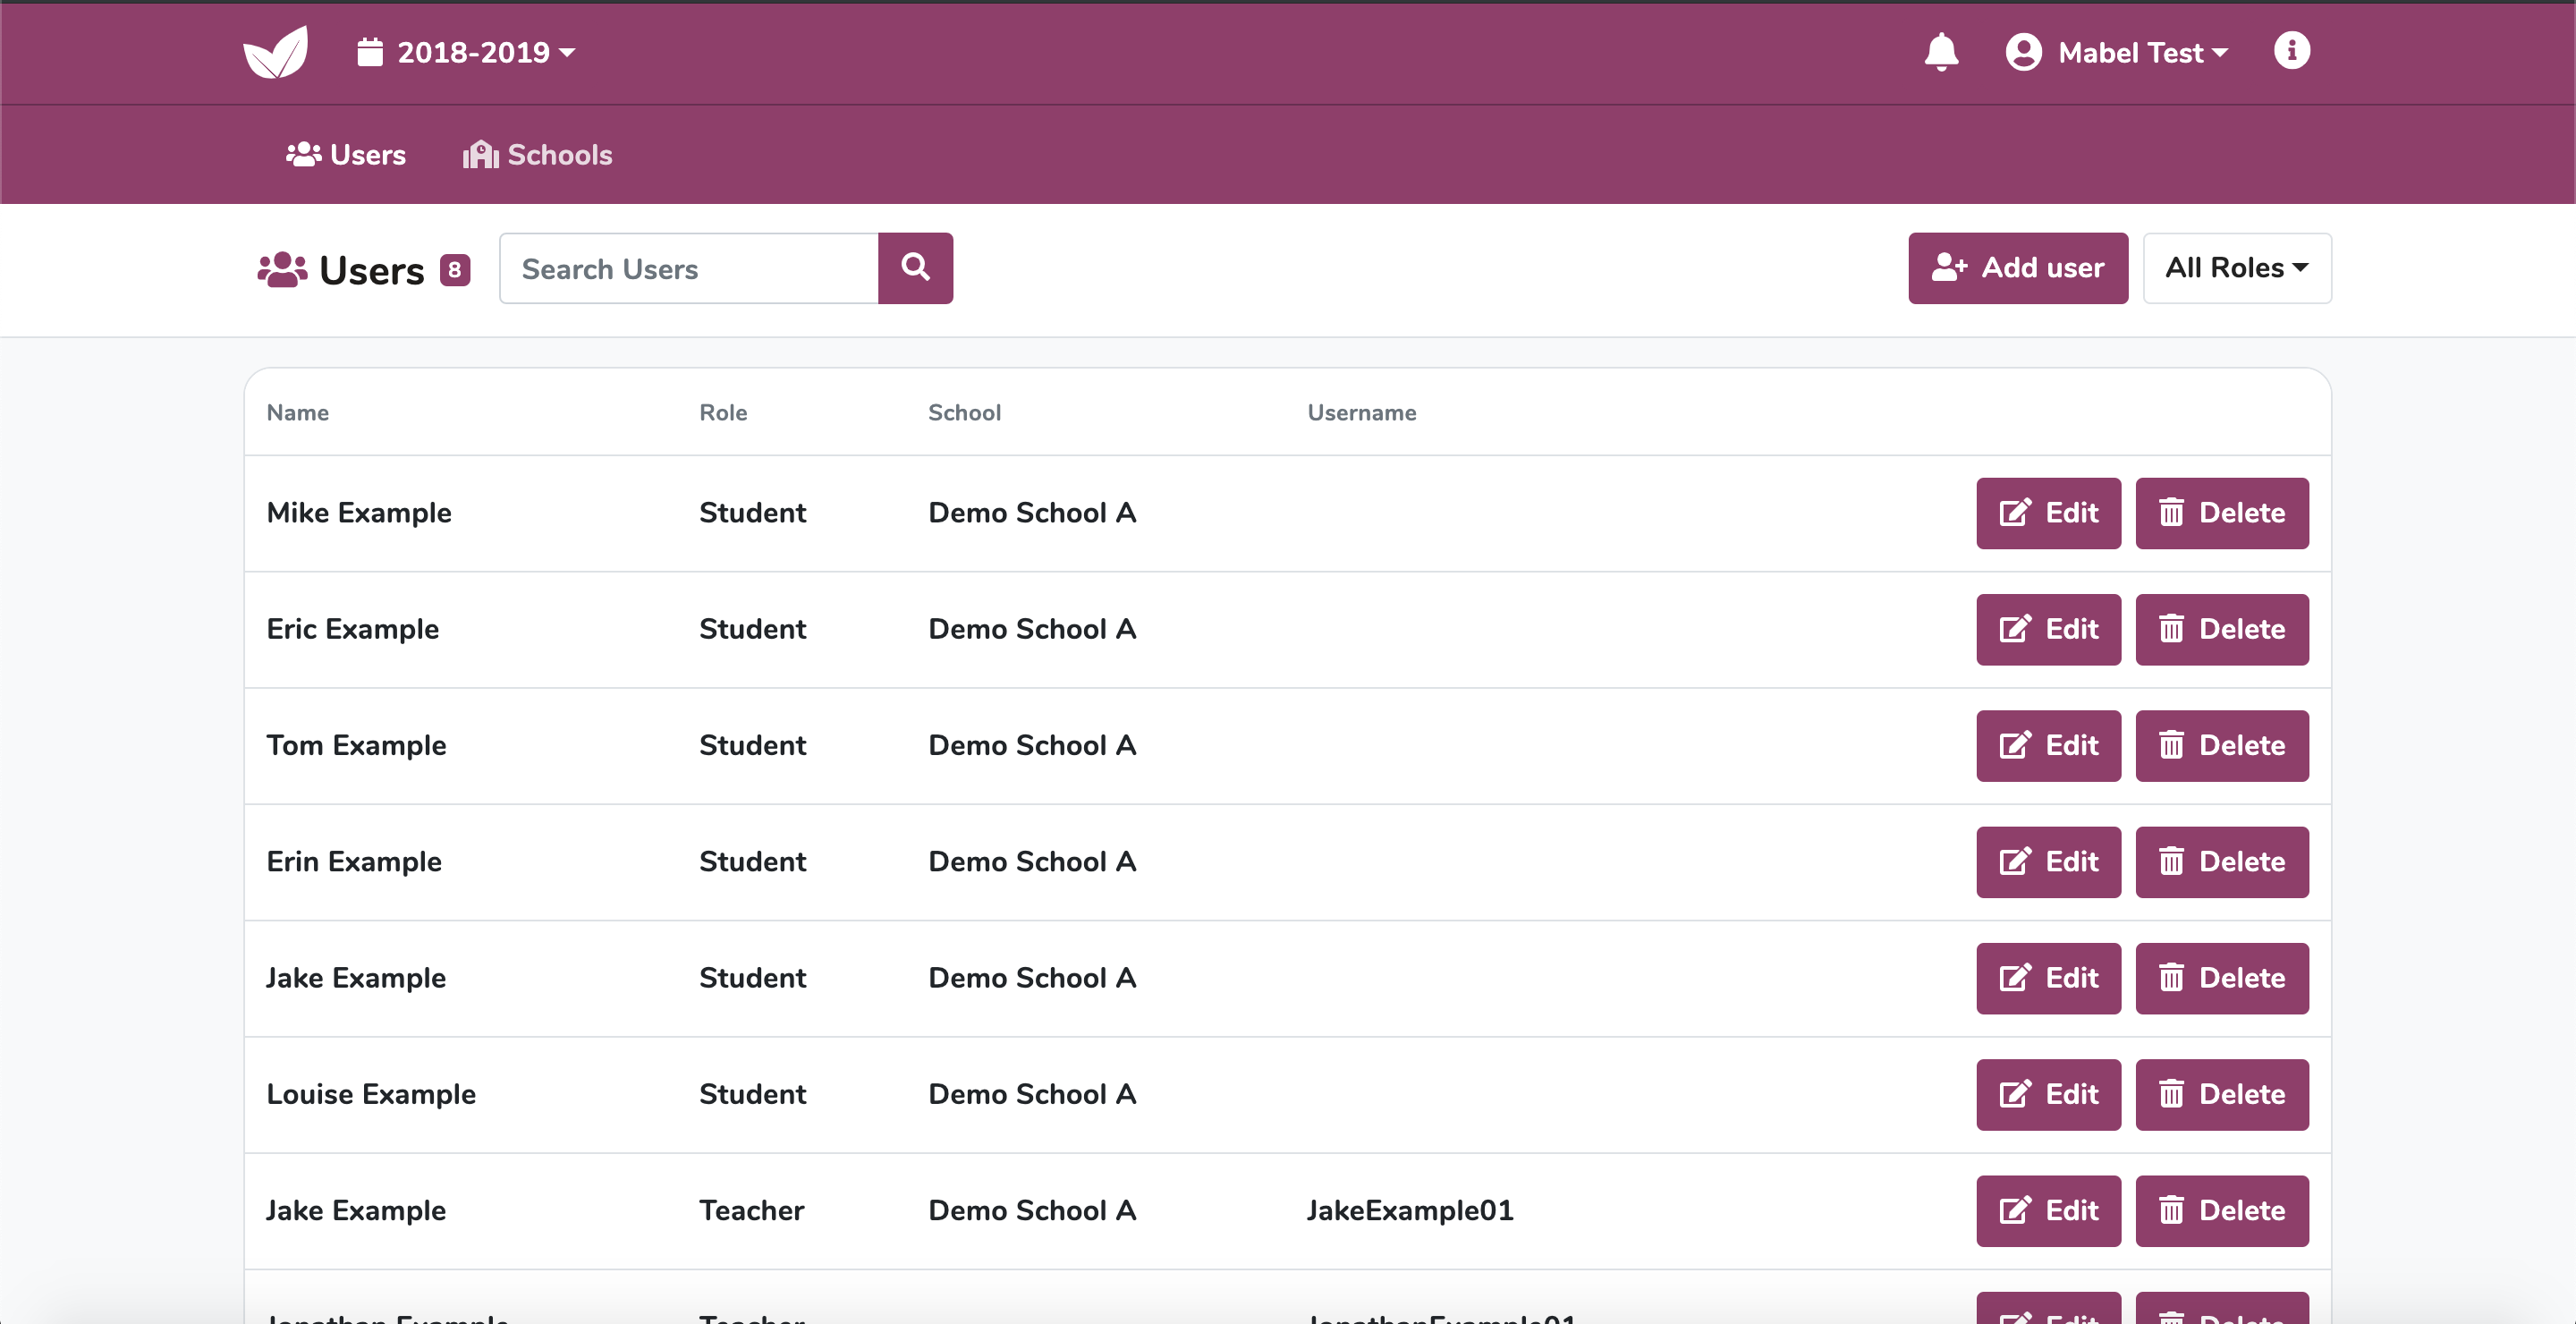
4.1 Users
The Users page in the portal will contain a list of all the users generated from your template.
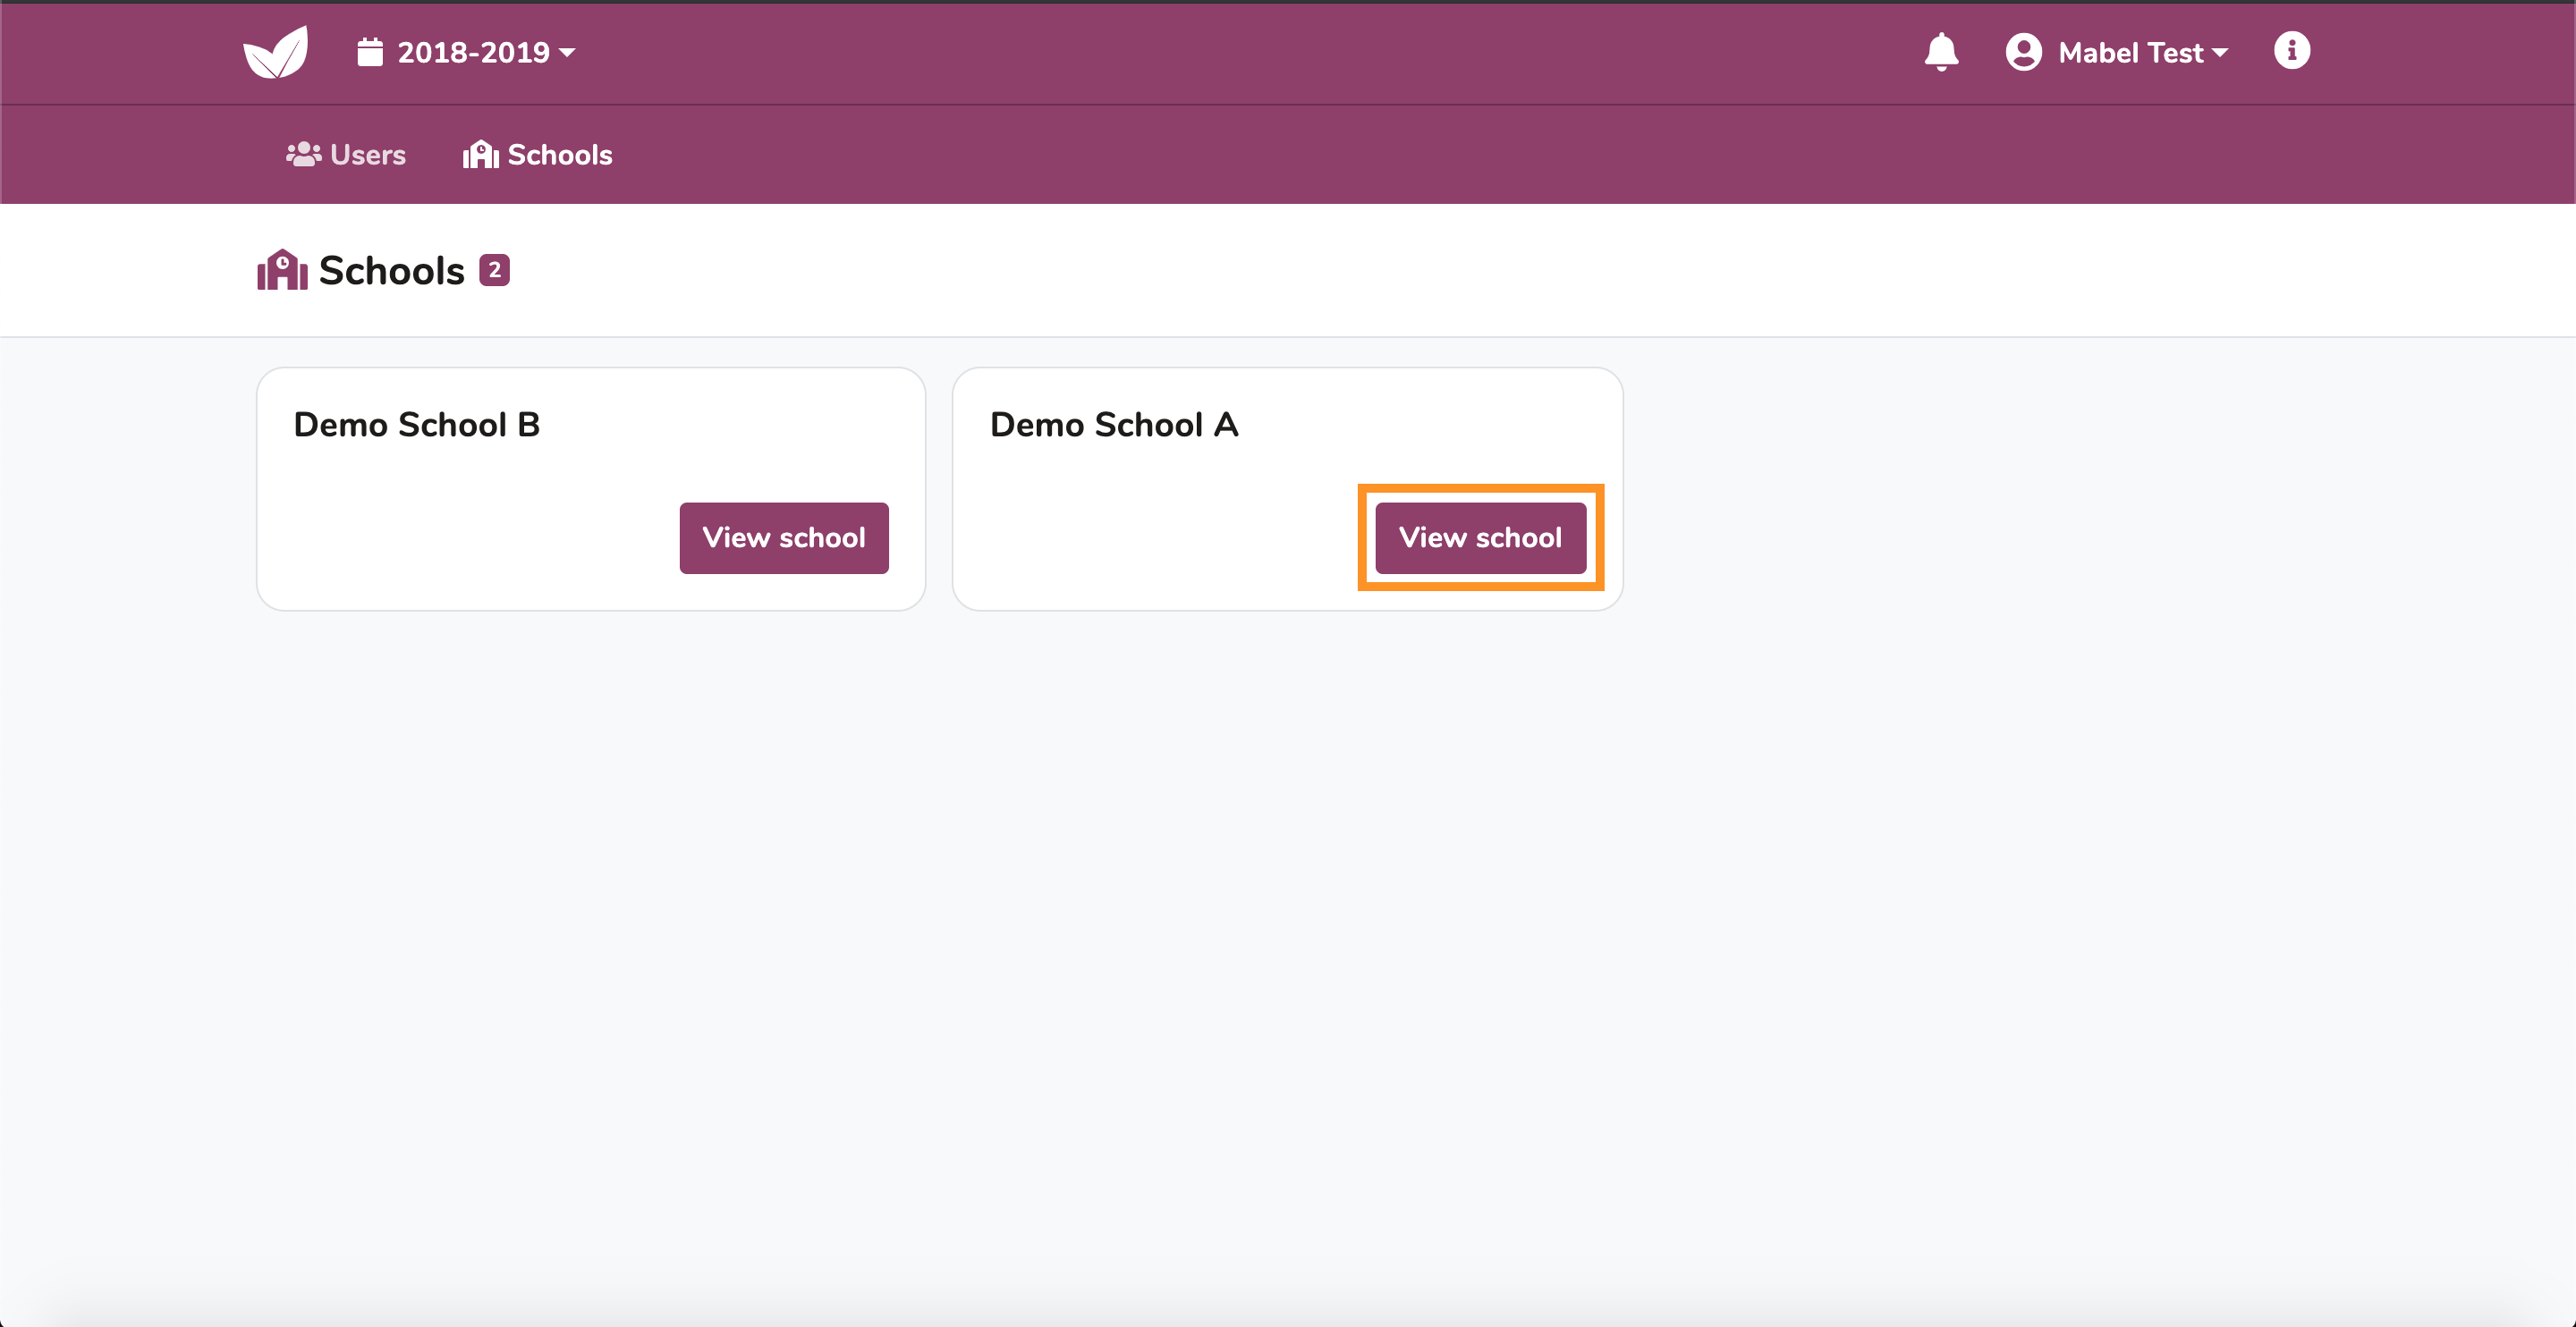
4.2 Schools
The Schools page in the portal will contain a list of all the schools generated from your template. Click View School to view the school’s classrooms.
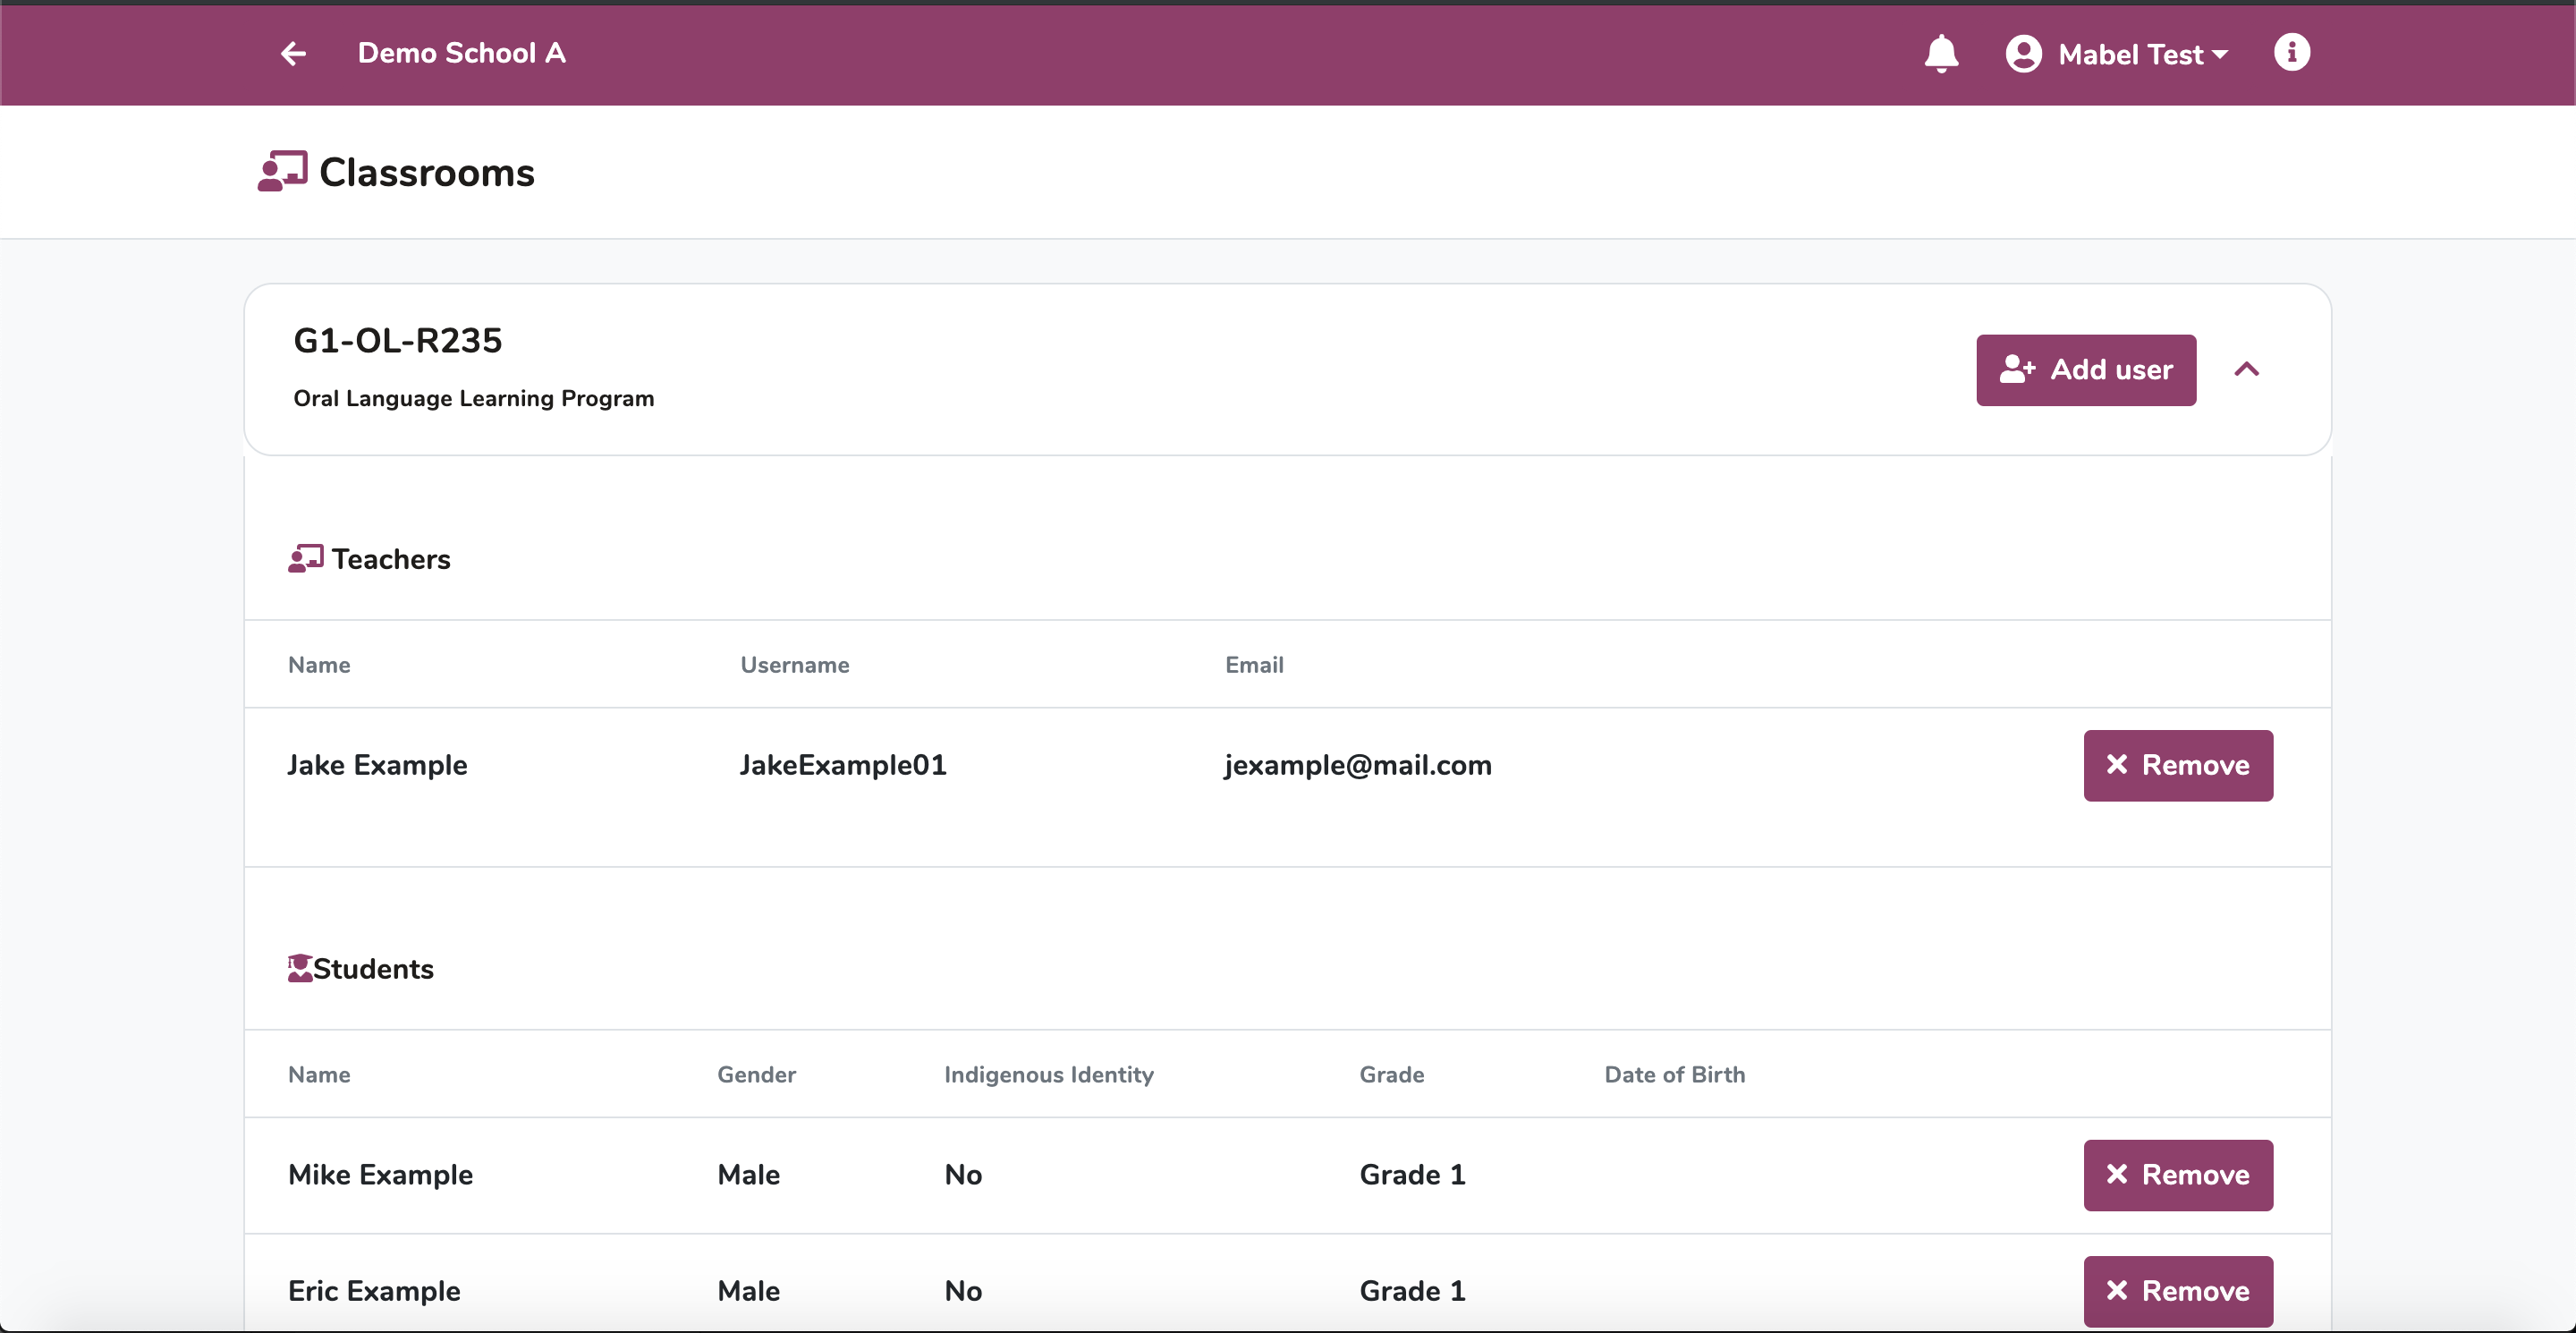
Click the down arrow to open a classroom and view its contents.
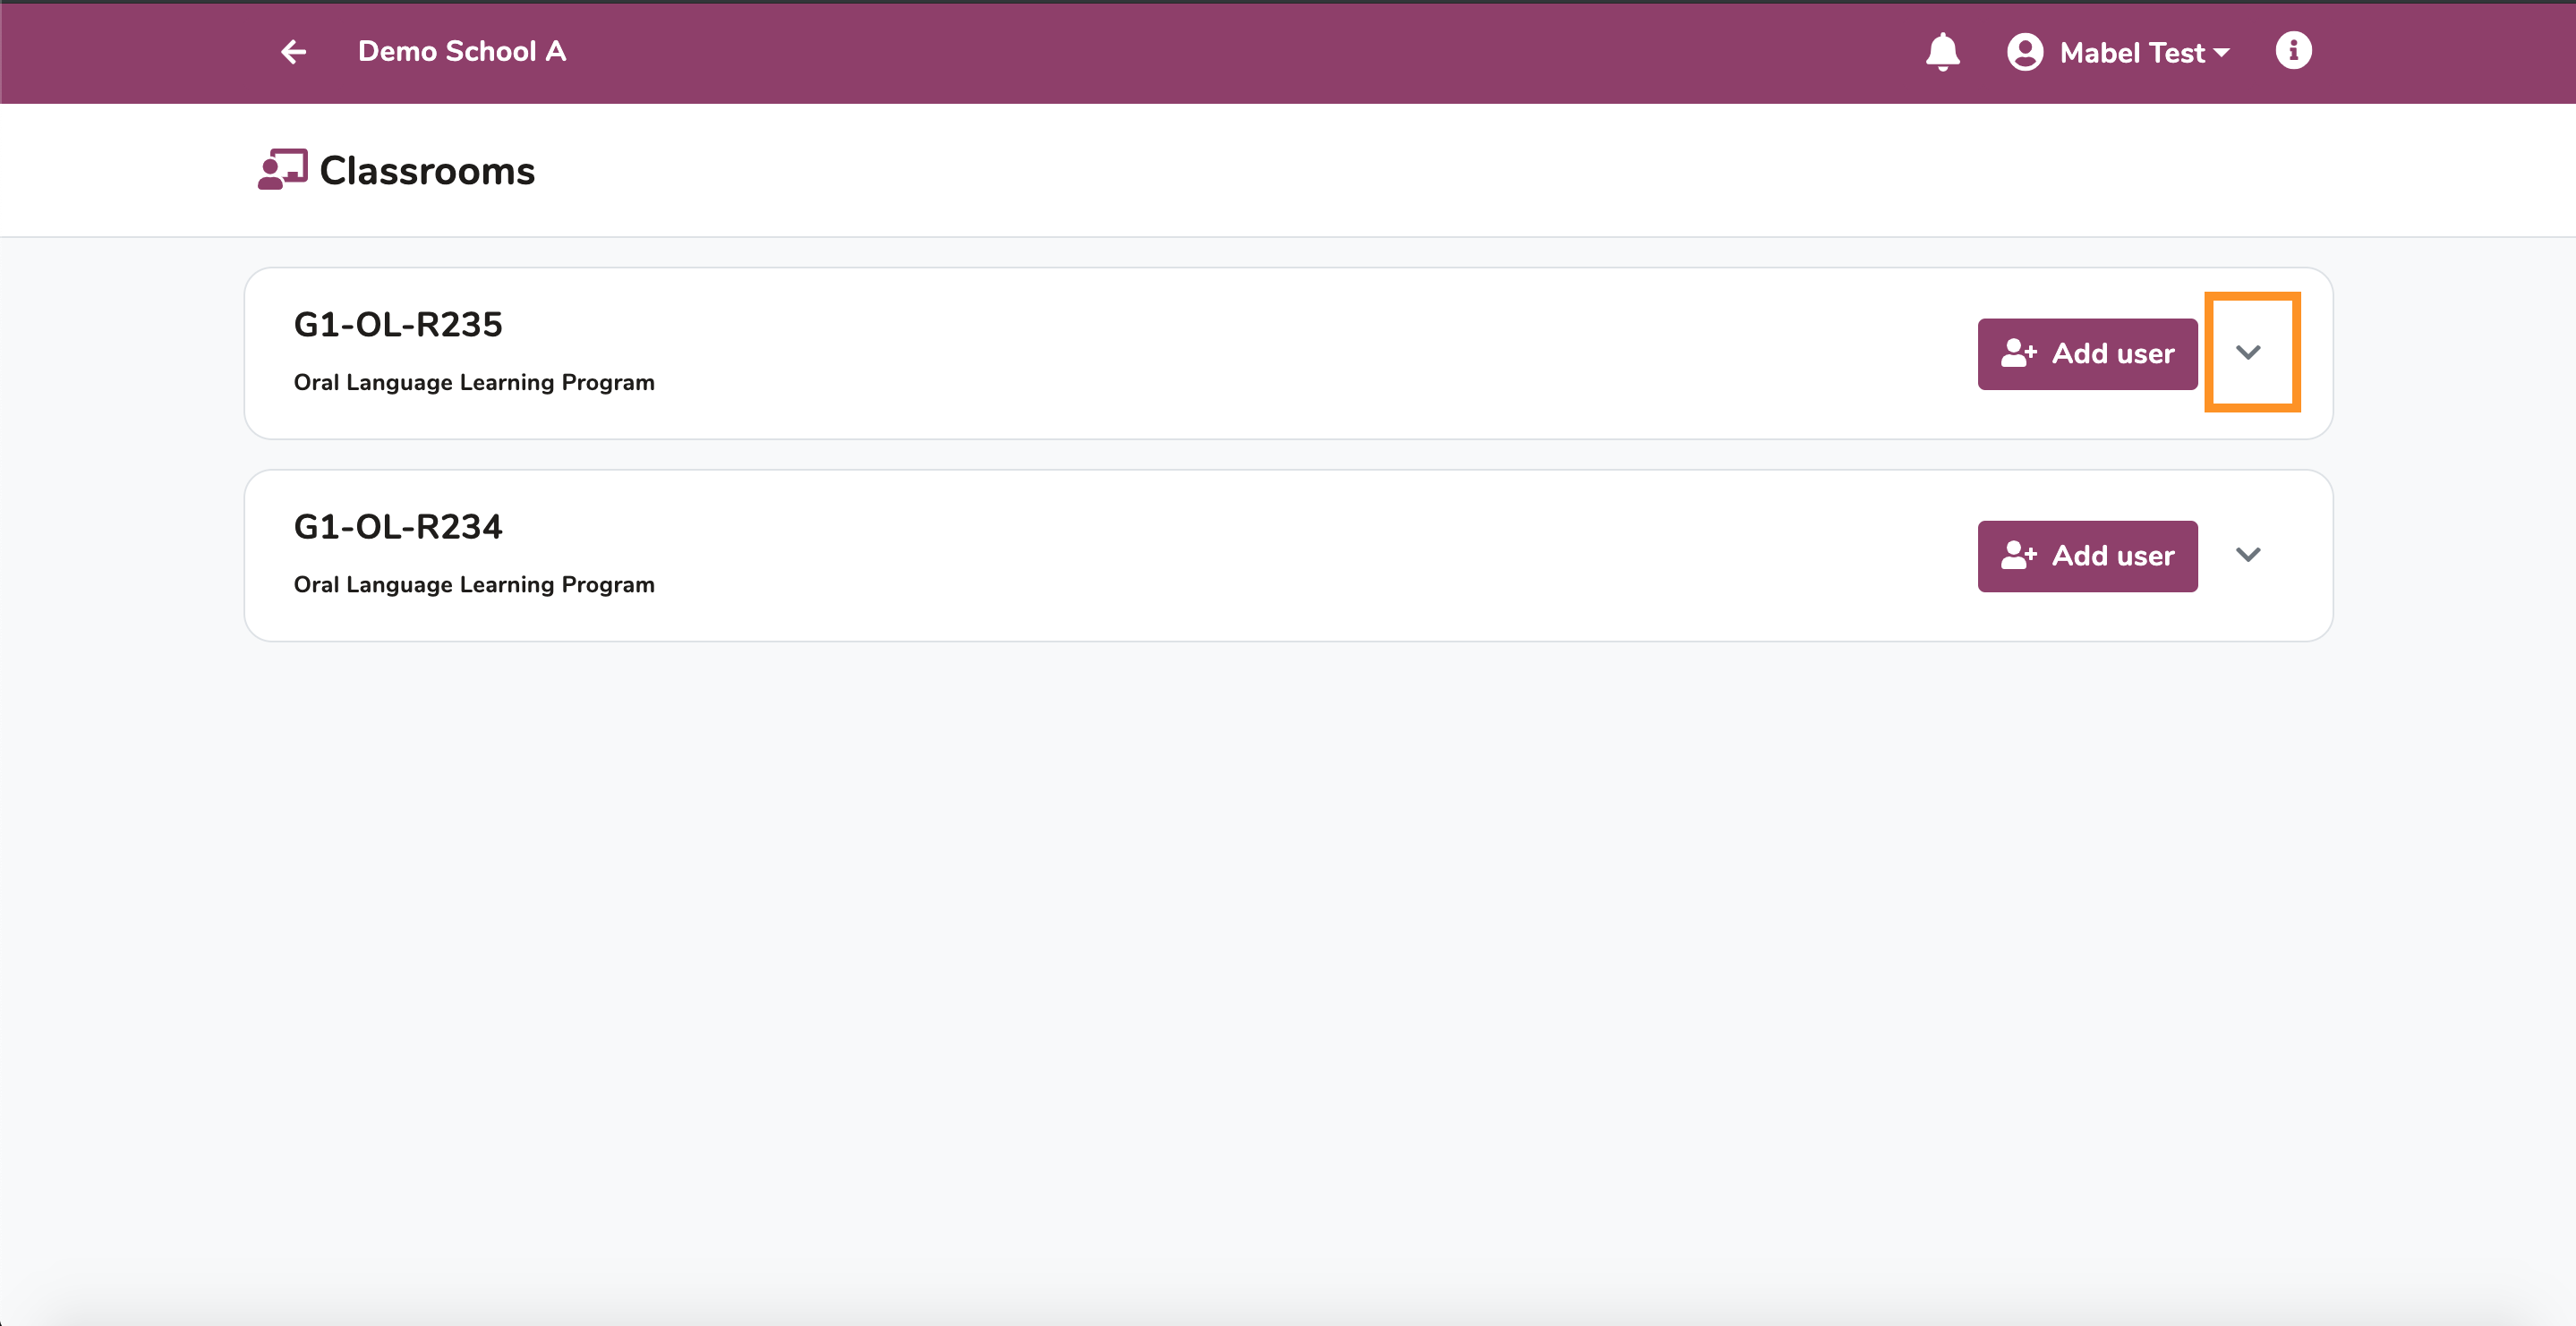
Review the classroom to ensure the correct teachers/students have been added to it.
Teachers, Principals, Directors and Superintendents added to the platform will be notified by email of their accounts creation and can begin using the Sprig platform!